Emergent technology

The comparison of established technology and emergent technology on Chroma Key and Rotoscoping.


Chroma Key

Established Technology

It is evidenced that the green screen technology was invented by Larry Butler for the movie The Thief of Bagdad (1940). It was an act to reduce the cost of setting and props.

It has been one of the technology used in a wide range of production, involving the needs of physical curved green screens, set up crew members, lighting crew, green screen suit man. Also, prep artists, vfx artists and compositors are crucial roles in post production stage.

(InFocus Film School, 2017)

Emergent Technology – Virtual LED Panel

However, with emergent technology, a giant, high resolution LED panel is replaced instead of green screen. It allows directors, actors and production crew to visualise the setting during the production stage. Basically, it makes no different with a realistic on-site shooting, and even more, vfx artists can manipulate every pixels on the background artificially as early as production period.

(Vox, 2020)

According to Charmaine Chan, the lead compositor in Industrial Light & Magic, she used to chroma key with uneven green screen background frame by frame precisely, but with LED panel she worked with production crew simultaneously in the studio. The benefits of using it also included remaining edge details, natural color fringe in the result.

What is also worthy of our attention is that, the emergent technology established its convincible result on reflective objects. For instance, it is capable to reflect the true color lighting of what environment behinds the metallic helmet in movie of The Mandalorian. In other words, this alternative method avoid the green”spill”, which means the green edge on the objects that usually being projected by the green screen.

(Vox, 2020) – Movie still of The Mandalorian, (2019)

With this line of thinking, it is believed that the practise of using green screen in film production might diminishing as years pass, as it reflects itself as a better alternative of the established technology.


Rotoscoping

Established Technology

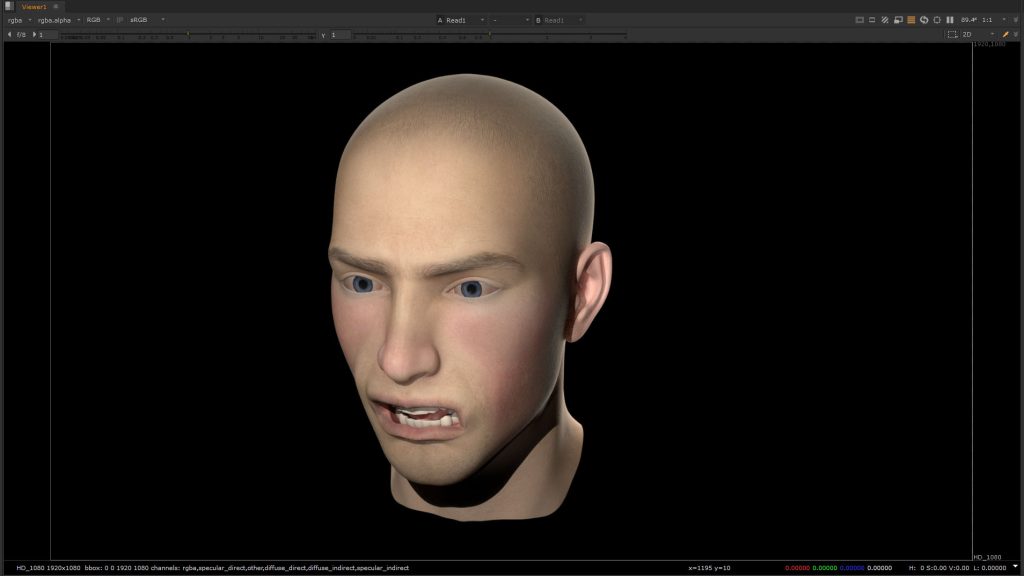
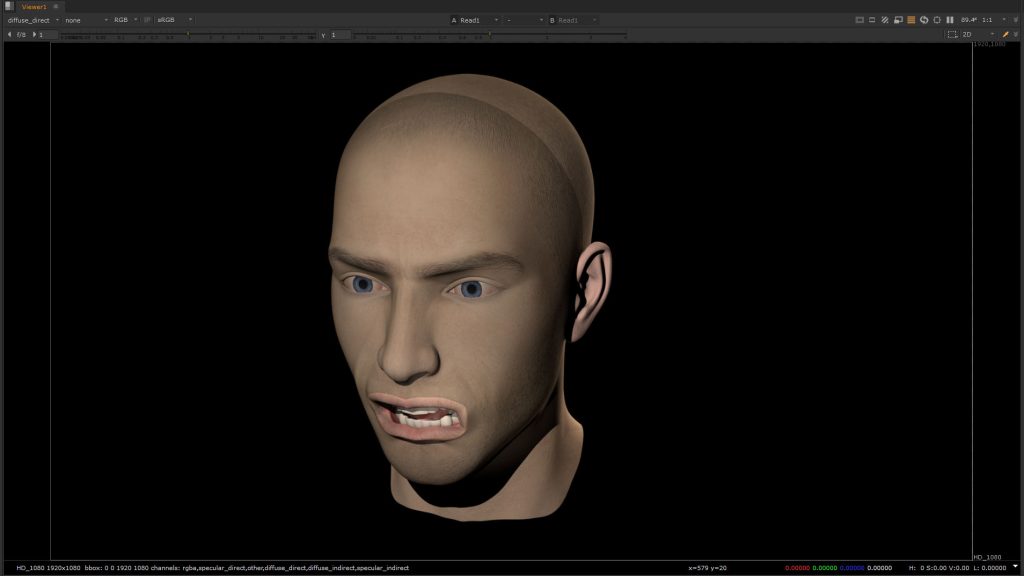
For animation aspect, roto technique is using to trace over motion picture footage one frame at a time to produce realistic action.
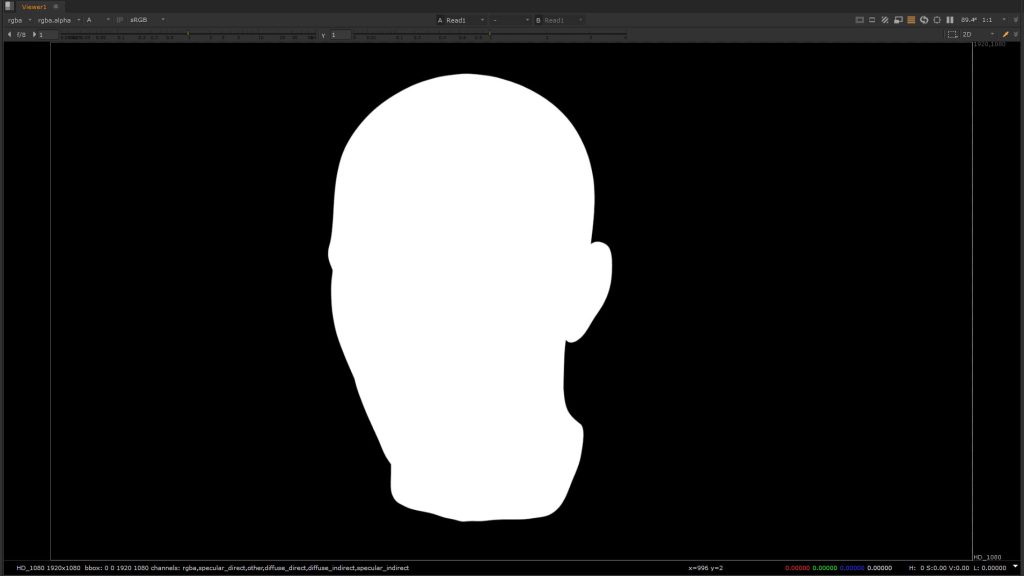
Then, silhouette is created that can be used to extract that object for another background in scene.

The original three Star Wars movies are definitely classic examples for this  traditional rotoscoping, VFX artists create glowing lightsaber effect with a matte based on sticks held by the actors.

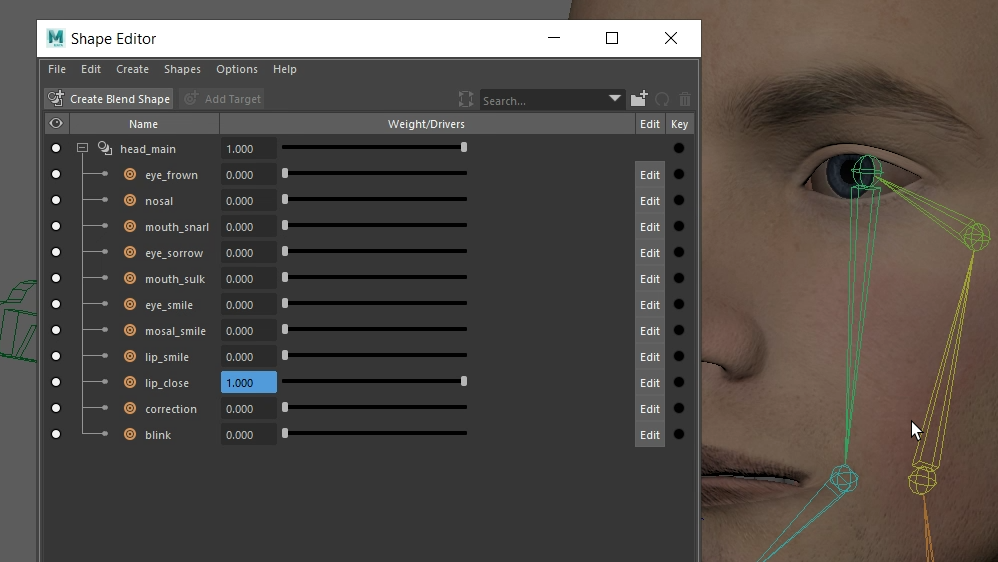
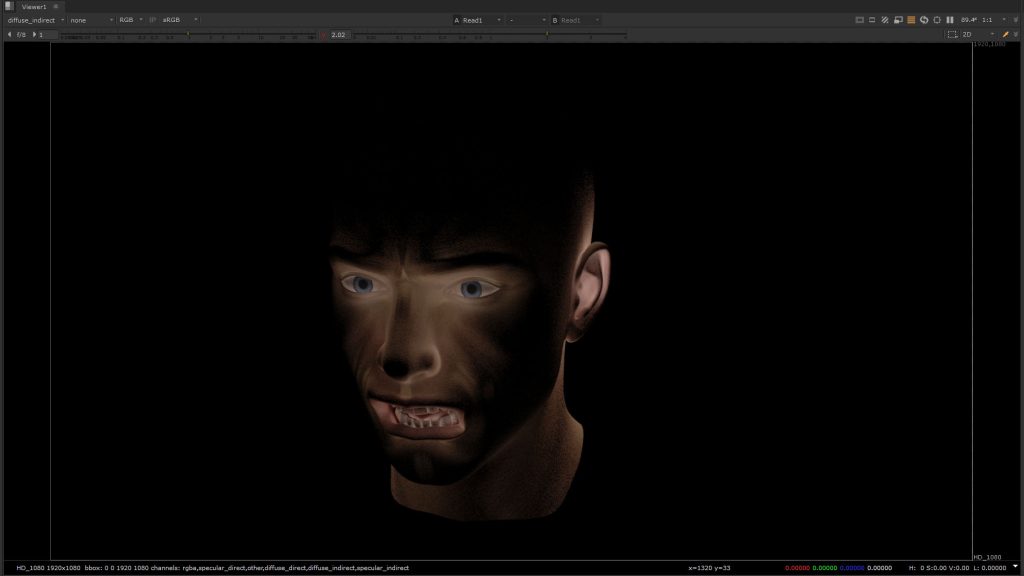
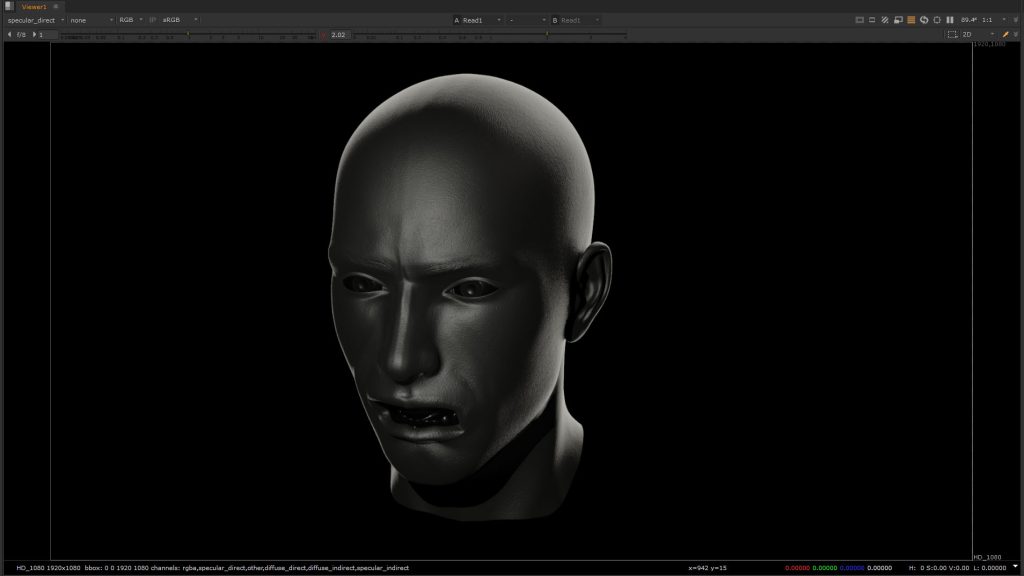
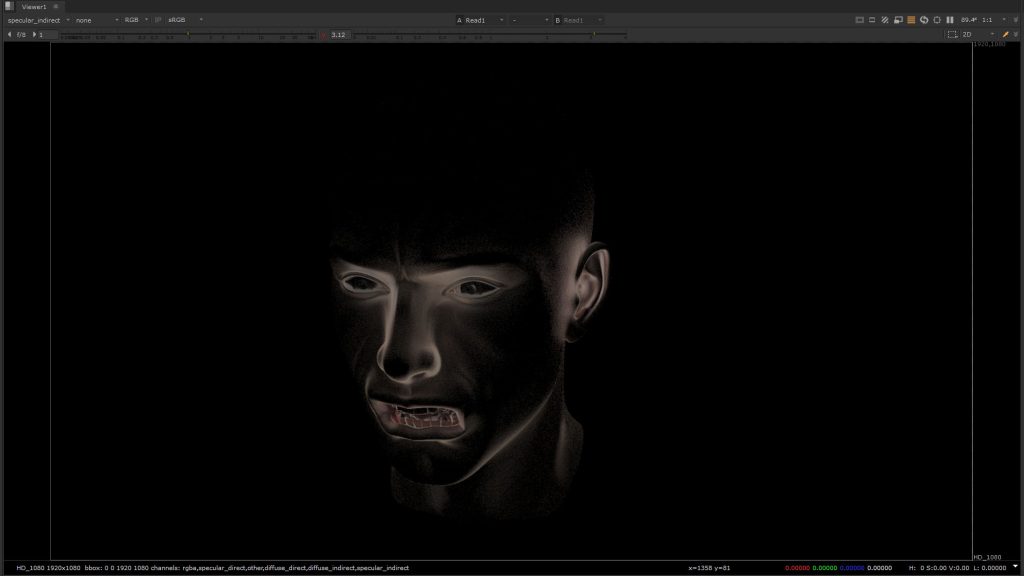
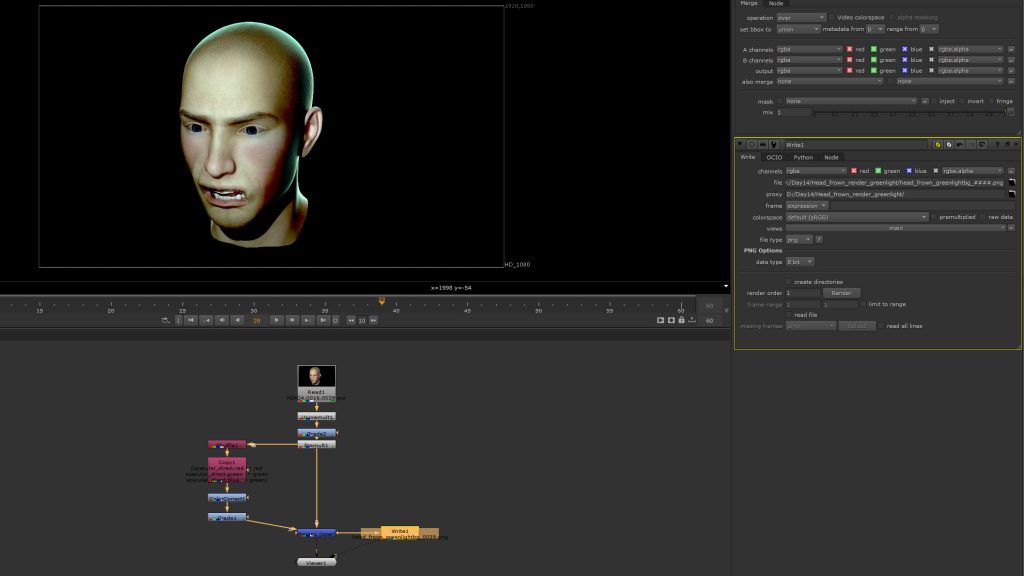
In my self-practice of rotoscoping with Nuke X 12.2. As a beginner of using Nuke, it took me almost 7 working days for a 4s output.

Every frame needs to be pixel-perfect, which required huge manpower and hours to work on it. In VFX industry, this kind of specific professional job task is the role of roto artists, who employing by studio to work on matte footage.

Emergent Technology – Machine Learning

However, with emergent technology of machine learning, RunwayML appeared to be a time-saving tool for vfx artists to obtain the same results instead of rotoscoping. With machine learning, the objects can be painlessly identified and altered frame by frame accordingly for being background masked out.

(runwayml.com,2021)

(Boone Loves Video, 2021)

Referring to the Youtube video created by Boone Loves Video, it indicates that every users can learn to apply this technic with only basic knowledge of using adobe software as assistant. It also mentioned that the up coming version of RunwayML is expected to perform even further ahead, while it is only a new launch platform in its developmental stage.

In sharp contrast with my previous rotoscoping experience, I only took less than 10mins to get a satisfied result from accessing RunwayML.

That is no doubt that this ever-changing post production industry will persevere to flourish, and every video creators certainly noticed the positive sides of this emergent technology.


Reference

1. Christiansen, M. (2009). Adobe After Effects CS4 studio techniques. Berkeley, Ca: Peachpit Press, Cop.

2. Rl, P. by M.F., artist unknown; cropped/retouched by (1915). English: Patent drawing for Fleischer’s original rotoscope. [online] Wikimedia Commons. Available at: https://commons.wikimedia.org/wiki/File:US_patent_1242674_figure_3.png

3. Vincent, J. (2019). Creators now have an easy way to incorporate AI into their workflow. [online] The Verge. Available at: https://www.theverge.com/2019/7/10/20682307/ai-machine-learning-easy-to-use-models-creatives-runway-ml

4. InFocus Film School. (2017). Filming With Green Screen: Everything You Need To Know. [online] Available at: https://infocusfilmschool.com/filming-green-screen-guide/.

5. Vox (2020). The technology that’s replacing the green screenVox. Available at: https://www.youtube.com/watch?v=8yNkBic7GfI.

6. Boone Loves Video (2021). [online] Available at: https://www.youtube.com/watch?v=wBkDdZYPj64.

Mise-en-Scène

Fantastic Mr. Fox (2009)

Settings & Props
In a mineral cave, with shinning quartz stone on wall

Costume, Hair & Make Up
Wearing their pyjamas with dirts. A scar mark on Mr Fox right side of his face after being slapped.

Facial Expressions & Body Language
Mr Fox teared up after being slapped, and Mrs Fox shows her impatient to Mr Fox by snapping his face, and start tearing eyes while she is complaining.

Lighting and Colour
Soft light with yellowish and warm color, light direction comes from bottom.

Positioning of characters/objects within the frame
It is a two shot to show only the main characters to face each other, none of other characters are included in this scene of their private conversation.

What role does the shot choice (Cinematography) play in the scene
Using close up shot is a way to let audience to have physical proximity with Mr and Mrs Fox’s facial expression. And it externalizes both character’s inner world, the immature of Mr. Fox, and the disappointment of Mrs Fox.


Anomalisa (2016)

Firstly, the two main character situated in the centre of the frame, composition is quite symmetrical and balance. As their facial expression demonstrate their anxiety and frustration, it depicts both character resonate their emotion to each other equally.

Moreover, it is a high-angle shot for showing the two main characters lying on the bed. The camera looks down on them and it points visual cues make audience get a sense of vulnerability and powerlessness for the characters.

Also, creating a warm and harmony household environment through the use of soft, orangish lighting. Every details in the empty space of the room is in focus which underscore a scene for audience to take a visual rest.

Regarding of costume, the characters are wearing outfit for outdoor instead of pyjama, the female one even seems to cross her arm as a symbiotic meaning of protecting herself, demonstrating the unease atmosphere. It communicates with audience their uncomfortable about the place they are staying.


Rebecca (1940)

Duration: 31:04 – 34.07 in link

Can you describe the relationship between the characters?
How do we know what the relationship is?
Can you describe how the mise-en-scene works together to tell us what the relationship is?


This scene illustrates some kinds of conflicts between the relationship of Mrs. Danvers and Rebecca. Audience is able to anticipates their collisions with the scene as below.

Mrs. Danvers leads the camera movement once she appeared in the scene, camera continues to follow though Mrs. Danvers until she was placed in the centre. It demonstrates that she owns her the dominant position in this scene.


Mrs. Danvers shows her arrogant attitude to Rebecca as her face was placed at the top area of the frame and then looks down to Rebecca, even she is a maid and Rebecca supposes to be a guest.

Two shot for the two main characters.

This situation aggravated by camera focus on Mrs. Danvers with a narrow depth of field when she moves from foreground to background, and let Rebecca out of focus. It guides audience’s attention to respond to the focused subject. Therefore, Mrs. Danvers still obtains the attention and be the dominating character.

Showing deep depth of field

It is equally important to take a glance at the fact that Mrs. Danvers takes up the right hand side of the whole scene. A certain distance remained, even they stay around in the room or walk in the corridor. In this way, protagonist (Rebecca) stays at the left, contradicting to the antagonist (Mrs. Danvers) remains on the right side.


The Breadwinner (2017)

What type of shot is it?
Middle shot

What is the camera angle?
Low angle shot

Where is the character located in the frame?
Centre of the frame

What is she wearing?
Yellowish clothing with red bright color burqa, a type of headwear

What is the depth-of-field?
Deep depth of field, large area in frame is in focus

Describe the colour palette?
Mainly yellowish and brownish color, low saturation for background.
But, high contrast color, redish, yellowish greenish for the main character.

Describe the lighting?
Hard lighting with harsh and deep shadow


4 stages of development

Week 04 Research activity

It is an analysis of 4 stages development for movie, Weathering With You, in term of hand-drawn animation which received four Annie Award nominations of ASIFA-Hollywood, and was selected as Japanese entry for the best international feature film category at the 2020 Oscars.

(GKIDS Films, 2020)

Weathering with You (Japanese Title: 天気の子 )
July 19, 2019 (Japan)
112 mins

Directed byMakoto Shinkai
CinematographyRyōsuke Tsuda
StarringKotaro Daigo
Nana Mori
Music byRadwimps
1. Clear narrative vision

It is a journey of an ordinary high-school boy, Hodaka  who has escaped away to Tokyo and meets a girl who appears to be able to manipulate the weather. Hina called herself “Sunshine girl”, as wherever she located, there will be sunny day for them. They spent their time together and developed a kind of love relationship.
One day, Hina disappeared without a notice. Hodaka tried to tackle every obstacles and started looking for the secret of his girlfriend.

2. Strong terms of reference

Shinkai designed and referred every shots from the reality angle.
The style of Shinkai is well-known for using Japan urban reality scene as reference.

3. Ideation & Design workflow

Based on previous success of Shinkai’s earlier works, 5 Centimeters per Second (2007) and The Garden of Words (2013), his work on Your Name (2016) also gained critical acclaim and commercial success.

Regarding of the global climate changes issue, Shinkai put his concern incorporate into the film, including his own wishes to arouse audience’s attention and contribute to his own community.


Pre-production
(GKIDS Films, 2020)

Production

The term ‘production’ has come to be used to refer to execute director’s plan with drawing, shooting and editing in hand-drawn animation.

(Alekseenko, 2019)


Post Production

Post Production refers to coloring, vfx, dubbing, music composing, and rendering.

In contrast to Western industries which colour management is mostly the final stage for post-production, Shinkai decided the colour palette as early as the compositing stage. This, in turn, allowed whole production team shared a sense colour in use.

(Born Digital, 2019)

4. Technical Research & Development

Evidenced by Ijyumi, the VFX artist in this movie, Adobe Photoshop and Aftereffect are used as the main software, with her wacom tablet to add layers for line drawing, coloring, highlight and shadow to create at least 7 layers for one single raindrop.

Ijyumi, the VFX artist, and her working desk

Budget and manpower

There is a multitude of views about Japanese animation production as an auteur-driven industry. Although there are good arguments in favour of the whole storyboard has drew by director’s his own, as remaining the style of Shinkai, some people have a different view for its drawbacks. Within 6-month production, in Shinkai’s own words at the interview by Polygon in 2019:

“For both Your Name and Weathering With You, production was pretty hard. What’s happening in animation in Japan is that there’s not enough people, there’s not enough time, and there’s not enough money.”

According to the description provided by Shinkai, Japanese animation industry was facing insufficient situation of lacking of systematic working condition for production crew. Shinkai also stated that he tried to improve staff retention with organic food, massage therapist and acupuncturist in studio.

It shows the fact that the production stage in Weathering With You has faced challenging situations before every pieces of art work being confirmed eventually.


Reference:

1. Alekseenko, A. (2019). ColorEdge Monitors Used for Production of Director Makoto Shinkai’s Latest Animated Work Weathering with You. [online] DisplayDaily. Available at: https://www.displaydaily.com/article/press-releases/coloredge-monitors-used-for-production-of-director-makoto-shinkai-s-latest-animated-work-weathering-with-you [Accessed 25 Dec. 2021].

2. Toh, A. (2021). Weathering With You: 15 Real Life Locations in Tokyo. [online] Mipon. Available at: https://mipon.org/weathering-with-you-pilgrimage/.

3. ワコムタブレットサイト. (n.d.). 映画「天気の子」VFXクリエイター特別インタビュー|ワコムタブレットサイト|Wacom. [online] Available at: https://tablet.wacom.co.jp/article/tenkinoko-interview [Accessed 25 Dec. 2021].

4. McLean, T.J. (2020). Global Hit Toon “Weathering With You” Signals Climate Change for Japanese Anime. [online] Variety. Available at: https://variety.com/2020/artisans/production/japan-weathering-with-you-anime-1203467424/.

5. Toon Boom Animation. (2019). Make it rain: 5 facts about Makoto Shinkai’s Weathering With You. [online] Available at: https://www.toonboom.com/make-it-rain-5-facts-about-makoto-shinkais-weathering-with-you [Accessed 25 Dec. 2021].

6. Born Digital (2019). Monthly CGWORLD + digital video vol.254. October 2019 issue ed. Japan: Born Digital.

7. Weathering with You Official Art Book 新海誠監督作品『天気の子』美術画集 (2020). Shinkai makoto kantoku sakuhin tenki no ko bijutsu gashu. (n.d.). Kadokawa, Kadokawa.

8.Weathering with You. (2019). Japan: Toho.

9.Shinkai, M. (2019). Tenki no ko Weathering With You Official Book Guide Character Design Art Cast Interview. Japan: Kadokawa.

10.GKIDS Films (2020). Weathering With You [Official English Dub Trailer – GKIDS] – January 15YouTube. Available at: https://www.youtube.com/watch?v=ps8qwWG8Uio [Accessed 28 Nov. 2021].

Ideas for RESEARCH Topic

There are three main topics I would like to study on it. For this, I prepare a few slides for my tutor to understand what I briefly think about them. With the 1on1 individual session, I can be able to ask for opinions and then clear my mind to start work on it.


Topic 01

How the 12 principles of animation still being applied in today Disney VFX ?

I have been fed with Disney movie since I was a toddler. Snow White and the Seven Dwarfs, Pinocchio, Beauty and the Beast, 101 Dalmatians, Toy Story, Aladdin, The Little Mermaid, The Jungle Book, The Aristocats, etc. I can name them on and on. Therefore, 2D hand drawing animation is my all-time favourite topics to study on it.

When I learnt the 12 principles of animation, I can always related to a multitude of Disney movies as examples. As 12 principles of animation were first released in 1981 by the book ‘The Illusion of Life: Disney Animation‘ , I was wondering, even in the year of 2022, are the animators of Disney can still be consistently follow the principles and apply them in movie?

Slide page01 is to describe 12 principles of animation by Lachina.com (left), and to show movie still of Big Hero 6 (2014) by Disney. (right)

Topic 02

What makes an appealing character design in animation?
Slide page04

We can all distinguish between adorable and basic characters by our own tastes. However, when it comes to a research to analysis what exactly matter with character design. There should be way more details to focus on. Maybe somethings such as, clean lines and easily readable features, there’s knowing what to exaggerate and what to minimise, how to give a hint of depth and background and what to do to develop personality.


Topic 03

How to stand the character out from the crowd with cinematography?

Slides to show the movie examples that I capture as crowded scene. I may collect a wide range of examples and start to divide them into categories to see how their work with cinematic storytelling.

Slide page07 – Dunkirk (2017)

Slide page11

Sum Up

So far, topic 1 is not quite recommended by my tutor, as the contents are expected to be way more than I can handle in this limited time.
So it is more suitable for me to continue working on topic 2 or 3.


03 | Nuke Cleanup

Result


I did this classwork mainly with Rotopaint node, including the tools of clone, brush and blur. The basic principle is same as photoshop, combining the tracker.

I also bought an entry level wacom tablet for me to work with pixels precisely.

I also studied what is the proper way to organise my node graphic by the youtube of Foundry.

Skill Up With Nuke | How To Stand Out As A Junior Compositor by – Foundry, imagination engineered
Figure2.1 – Work in progress node graph
Figure2.2 – Organised node graph

There are a few summary in organising my node graph.

1. Use visual language
– B-pipe as the spine of the script.
– A -pipe mostly on the left hand side is easier to read, quicker to navigate, even without zoom in.

2. Modularisation
– Separate the whole script into sections. My script in this case is not quite relevant, as it is a simple script, but still, I put backdrop node to label each area of my clean up.

3. Bounding Box Management
– Add crop node at each area clean up to keep the viewer neat, and avoid loads of unnecessary pixel information. (Figure2.3)

4. Concatenation and the flow of channels
– Prioritize the same family nodes to help Nuke to calculate the perfect pixels.
– Reformat node should be placed at the very end of the node graph. The reason is that, it is a better control for future changes, as the reformat node effects the whole node graph below it.

Figure2.3 – Bbox management to avoid heavy loading script

01 | Idea Brainstorming


First inspiration by the artwork “Diving and coffee” of the artist Fredrik V Thelander. From all kinds of visual among the social media, artists still can able to find their ways to grab audience’s attention. I am always attracted by their tricks, especially when live action combined with realistic vfx that we almost can’t tell if that is real or not.
So, I decide it can be one of the ideas for our term 1 group project. Even if not, I hope it can still be a cheerful sharing to my fellows as brainfood.

09 | Facial expression

Result

I enjoy working at this animation for facial expression very much. Comparing with the motion in last version (08 | Rendering And Nuke Color Correction), the squarely mouth problem was solved. All facial expressions are able to deliver the emotion accordingly. Even the smile one is still not since enough, it may needs much more mesh for me to set keyframe on cheeks and eyes, which is a long process for me to study on.

Basic movement

3 types of emotion movement

The whole progress is challenging but with a steep learning curve, especially for the skin area at the neck. It is not easy to define which is which to separate the upper part and lower part in paintweight tool. And when the motion is too exaggerated, it got distorted, which is obviously not the thing I want to see.

Smooth the paintweight for the jaw movement

Reflection

At this self-practise, I need to bear in mind with uncanny valley as well. As my model is a human-like one, my motion is tend to be as humanize as possible, with other elements not quite finalized yet. It became a sense of unease when I reviewed my result. But still, it is quite a nice way for me to practise the the facial expression motion with shape editor in Maya.

08 | Rendering and Nuke color correction

For this week, I’ve slightly animate the facial expression as a test. Then I rendered my outputs with separated passes, which I then able to input in Nuke to adjust coloring. I’ve also learnt the concepts of passes in Nuke are actually quite similar to other 3D software, such as Cinema4D.
In this way, with similar methods, I can take the frames and then layer them using blending modes to rebuild the beauty pass in Nuke, so from there I can make my choices meticulously and adjust how the shot can be improved.

Facial Motion Test
Maya output for the frown face

Work In Progress

The facial expression are separated into various sliders in shape editor to animate them controllably.

Nuke passes

RGB
Alpha
Direct diffuse
Indirect diffuse
Direct specular
Indirect specular

Color grading in Nuke

Result

In my color adjustment, I mainly adjusted my direct specular and indirect diffuse to add greenish in lighting for some spooky feeling. I didn’t spend too much time on it, it is just a first trial for me to understand how Nuke function and get familiar for my finger muscle with interface of Nuke.

Regarding to the facial expression, I suppose I should not animate all parts of meshes in same timing. I will definitely enhance the facial expression, especially the mouth movement, as it is too squarely in this version. As always, it is believed that subtlety is the key for all kinds of eye-comforting and realistic motion.

Nuke output

07b | Subsurface on ears and face

Result

This week, it is aiming to add subsurface to ears and face. As human ears are commonly pinkish with thinness that slightly showing blood vessels, subsurface scattering in this case can able work with texture in similar ways. Also it stimulates when light penetrates a translucent surface like a grape, and is absorbed and scattered.

The subsurface texture on ears
Subsurface texture for my model on cheeks, nose and forehead.

Work In Progress

It is the work in process for my model. As ears are slightly transparent in their texture, I adjusted the subsurface to create a transparent texture for the ears. Meanwhile, the texture of red veins have applied, to provide a little bit details and imperfection to my model.

Here is my reference of how to show realistic eyes with correct lighting in subsurface.

Youtube Channel: Alan’s Art Log
Showing the subsurface texturing with backlight only

Adding veins, blood vessels, scar mark and pigment on UV

Furthermore, for subsurface of cheeks, nose and forehead.

Reddish veins on cheeks and nose
Scar mark and skin pigmentation on forehead

Last but not least, adding bumpmap to lip.

Bumpmaping on lip

Reflection

So far, I am quite satisfied with my result, I have learnt how to make my character realistic with imperfections. All of these slightly details create an unique identify for my character. Again, I believe the key to adding subsurface is subtlety with adding imperfection to create realistic face model. Overall, there are no perfect human face in reality world.