In Nuke, the 2D panel tracking is user friendly for everyone to apply the tracking. However, the most time-consuming part for me is the use of my organising skill for the node graph in Nuke. Which go which, where and where link together, etc… And the prioritization for each steps were quite confusing at first. It might seems an easy task with 2D panel tracking, but when it came with clear up and color matching. It was not easy anymore to put separated tasks into one single script. Fortunately, I eventually overcame it in my own way, but I hope it is able to reach the industry standard for other compositors to understand my node graph.
There are 3 main techniques in this task, including 4-points 2D tracking, rotoscoping and color matching. For me, color matching is the most challenging part, as I am not sure which parts within the footage to reference.
I did this classwork mainly with Rotopaint node, including the tools of clone, brush and blur. The basic principle is same as photoshop, combining the tracker.
I also bought an entry level wacom tablet for me to work with pixels precisely.
I also studied what is the proper way to organise my node graphic by the youtube of Foundry.
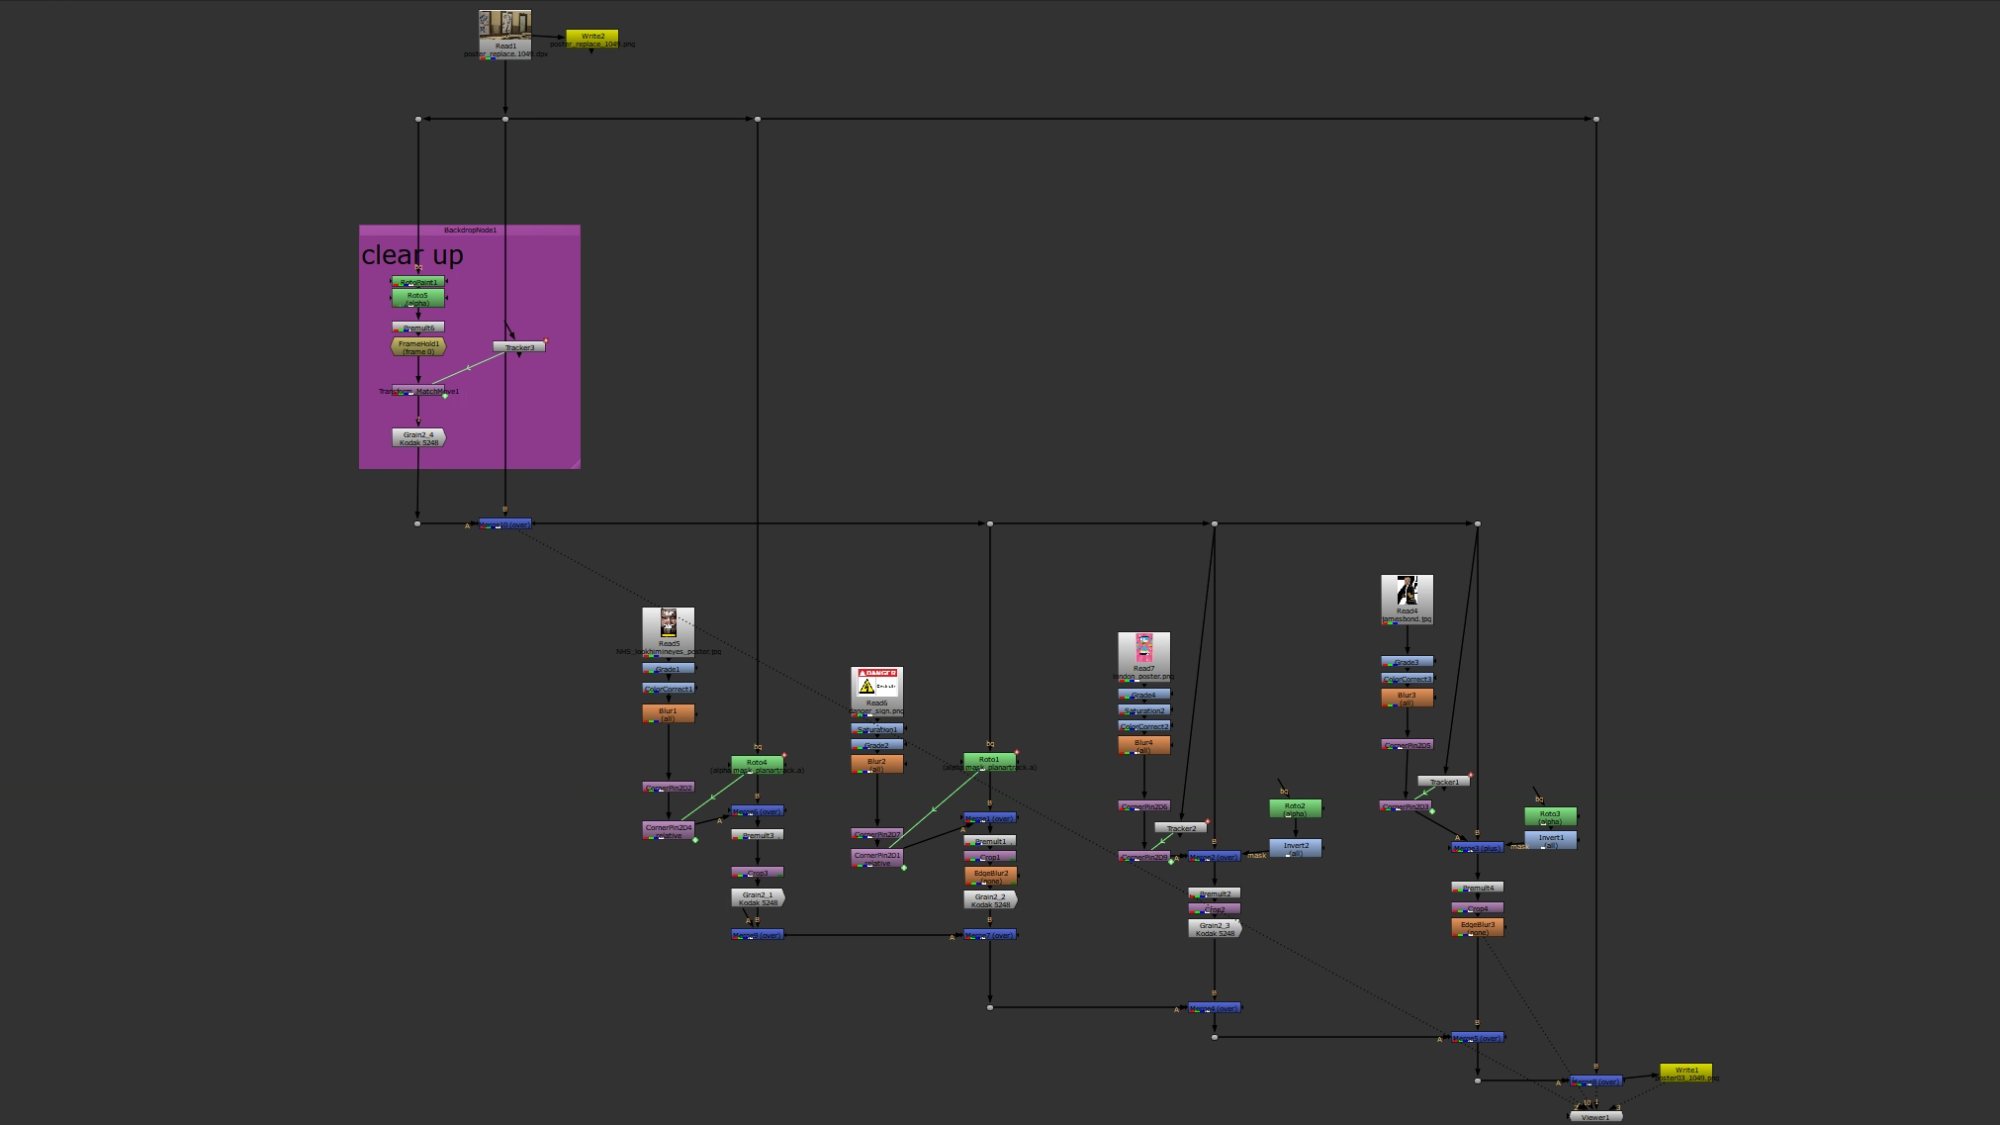
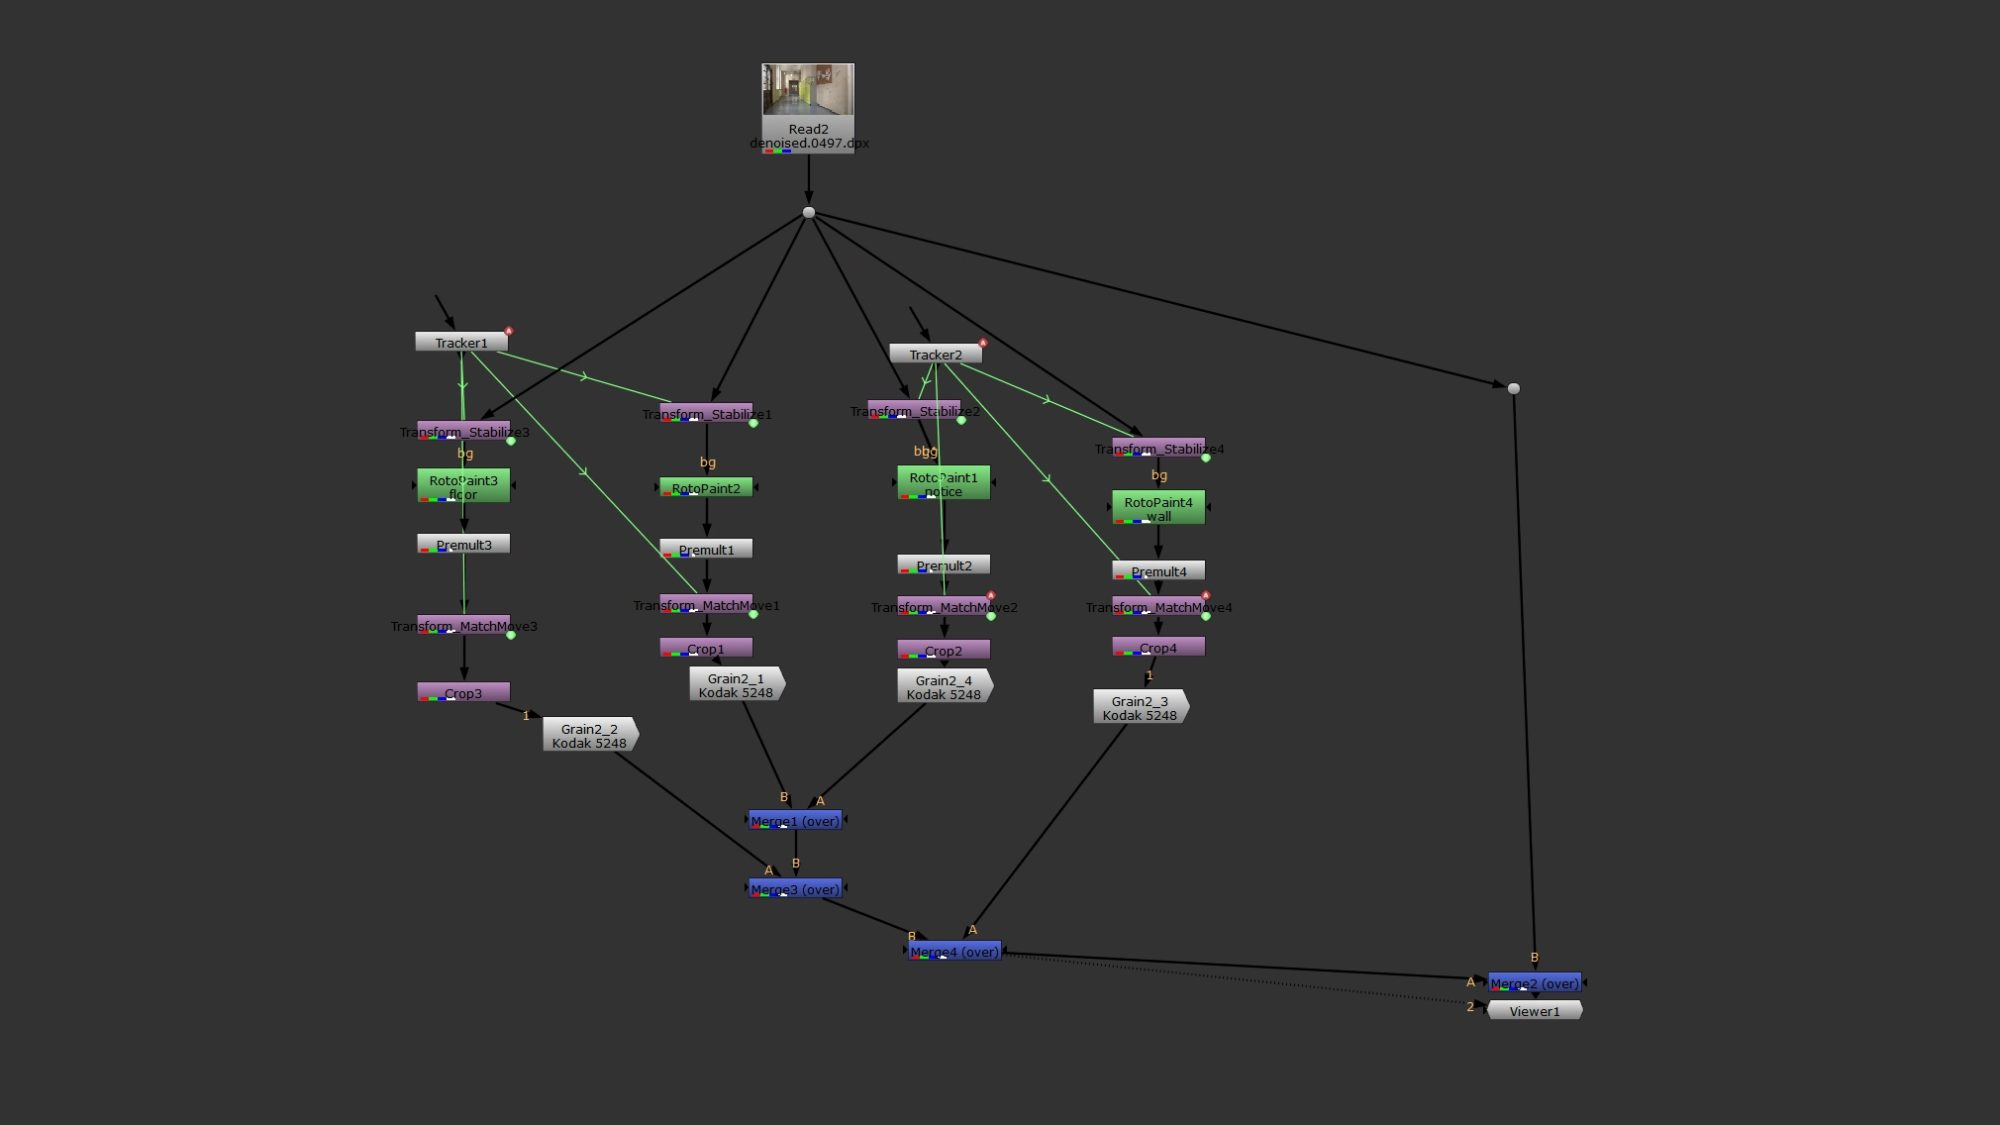
Skill Up With Nuke | How To Stand Out As A Junior Compositor by – Foundry, imagination engineeredFigure2.1 – Work in progress node graphFigure2.2 – Organised node graph
There are a few summary in organising my node graph.
1. Use visual language – B-pipe as the spine of the script. – A -pipe mostly on the left hand side is easier to read, quicker to navigate, even without zoom in.
2. Modularisation – Separate the whole script into sections. My script in this case is not quite relevant, as it is a simple script, but still, I put backdrop node to label each area of my clean up.
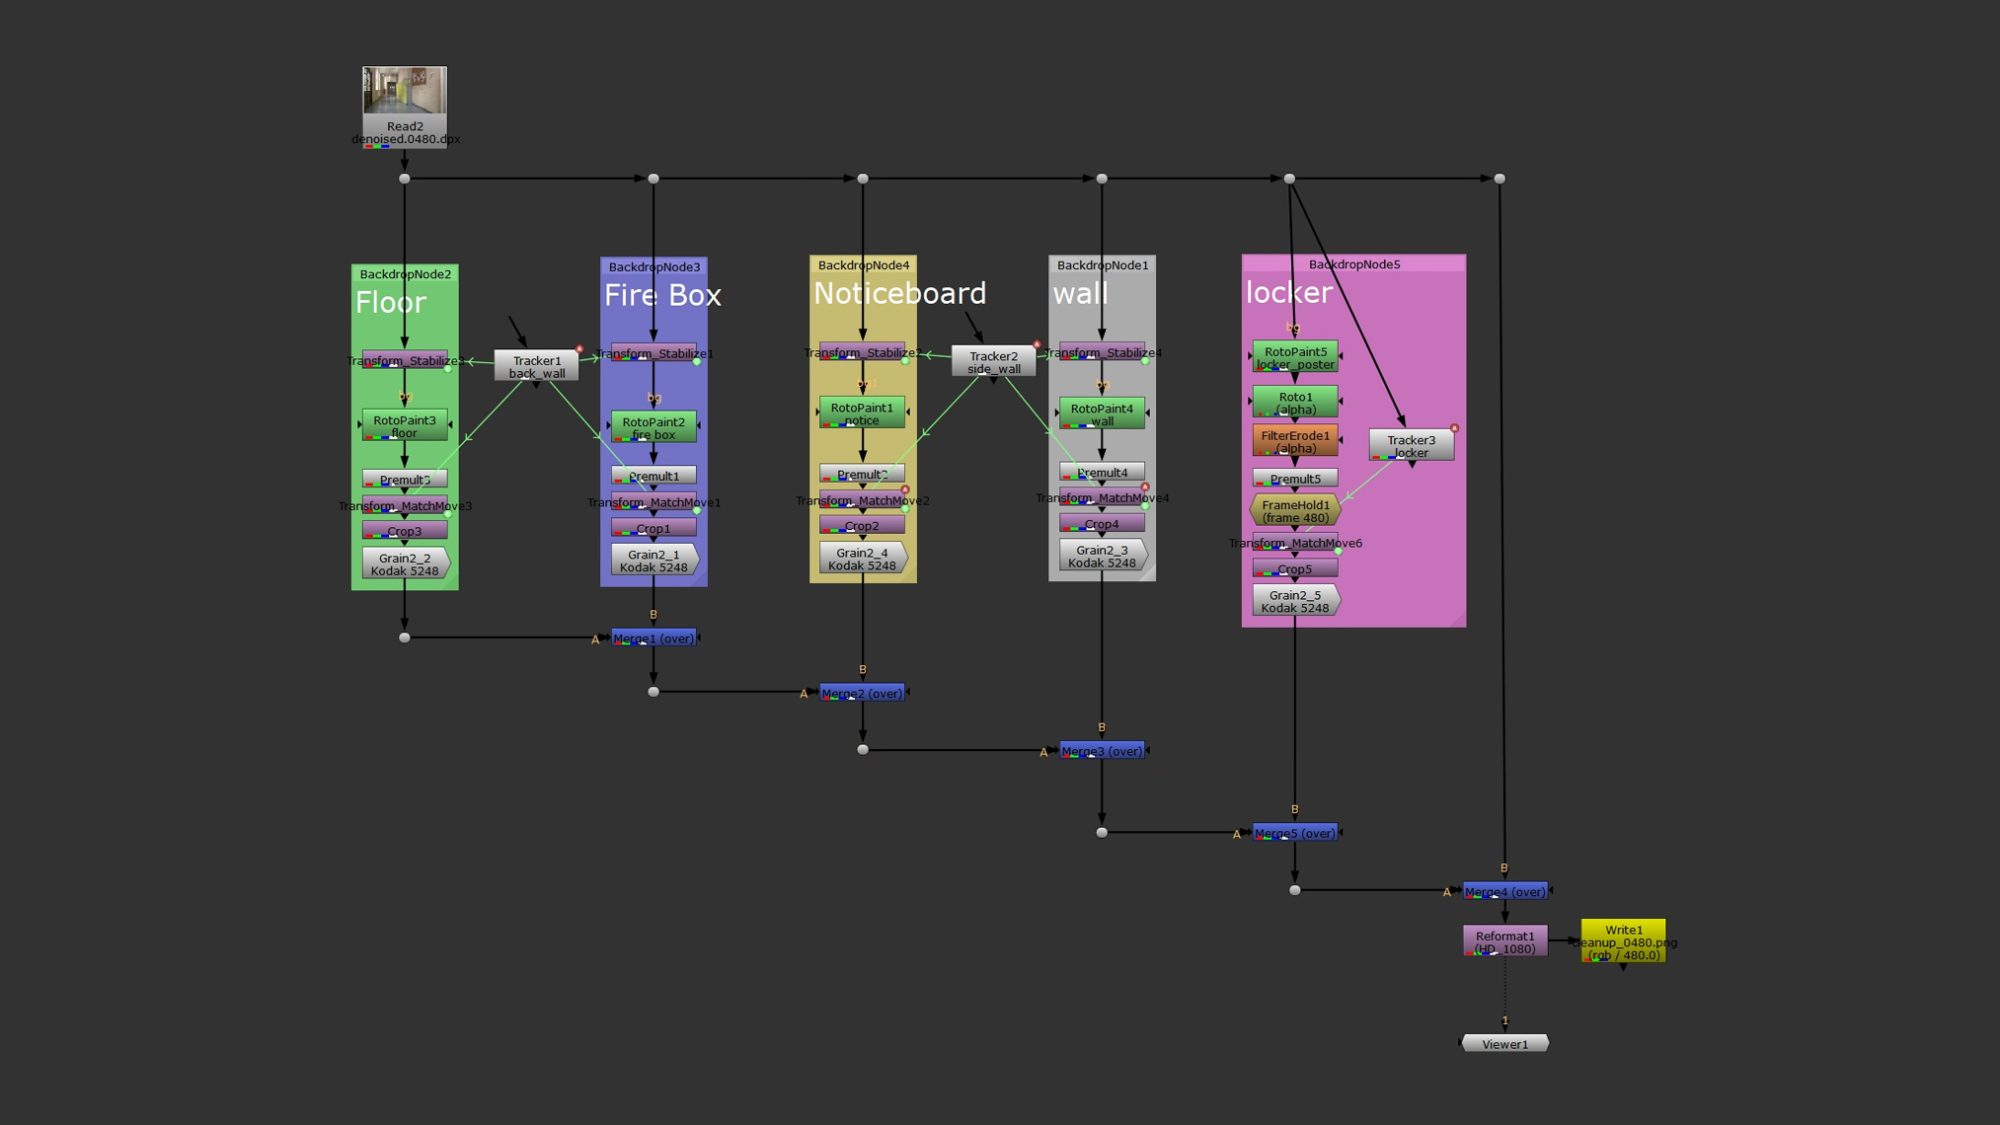
3. Bounding Box Management – Add crop node at each area clean up to keep the viewer neat, and avoid loads of unnecessary pixel information. (Figure2.3)
4. Concatenation and the flow of channels – Prioritize the same family nodes to help Nuke to calculate the perfect pixels. – Reformat node should be placed at the very end of the node graph. The reason is that, it is a better control for future changes, as the reformat node effects the whole node graph below it.
Figure2.3 – Bbox management to avoid heavy loading script
With my previous experience of using Aftereffect, it needs time for me to adjust while using Nuke, even sharing the same concepts within both softwares , or even among all other compositing software, the keywords and terms in Nuke are seems to be strangers to me.
Another obstacle is my aesthetic skill on coloring. While I need to eyeball the color of background and the object to finetune and match them. All I can say is that, somethings are not right yet, the airplane is still a “fake” one, it didn’t merge with the environment, but I don’t know which buttons to adjust my discomfort for the color.
Figure 2.1 – The node graph of this color match classworkFigure 2.3 – The work in progress of the color matching. Figure 2.4 – The top one is cloud png without premult node, and the bottom one is with premult node.
And when I first input the cloud png into the script, the edge of the cloud was so rough that I misunderstood Nuke cannot recognise the alpha pass. But then I discovered that what I need is just a premult node, as we don’t need this step in aftereffect, I definitely need to solid my knowledge with the concept for premultiplication.
Result
Figure 2.5 – The result of my classwork, color matching for a airplane with the sky environment.
That is the best result I can gather, but I am still not satisfied with the color match. Somethings are still not right by my eye judgement.
I am not satisfied with the result, still a lot things to learn. I think I should not put all my roto in one single roto node. I should separate them into several nodes for better organization and less chances for distorted roto mask.
Work In Progress
It took me nearly 7 working days to finish this task, which is way more complicated than my expectation. When I struggled in working with all these chaos, I also did some researches of tips and suggestions for Nuke newbie on YouTube. This, in turn, allows me to find inspiring tips from YouTube creator, Hugo’s Desk, which explained how to do roto in Nuke quite clearly, and the most useful tips from him is to keep on hardworking in roto. No secrets, no magic, just hardworking.
My roto became a disaster !!!
Hair shape roto is not finished yet
Still seeing black edge of white T-shirt roto
As the footage is a jpg sequence that not much details for me to do a pixel-perfect roto. I am not able to see the hair shape to define the roto, even I adjusted the gamma in my viewer, still I can’t identify the edge of my matte.
Still, it is my first rotoscoping task in Nuke. I will keep it in my mind to apply what I have learn for further rotoscoping.