Category Archives: Term 04 Final Major Project

WK10 Final Submission

Final Major Project

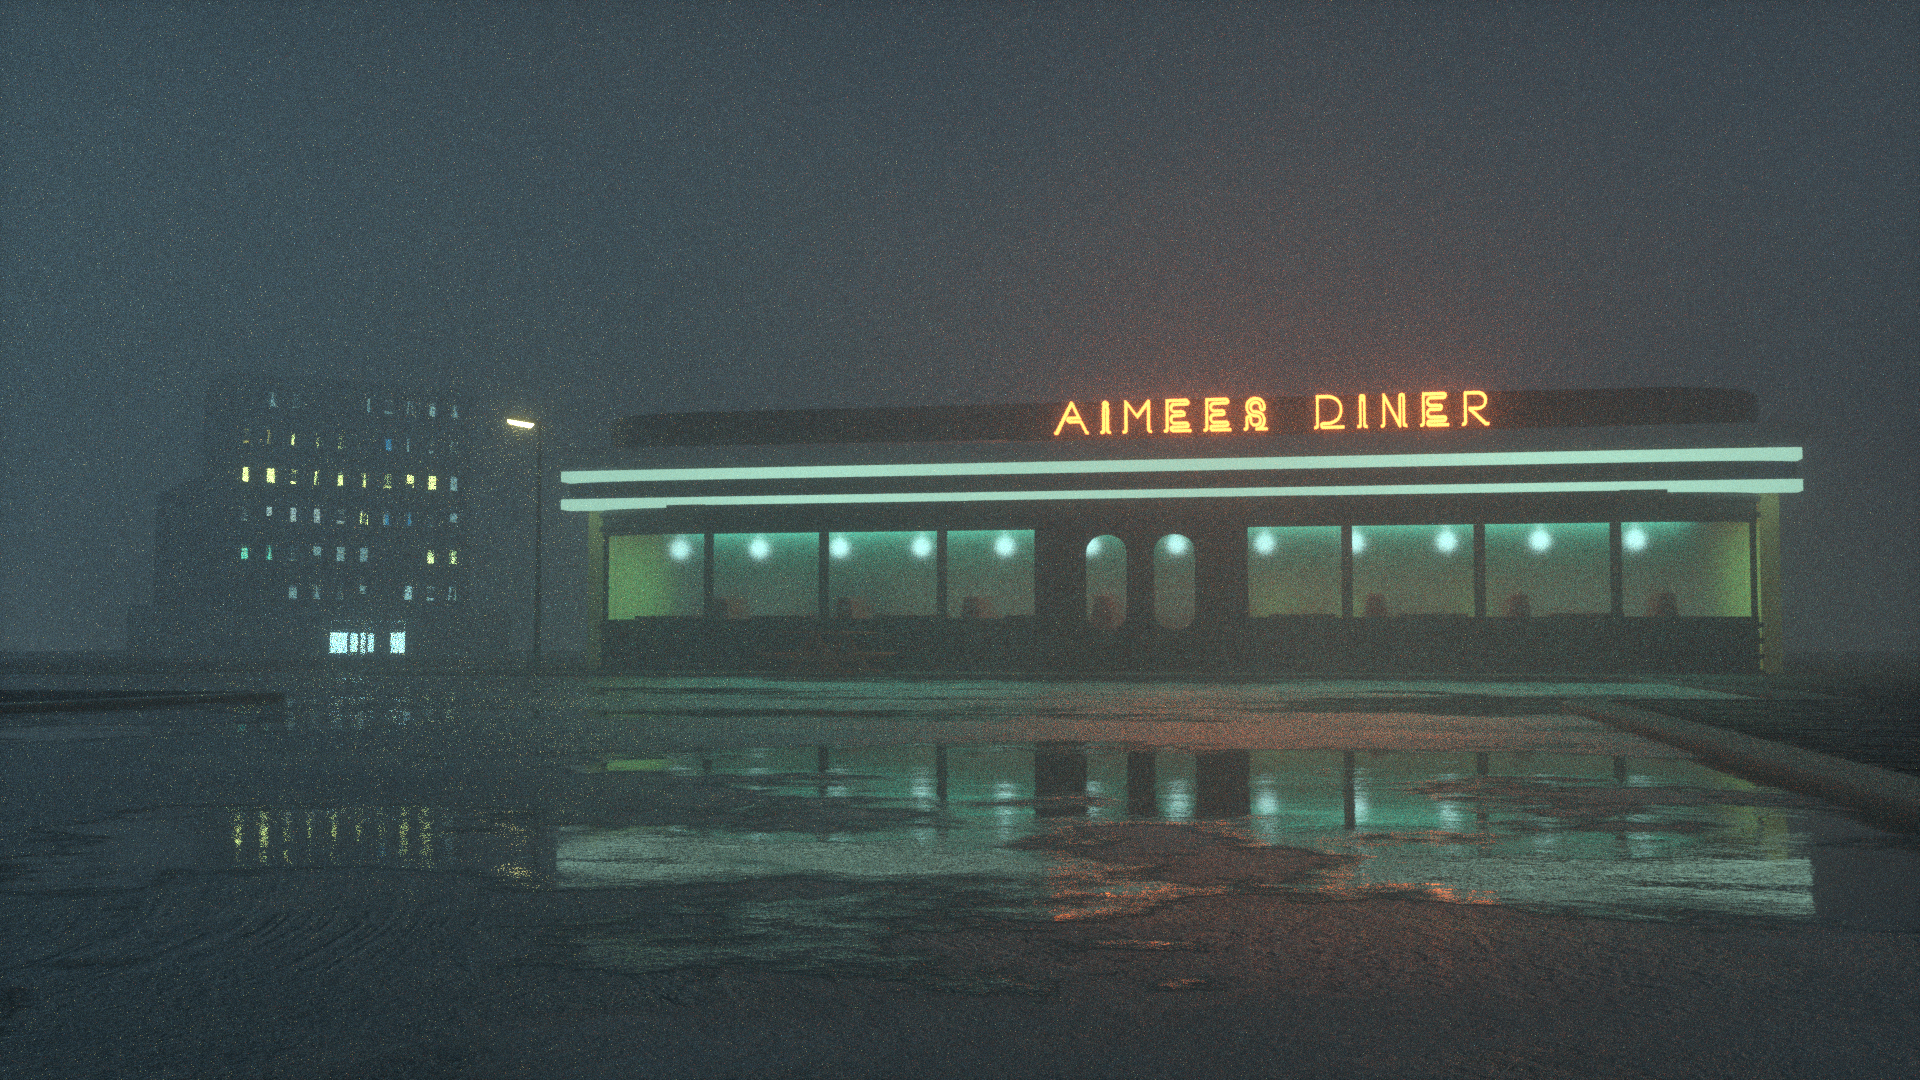
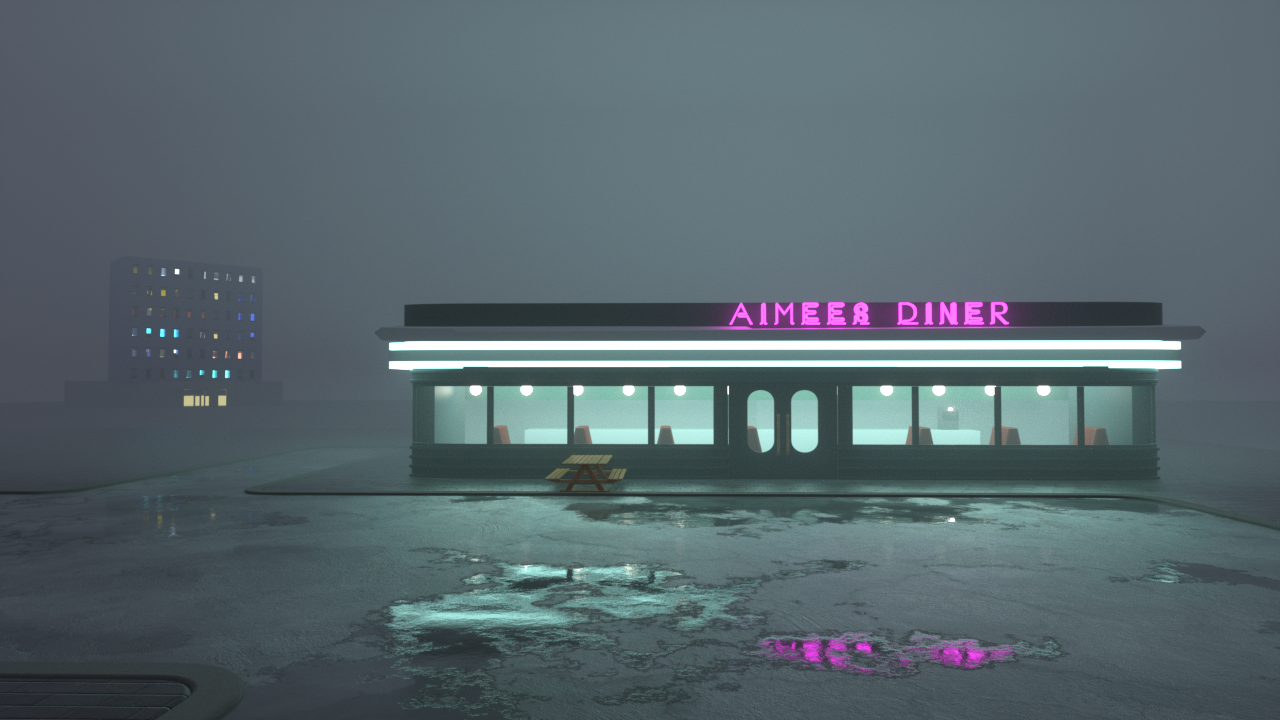
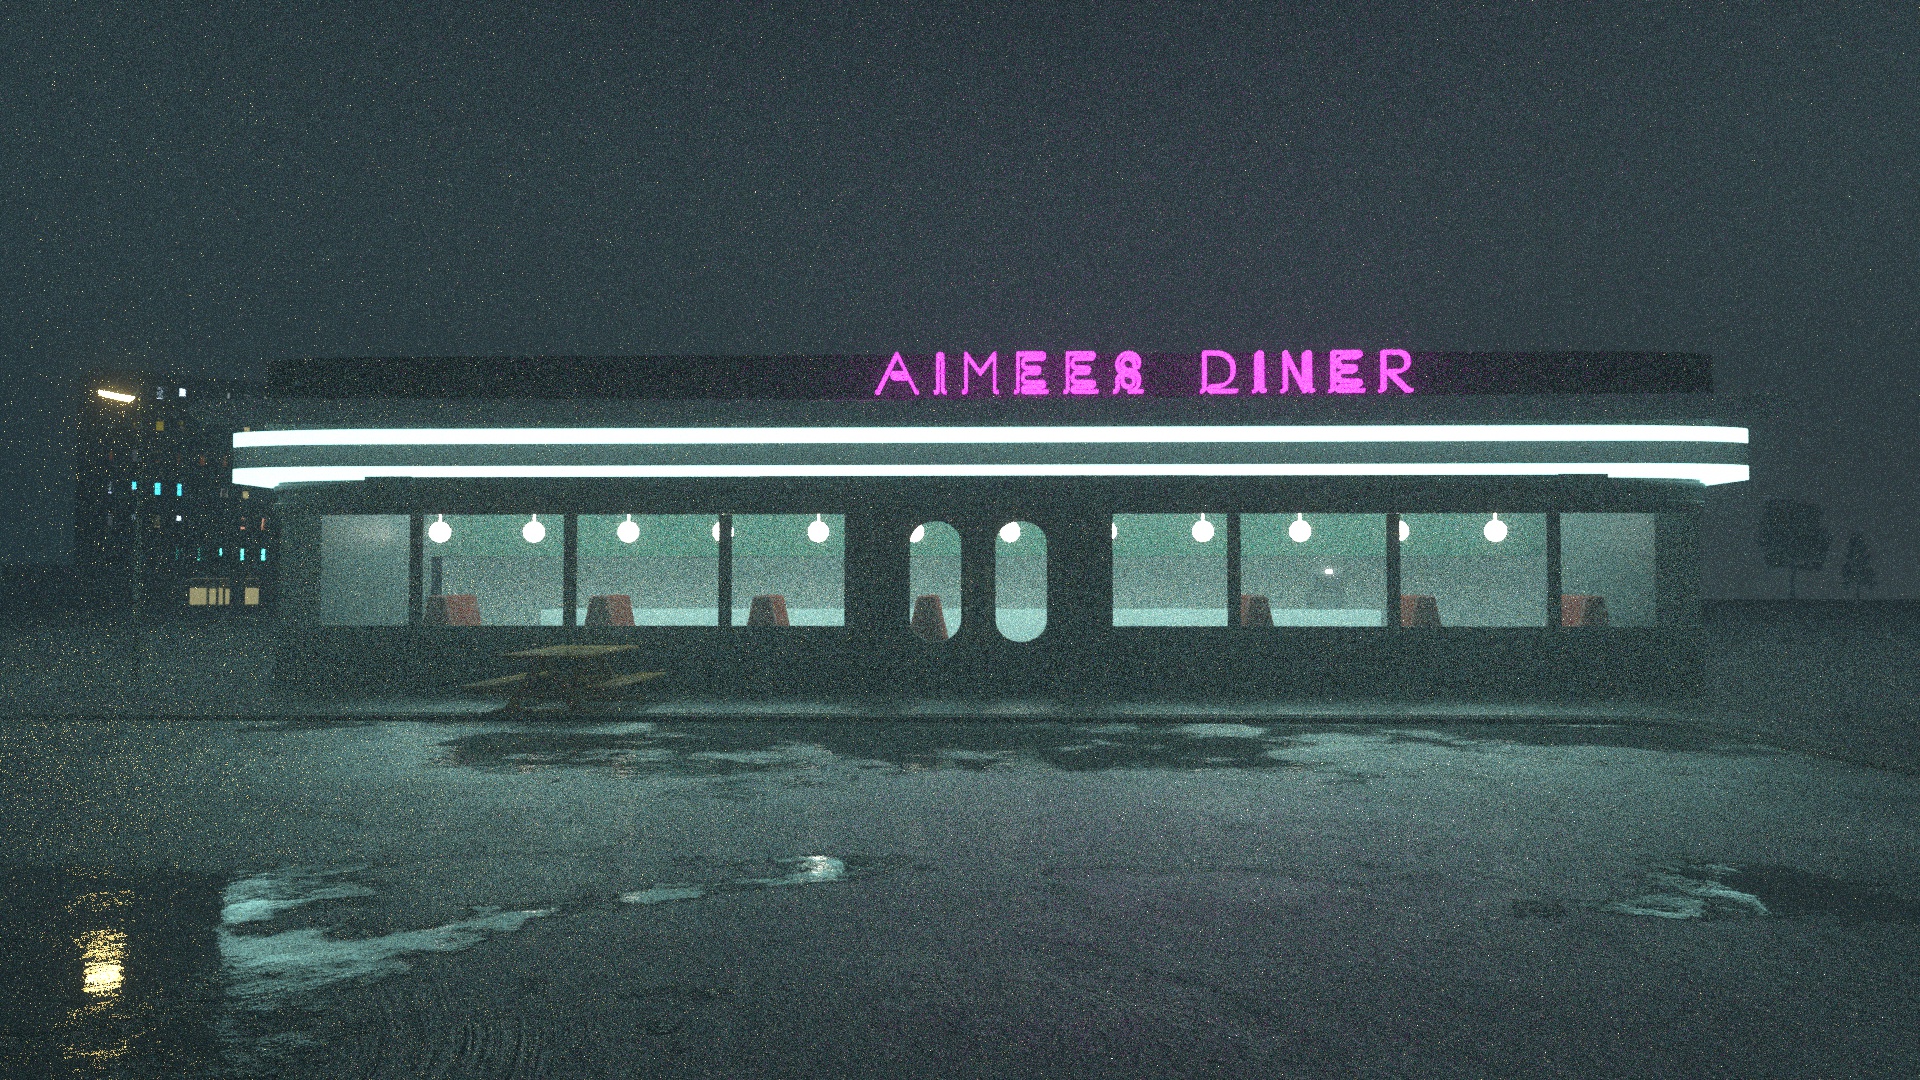
Finally, I have submitted my FMP! This project mainly focus on rendering an atmosphere to present my own imagination. It quite matched with my reference in brainstorming stage.

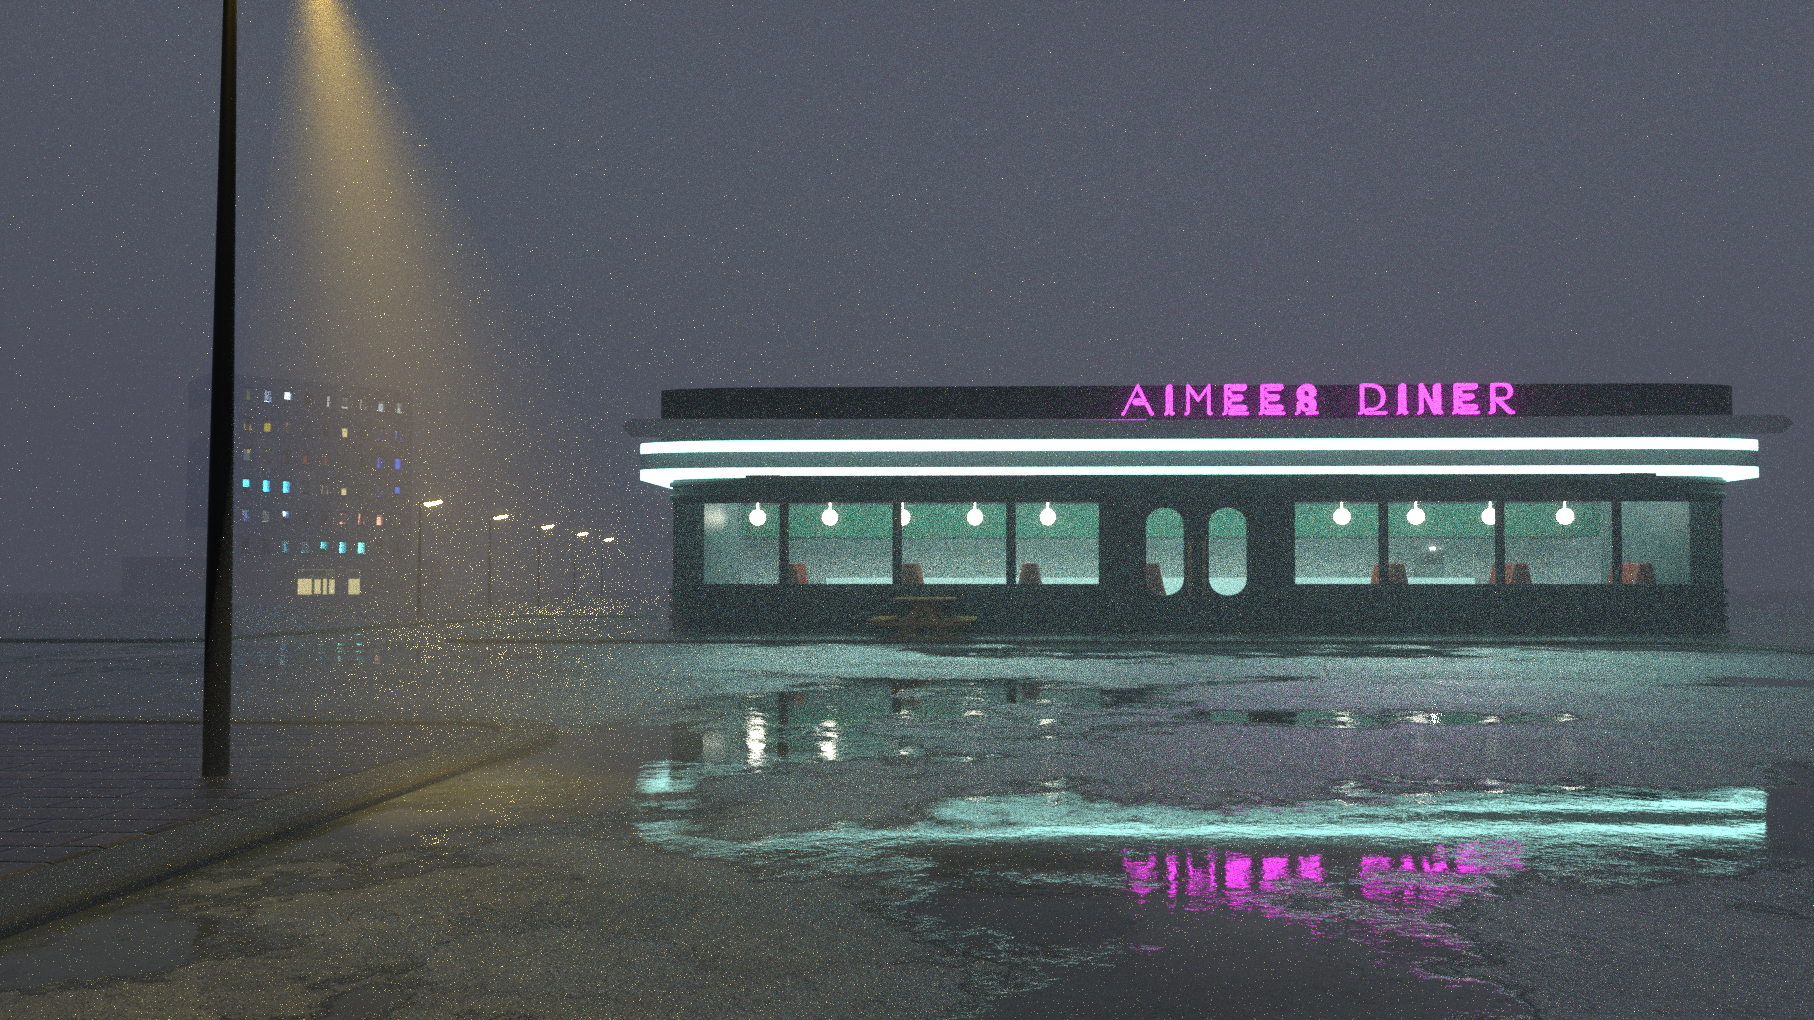
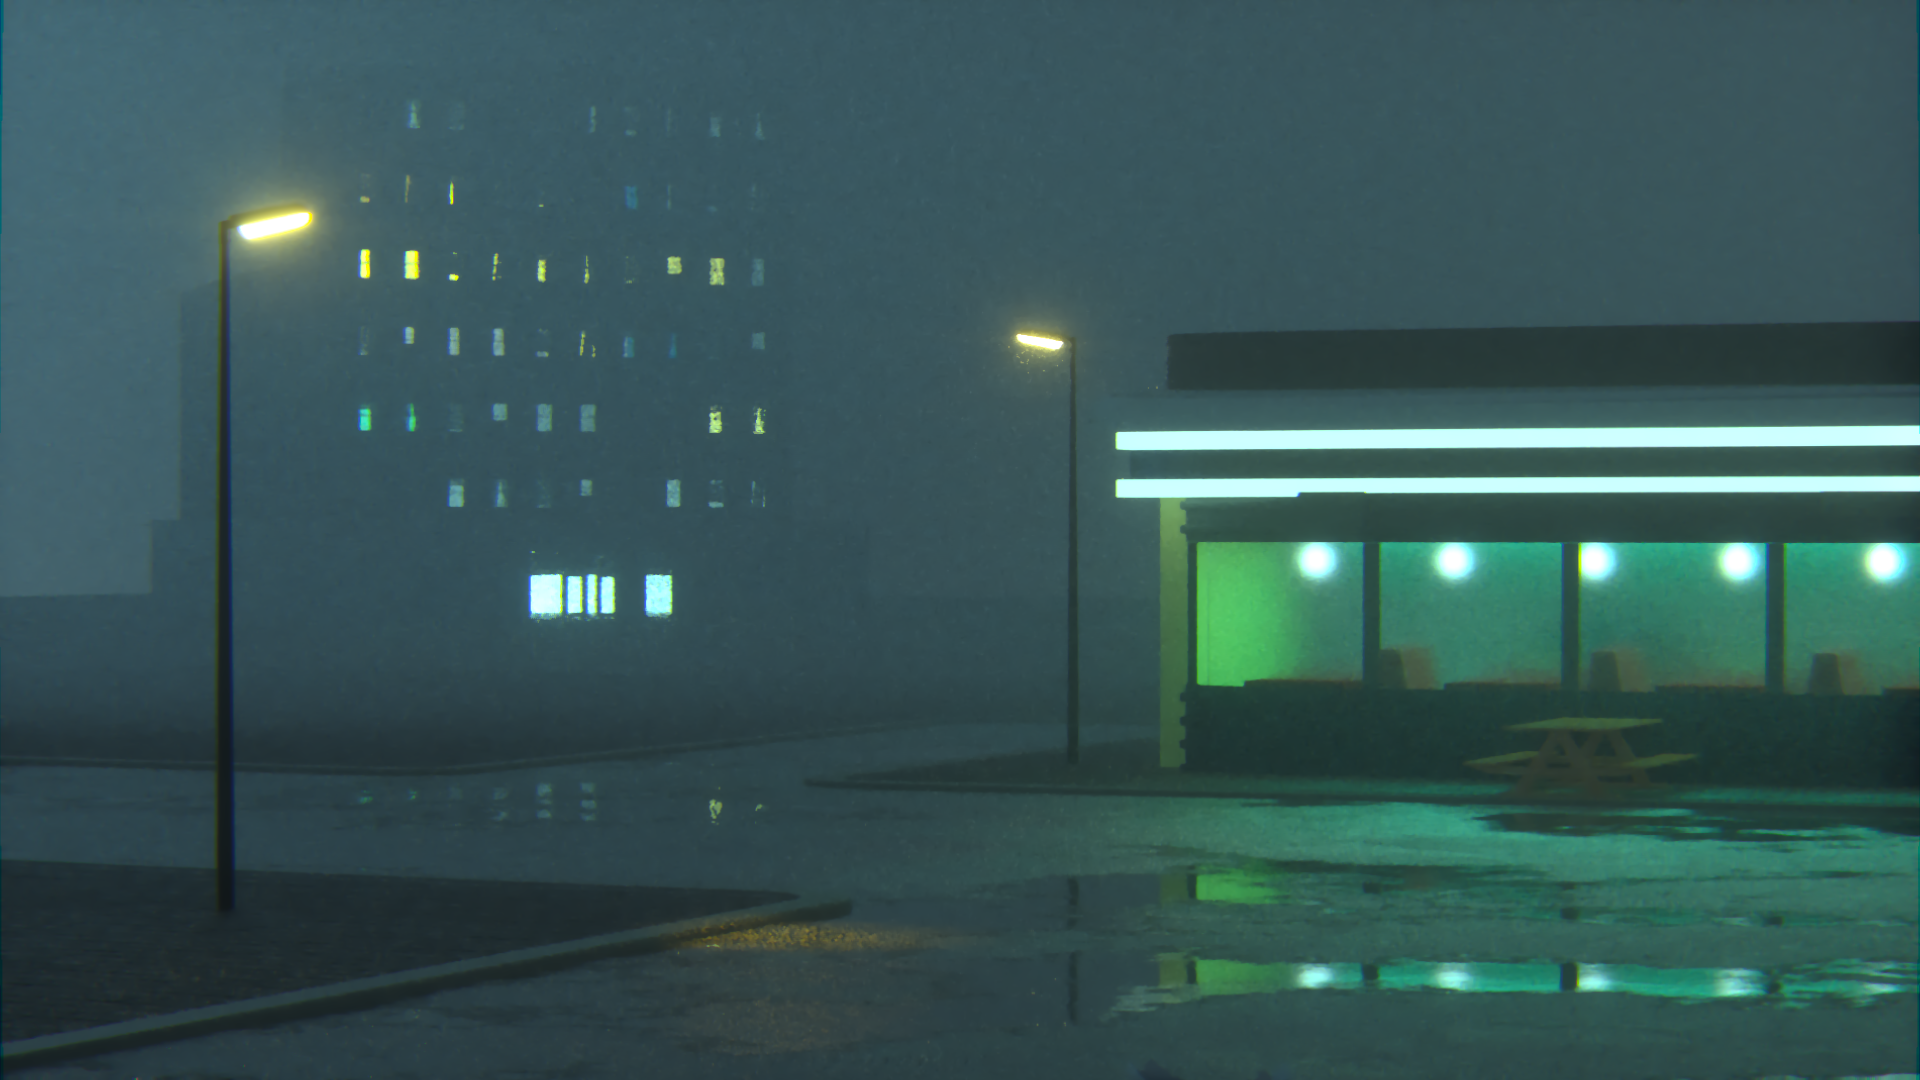
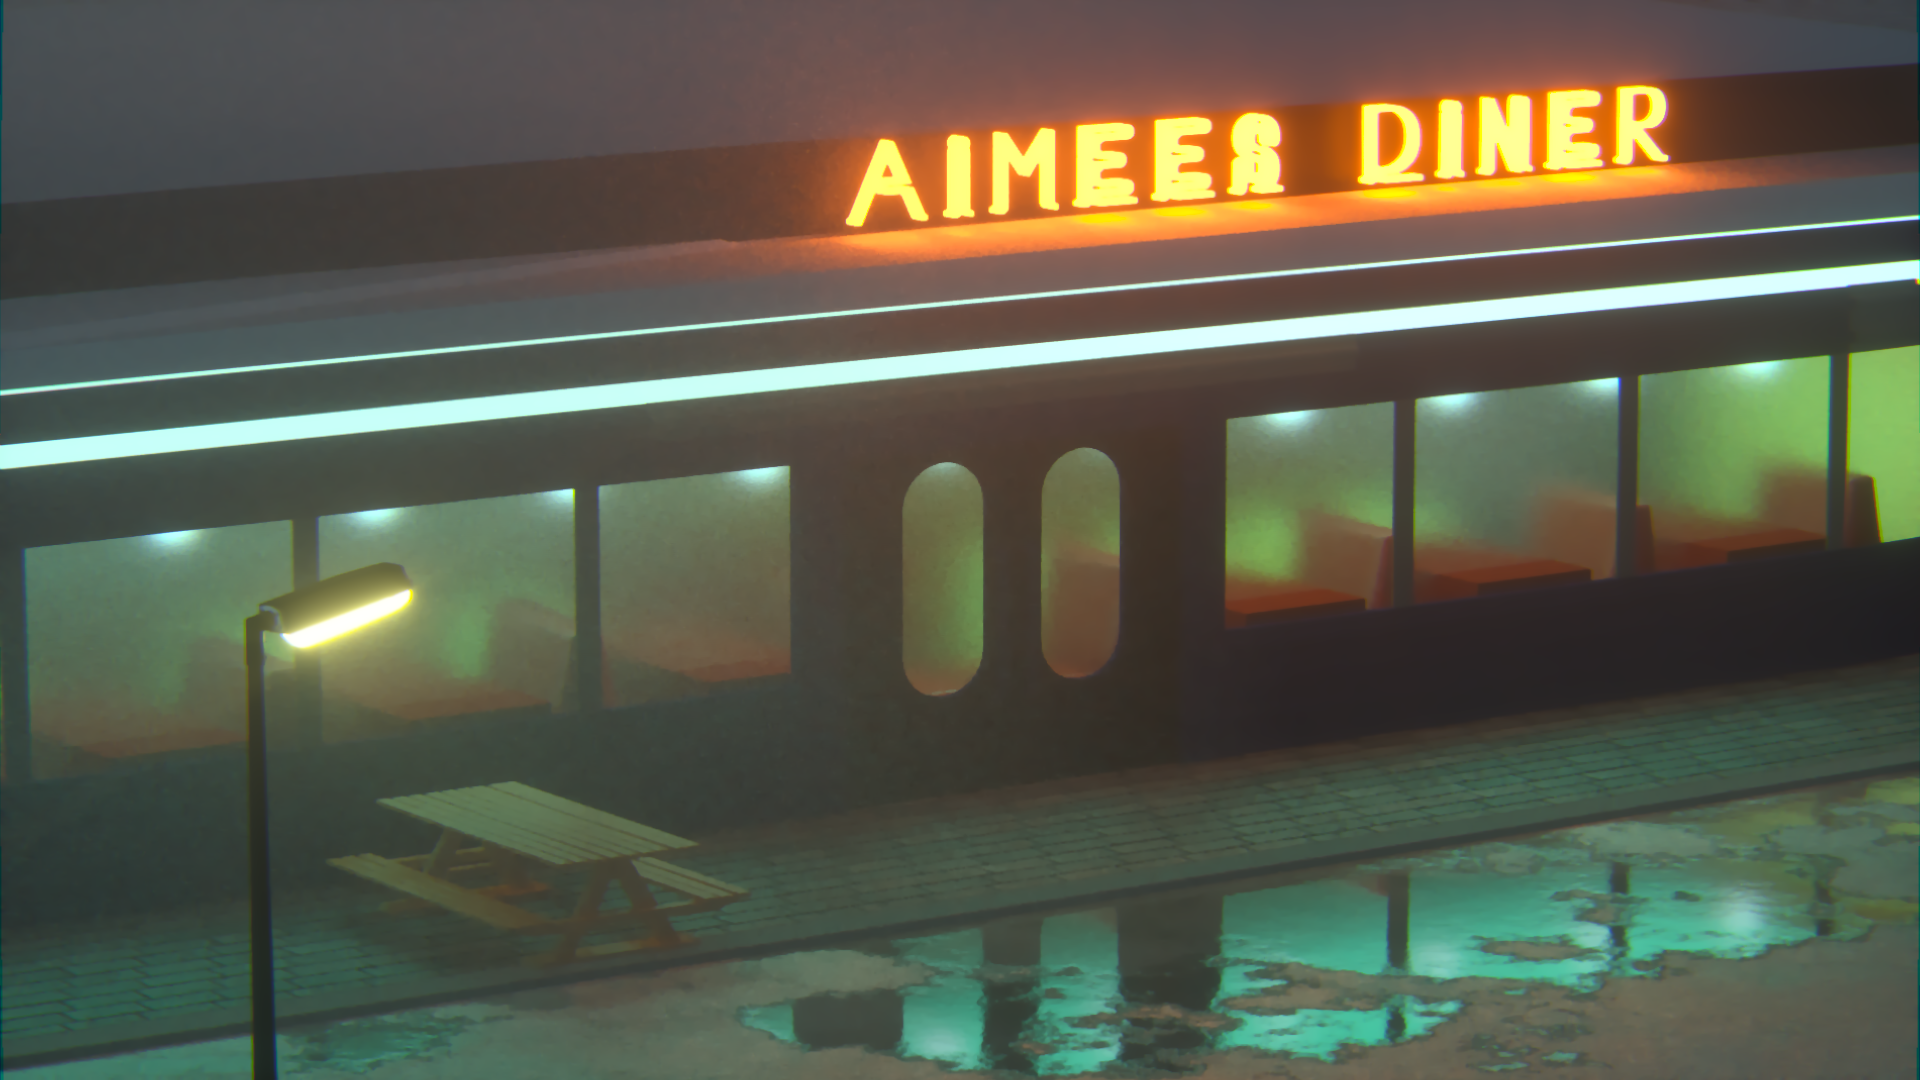
I replaced the windows with blurry transparent one, which matched with the mist weather. To contradict the color of the bluish midnight, I finally decide to utilise warmish yellow orange for the main neon lighting and supportive street light.

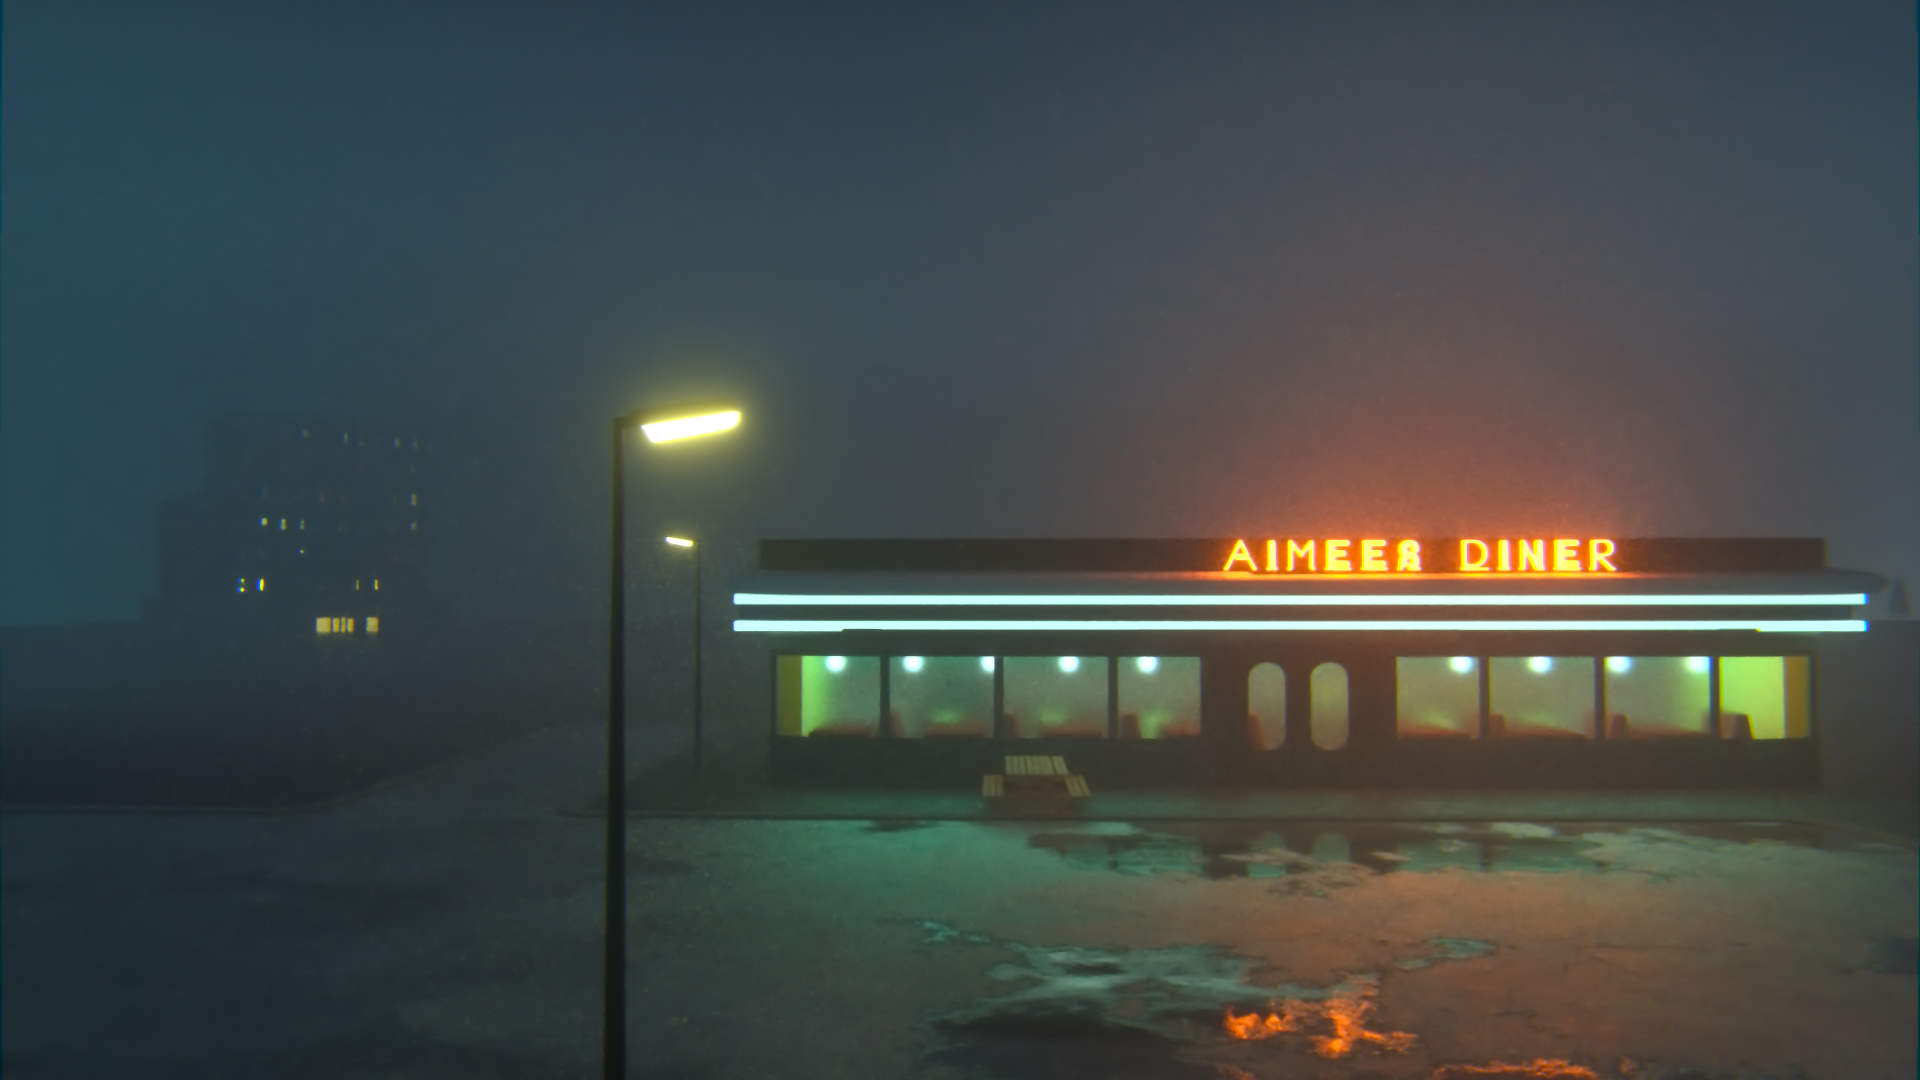
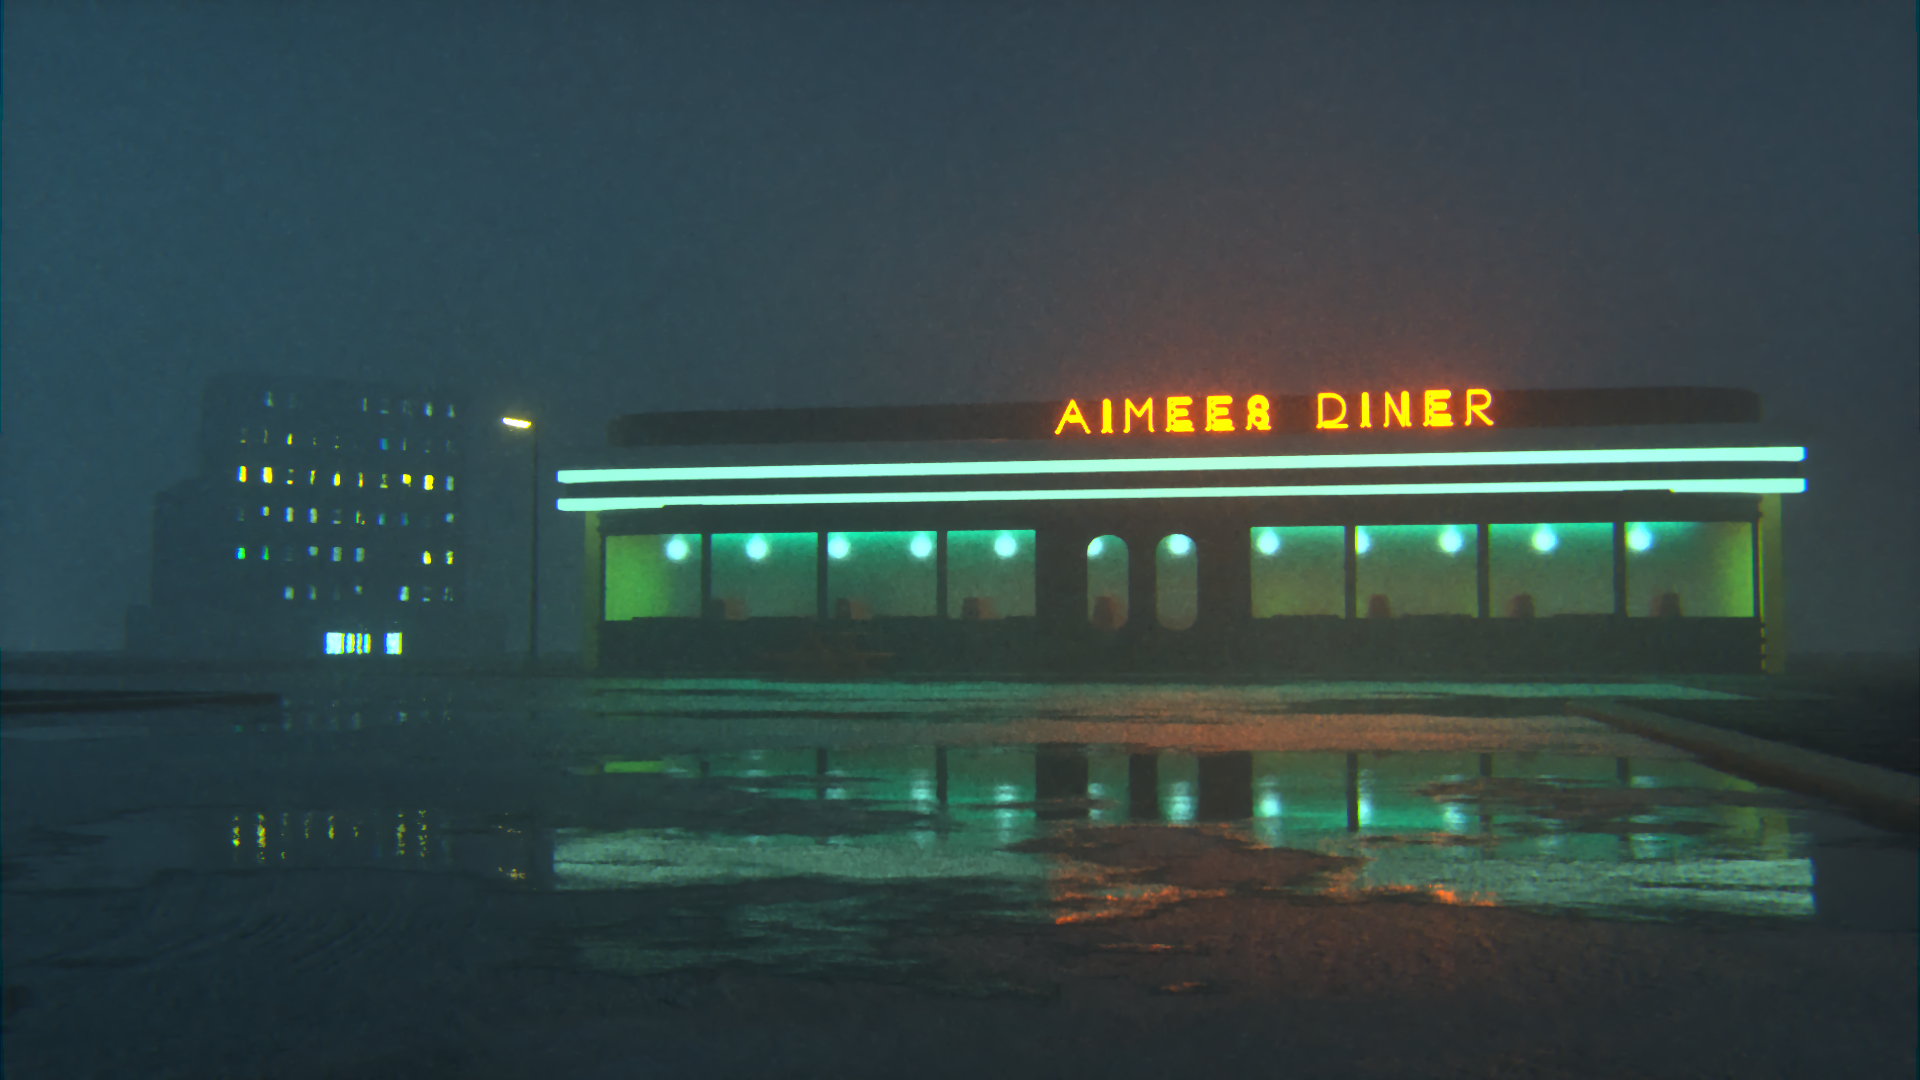
I wish I could have more time to explore different angles and lighting. And that is interesting that people provided feedback to me that this work reminded them the PS4 game Stray, Cyberpunk, or even the famous painting, Nighthawks by Edward Hopper. That’s inspiring to hear from all kinds of points of view from others.


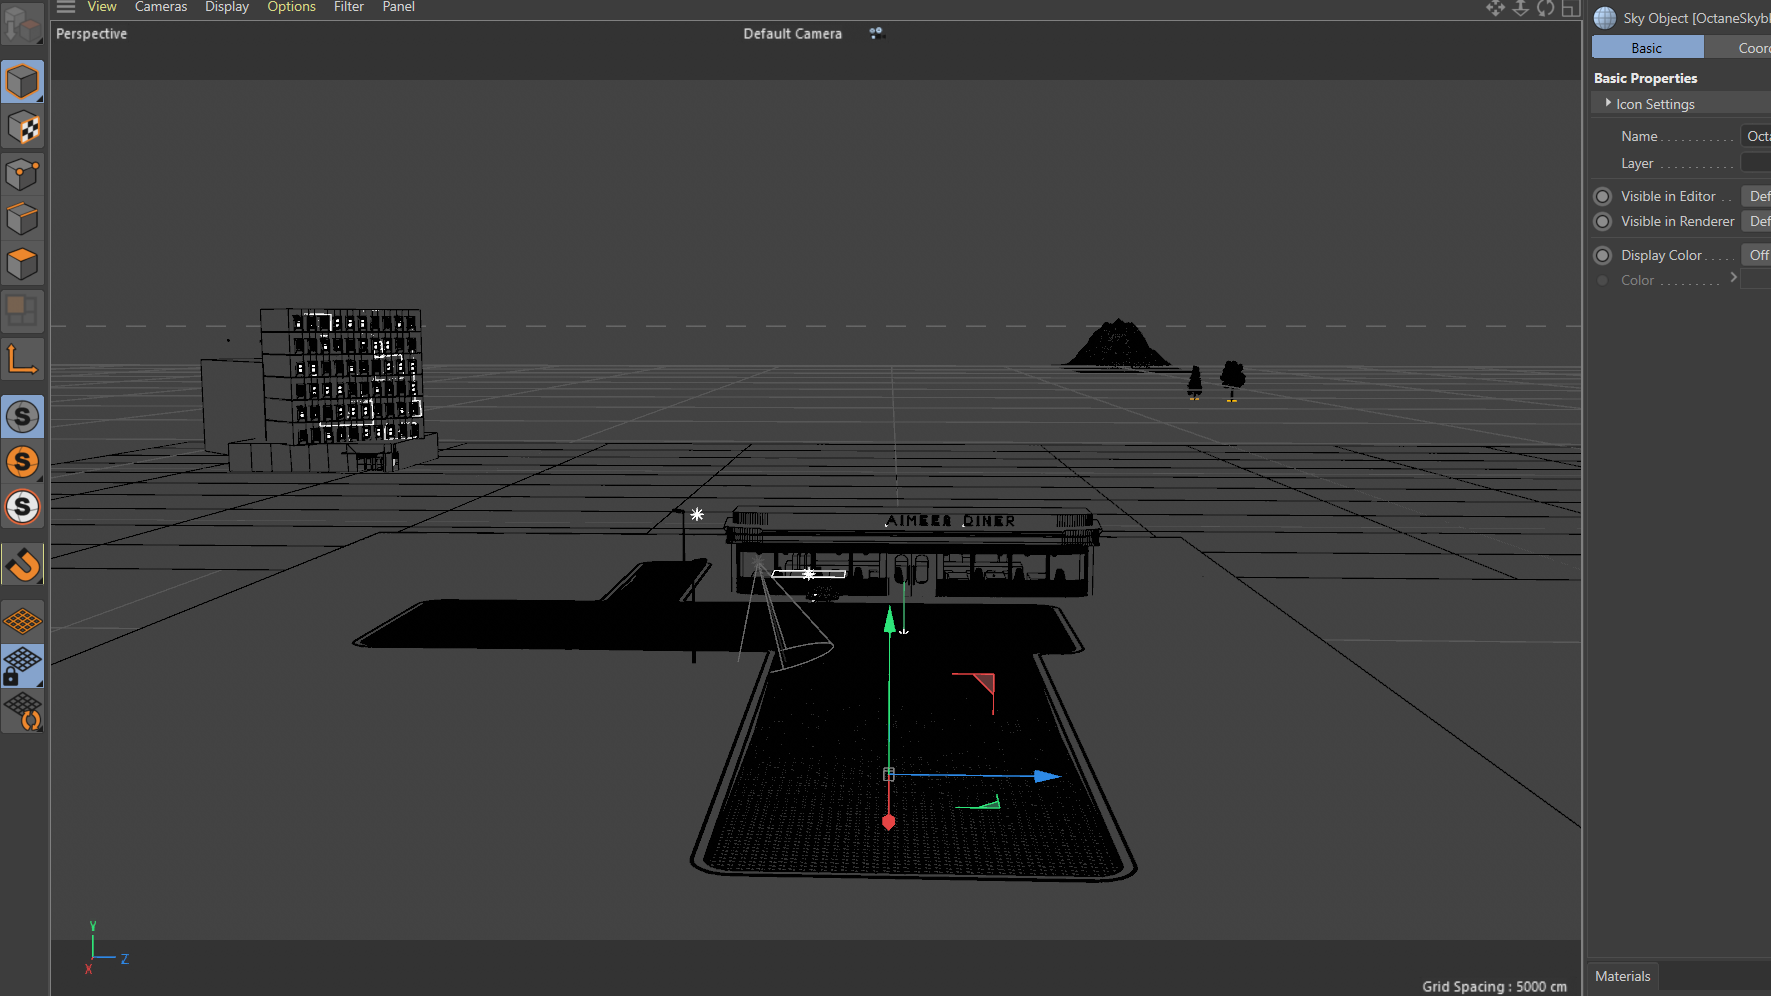
I didn’t render the props layer on the ground in the final version output, as it caused some flickering in video that I cannot fixed in my final stage of submission.


Term 04 – Self Reflection

Even I understand that this project in term 04 is quite important for us to present our skills in near future job seeking. Compare to what I want myself continue in my career path, I would like to try out something in my own imagination. In my previous experience, I was a motion graphic designer in Hong Kong. And of course I would love to continue to work in this profession. However, my goal to achieve a master degree here, is to explore more possibilities. Instead of just focusing on motion, it is a precious chance for me to try something I am not familiar about.

Creating a scene design is not my type of work I used to work on, but sometimes when I browsed others artwork, I always wonder how did they do that. Therefore, in term04, I did not hone my motion skills, and just try to push my own boundary.

After my graduation, I would love to seek for job opportunity in motion design industry, but I still satisfied for the fruitful result in my whole master degree programme. I believe it is crucial for designers to be a T-shape person which means their skills involved board knowledge, but at the same time they specialise deeply in one profession.

Image from medium.com – Kris Coverdale

WK09 Nuke Adjustment

From Cinema4D, the rendered version the noise is quite obvious in still, and even worse in sequence. Therefore, I imported them into Nuke for some final adjustment. And Nuke did a great job on this, with gizmo: one is Firefly Killer by Stefan Muller, and the other one is mtPixelFixer v3.0 by Miguel Torija. Both did a great work on the plate. Instant result by a quick plugin and no flicking while footage playing as well.

In addition, a filter with colour contrast added, and a lens distortion also added to act as a bit of imperfection to it.

WK08 Atmosphere Volume Fog

Result

This is the camera Angle design for this scene, but seems too noisy for this render. I will need to try another version with less grain. It is not easy to balance as lowering the voxels size would definitely dragged the computer performance slower.

At this moment, my renderer takes about 3-4 minutes to render one frame. I think it is acceptable as the total number are 250 frames.


Regarding the volume fog, I expected the thickness would be just above to see the building lighting behind. As it is quite a distance from the main diner to the building behind. The lighting should be dimmed but remained visible for mystery.

I also used some modelling in Cinema4D default content browser, such as the street lamps. It is so convenient to add them in scene, as they are all fully modelled and textured for designers to use. As I am not very keen to work on UV texturing, it would be a great help for me to save some time. And I felt it is quite common for VFX artists to use preset modelings, as long as they have got their permission and add credits to those artists.

WK06 Camera Angle Design

Lens 100mm

This week I have tried to explore a new angle for my scene. Camera position and lens choices are both important for me to tell a story.

As it is a scene design, I prefer to use wider lens to create the scene. I would like to show the whole atmosphere instead of modelling details to my audience.

Lens 24mm

Regarding texturing, I didn’t complete my UV mapping properly. It is not easy to get it right and it is not my purpose to create this project. So I would rather skip it. In my future project, I might think about purchasing some preset 3D models with texture included in a similar project like this one. It would be helpful for me to focus on what my interest is.

Finally I am satisfied with this composition. And I think it is much more better for having symmetric design in a scene to present its solitary. But the details of the building behind became less obvious than my expectation. To compare, the interior design of the diner became quite important to the scene, which I don’t want to. I didn’t add details of it as I just want to emphasise the atmosphere. Maybe I would dimmed down the opacity of the interior area of the diner.

WK05 Adding Props and Details

Trying to add some details on street, as similar as we have always see some garbage on floor. I tried with some simple cube first, as I used a vertex map on the surface of the road and link with a Cloner to distribute them on yellow area accordingly.

Then I built crumpled paper and folded paper as garbage to replace the cubes. I saw a tutorial by Ukramedia that it showed a skill to create crumpled paper with softbody and colliderbody dynamic, by scaling down a sphere, the paper geometry inside the sphere can deform into a crumpled one effectively.

Paper modelling WIP
Result of paper modelling
Reference from Ukramedia

Instead of duplicating every objects and place them accordingly, I prefer to place them randomly with Octane Scatter to save some render time.

WK 04 Lighting

And for the lighting of neon sign in scene is actually not a lighting source, it is a texture with blackbody emission. The advantage is that a blackbody emission could create a glow effect. Compare to realistic neon sign, it should included three colour of layers, the core part in white, the stoke in pink and the outward stroke in soft pink blurry colour. So I am working on neon sign to create a glow effect hopefully similar to the reference.

Not only adjusting the blackbody emission to create this effect, but also add a post processing effect in Octane camera to enhance the bloom effect, which is the key element for the burry outward stroke in neon and glare power if needed.

WK03 Texture

This week, I recreate the reflection on floor that I saw it on Cyberpunk 2077. It is a wet surface and organic shapes of puddle that we usually see them after raining. It also looks great to reflect some neon light color on the floor.

Just using one texture from ambientcg.com, but mixing the reflection with a b/w noise layer to create wet and dry surface on floor.

WK 01 Modelling in C4D

Apartment building

This week, I built some windows of building, and tried to add some variations for each window. In total, there were 8 types of window, then adding cloner to duplicate all windows into an apartment building.

Put the building in a scene to estimate the proportion of it. – Focal length 24mm
American Diner

Also, I tried to follow some references of American diner to build a similar one. Then combining with the apartment building to put them into a scene. And with the helps of some props, such as a 180cm tall human figure and a basic car figure which are default element in Cinema4D, to help me to measure the proportion of the whole scene.

Timeslapse of modelling the diner

Put the diner in a scene to estimate the proportion of it. – Focal length 24mm

Idea Updated – Loneliest Place 2.0

Loneliest Place 2.0

Create a scene design for an abandoned city by using Maya, Cinema4D and Nuke.
Based on the idea of term03, it would be a revised version for a new scene as my final major project. I think it would be better for me to hone my skills with foundation of what I did in term 03. However, I would like to try this new version in Cinema4D as I believe Octane render engine seems to be a faster response option for me. Moreover, with a revised idea, I can work on a better version with comments provided by my tutor in term 03, which I think it can be a much more completed version as my final major project.

With some keywords in my mind, such as:

Abandoned City

Before Dawn

Witching Hour

Neon Light

No Man Land


References

Troy Paiva – Light painting photographer


Noel Kerns – Light painting photographer


Random inspirations from Pinterest


Lighting References – Neon light


Production:
– Scene design
– Object modelling
– Colouring & texturing
– Lighting
– Camera movement design

Post – production:
– Compositing
– Colour grading & matching

Timeline:
Week 1-2 – Modelling in Maya or Cinema4D
Week 3-4 – Colouring and texturing in Cinema4D
Week 5-6 – Lighting and camera movement design in Cinema4D
Week 7-8 – Compositing in Nuke
Week 9-10 – Colour grading & matching in Nuke

Deliverable:
Scene design video
– HD format 1920 x 1080

Duration 5s-10s
25fps
– One shot with steady camera movement horizontally,  aka panning or tracking