Try to imagine what would you do with a lost item, such as a wallet on street? In reality, it is expected that pedestrian will pick it up cautiously with head turning to look around for its owner. However, in my character’s design, adding exaggerating body language to present his personalities, tipping toe to look around, and holding his arms on waist while observing the object, communicate to my audience with his personalities, eg. conscientious and inquisitive, without a word of dialog. Being extreme is a way for me to follow the animation principle (Figure 6b.5) and add excitement in the motion for audience to understand my character.
With adding animation principles as below.
Figure 6b.2 – Version 01 – Pick up motion
Figure 6b.3 – Version 02 – Pick up motion with object followed, character staging and secondary action on his left hand.
Figure 6b.4 – Version03 – Adding exaggeration to show character personality.
This week, it is the classwork for animating two types of weight, hard ball and soft ball in Maya.
Image source from The Animator’s Survival Kit
With The Animator’s Survival Kit, every animators know bouncing ball on floor depends on spacing and timing. However, when it apply on stairs, I have to implement the textbook knowledge into practical situation.
Result
Hence, loads of eyeballing adjustments of work in this classwork, which I can hardly descript in written English. I observed my ball in loop play, and somethings were still not right to my eye. After over and over, finally this result is the most acceptable version as the types of weight can be easily identified between hard ball and soft ball.
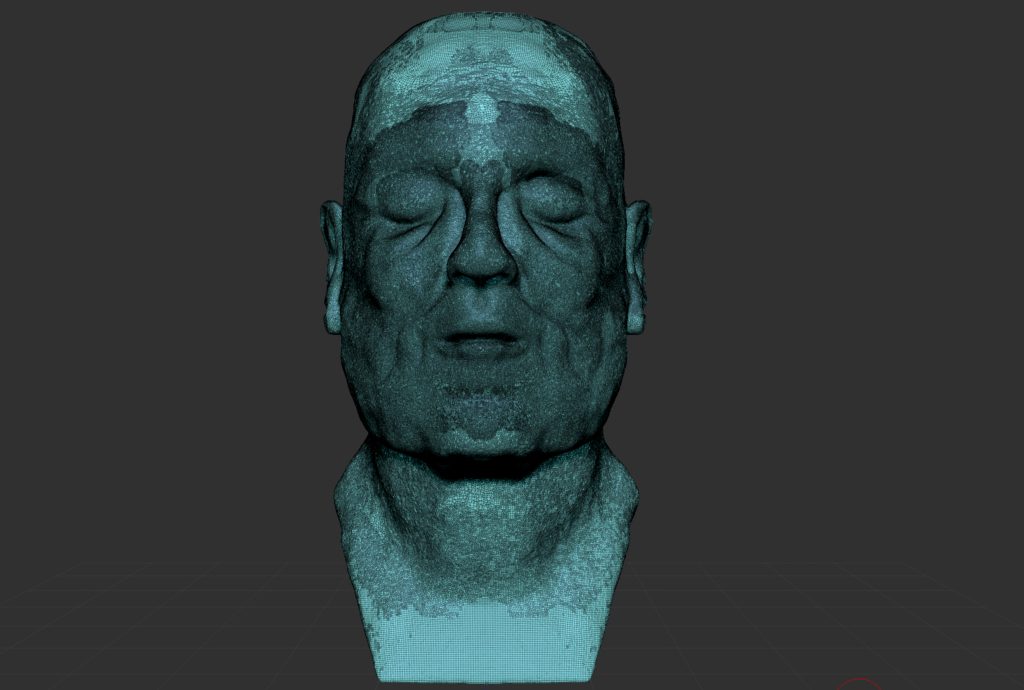
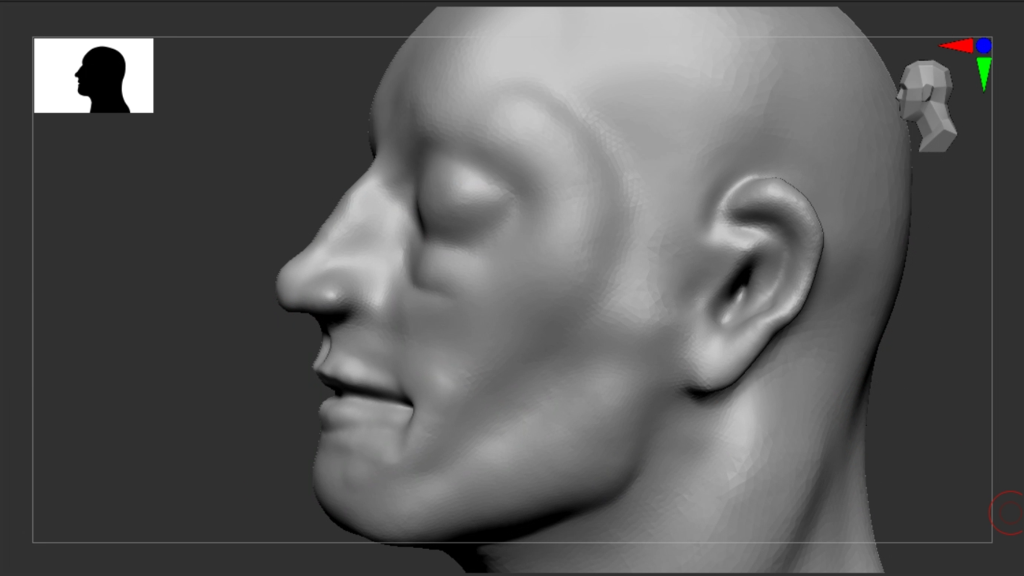
First male head modelling in Zbrush. I think there are too much “fingerprints” on my male model. And I made it look like an elderly, which is not my purpose. Jaw line is not obvious and it is not masculine enough.
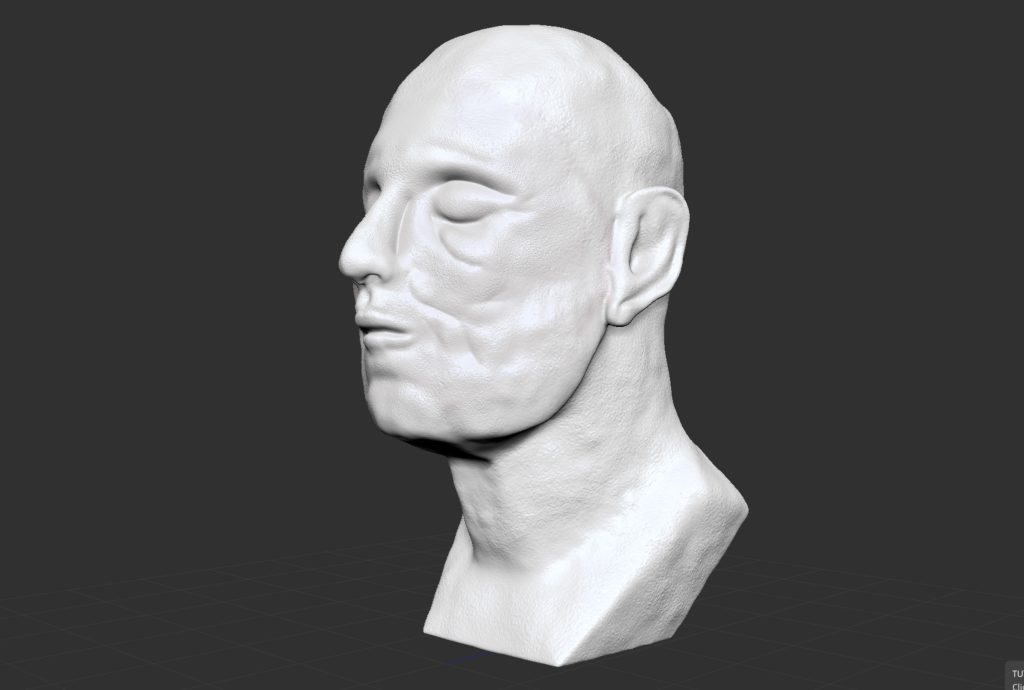
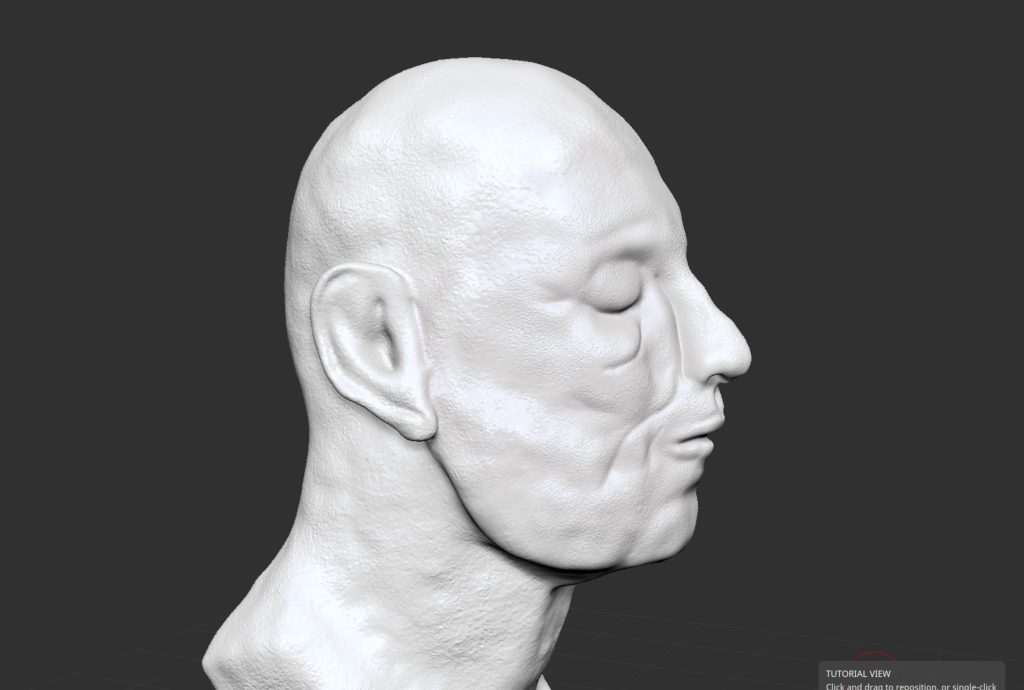
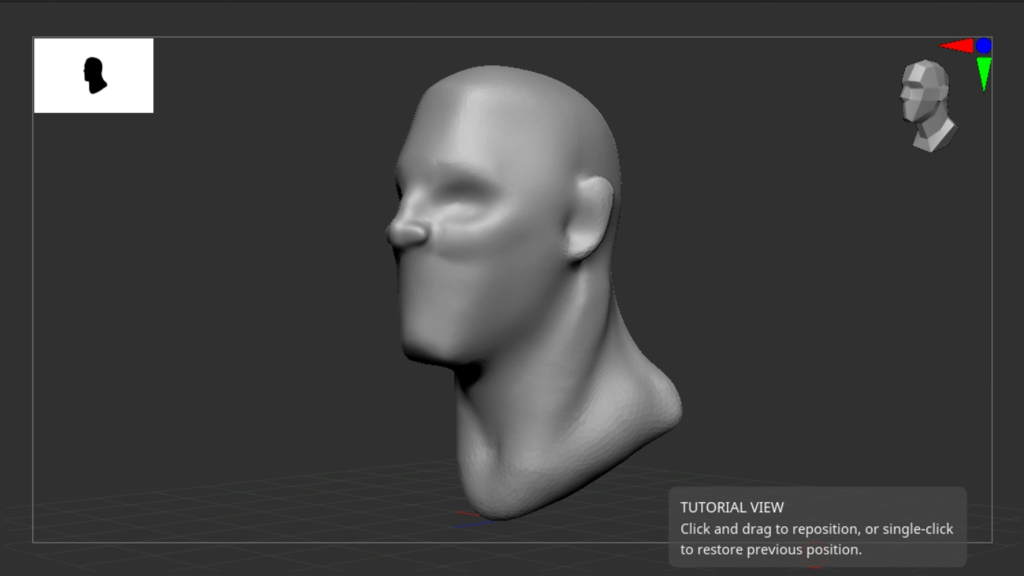
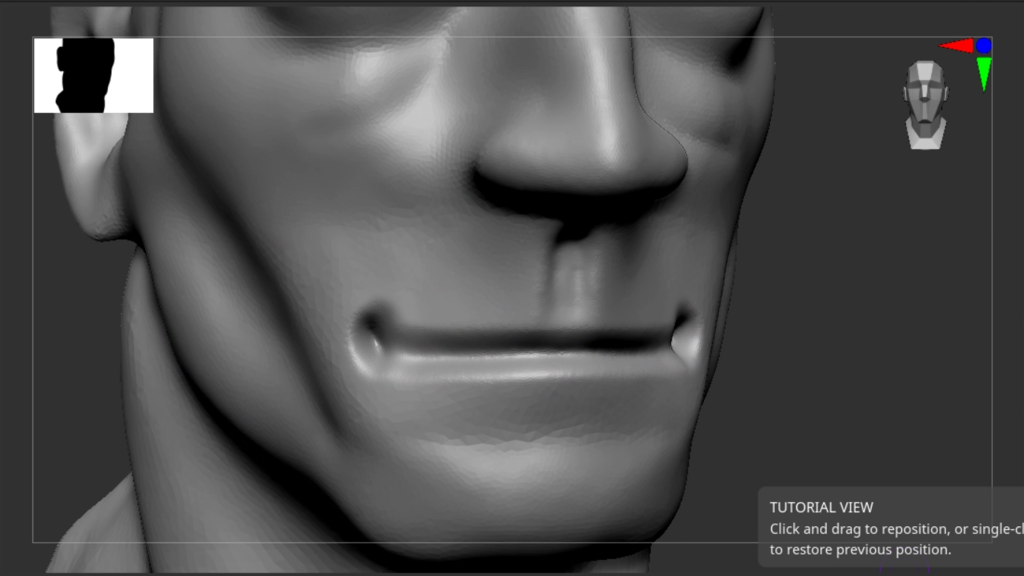
Second male head modelling in Zbrush after reference from Youtube channel SpeedChar : Proportions and shapes of the human head in 1 hour
I think I am satisfied with this result and I am ready for the next step, painting on his face and skin texture.
Maya was the software I had used it around 5 years ago, and I shifted to Cinema4D for a while, as I thought the Maya default render engine didn’t perform well even if I put so much efforts in it. However, after all these years, with Arnold renderer, I am quite surprise with its rapid respond and excellent performance. Despite Maya still crashed for tiny things sometimes, I think I feel more confidence to work with Maya again, as Maya is still the major 3D software in VFX industry. I don’t think there is any reason for me to not work hard to overcome it.
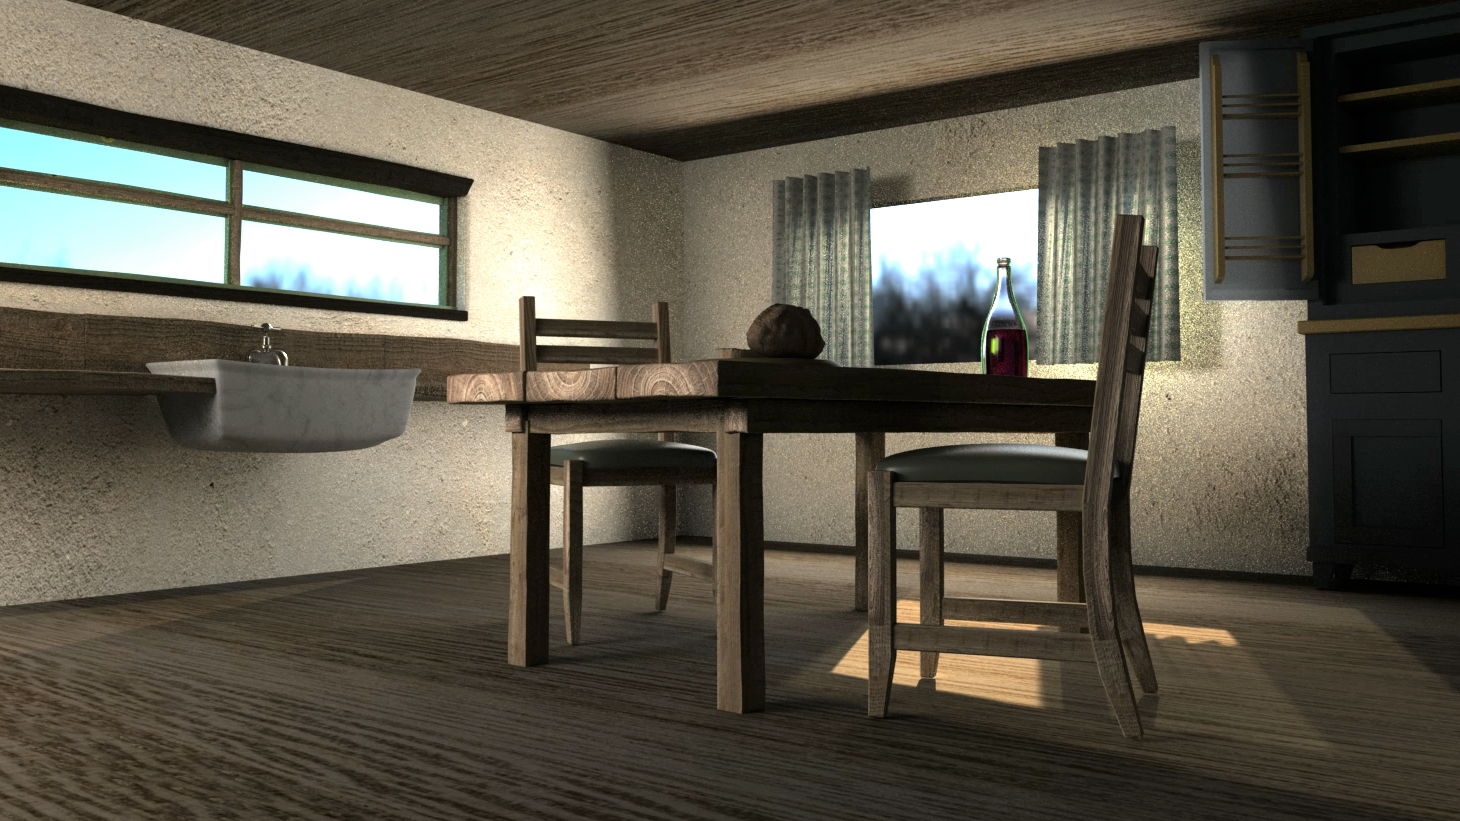
Finally, after weeks, all assets were put into the kitchen scene. What a nice kitchen dinning area for two! I am glad I did it!
Still, for these kitchen scene, I am not satisfied with the texture of cupboard, curtain and fire stove. The wall is too rough as well. Too much exposures around the windows. Loads and loads of things I can keep on complaining. However, within this period of Term 01, I have trained my finger muscle to get use to Maya. Moreover, I’ve kept myself focus in details with aesthetic judgement, which I think it is another endless topics for every artists and designers in this ever-changing industry.
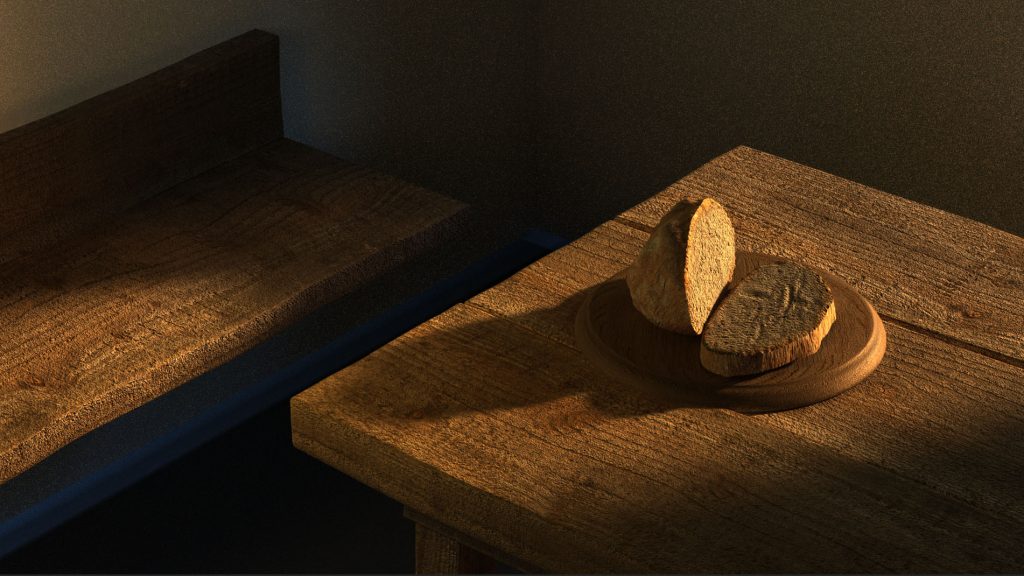
It is a classwork for practising modelling and texture. Also, I learnt how to use maya camera to frame one single frame to output a snapshot.
Result
I think the noise for this scene is way to much, but lighting is quite easy to control. I only used three points lighting for my objects, especially for the glass bottle, the Arnold render is way more qualified than my expectation. Comparing with my experience a few years before, I only used physical render for my output, which is much more time-costuming.
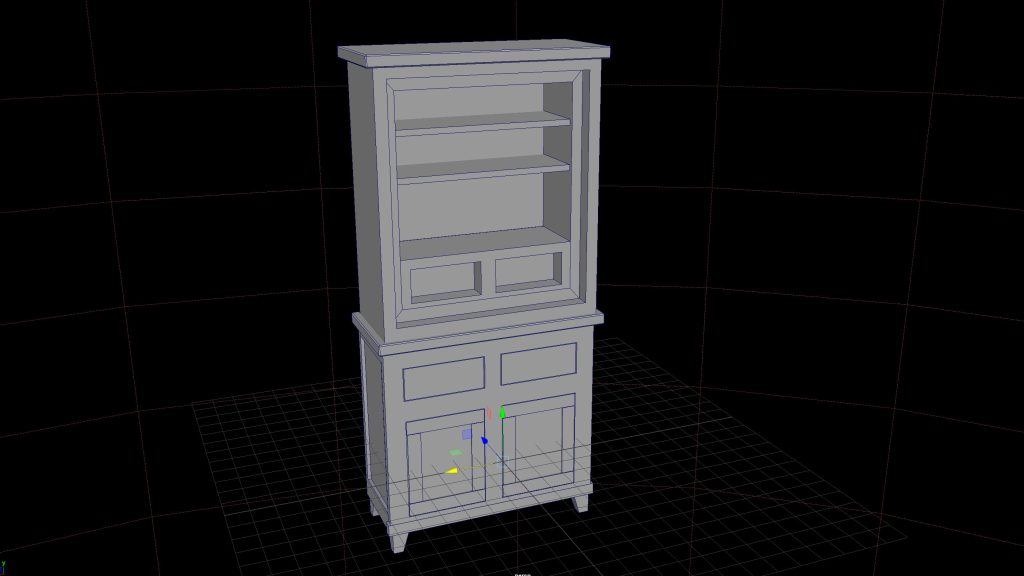
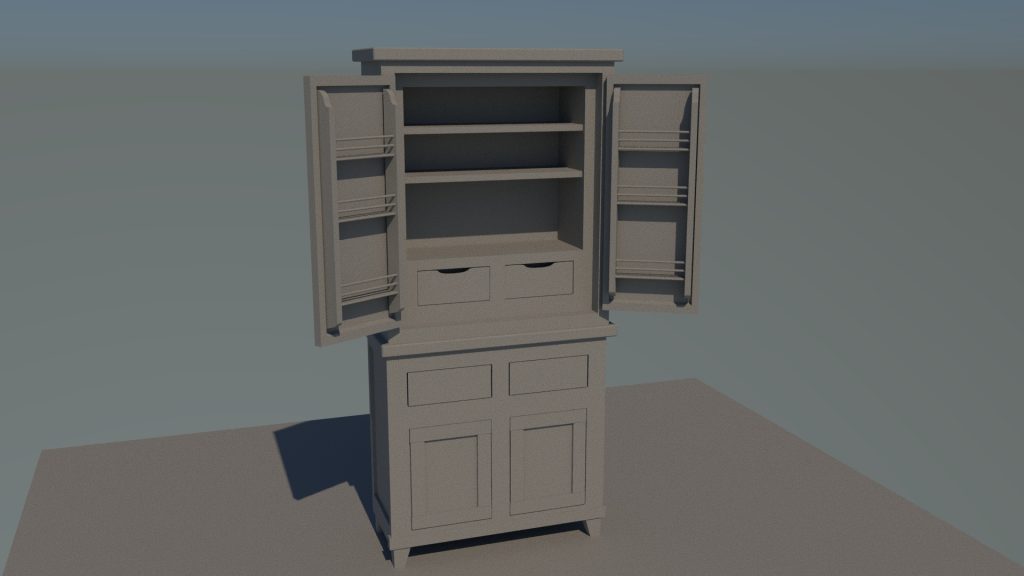
I would like to add this cupboard to my scene, some details have not decided yet. But I think it is a good practise for me to deal with Maya software, as it is not same as Cinema4D, even some concept may be familiar but I need to train my finger muscles to do all the shortcuts correctly.
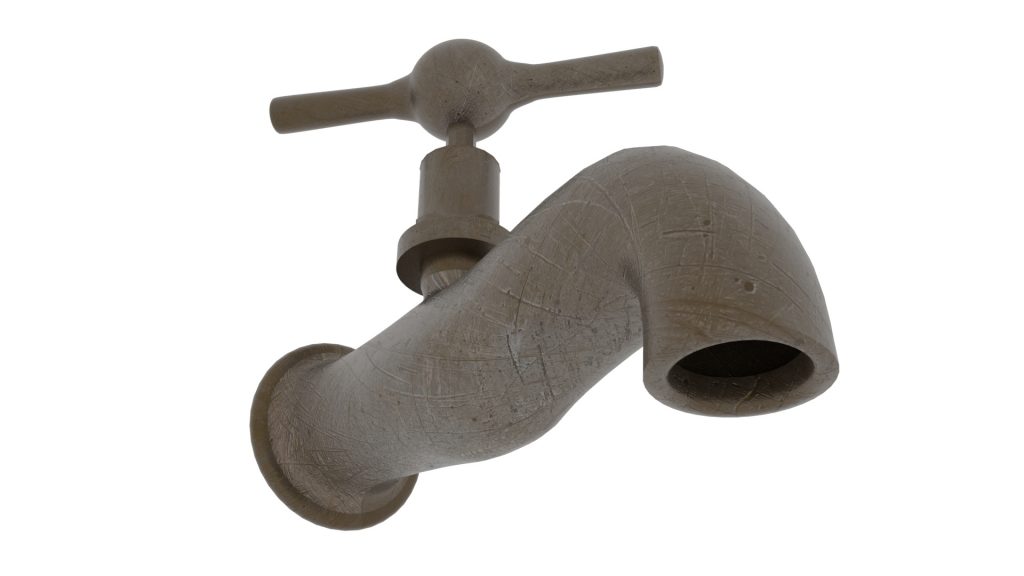
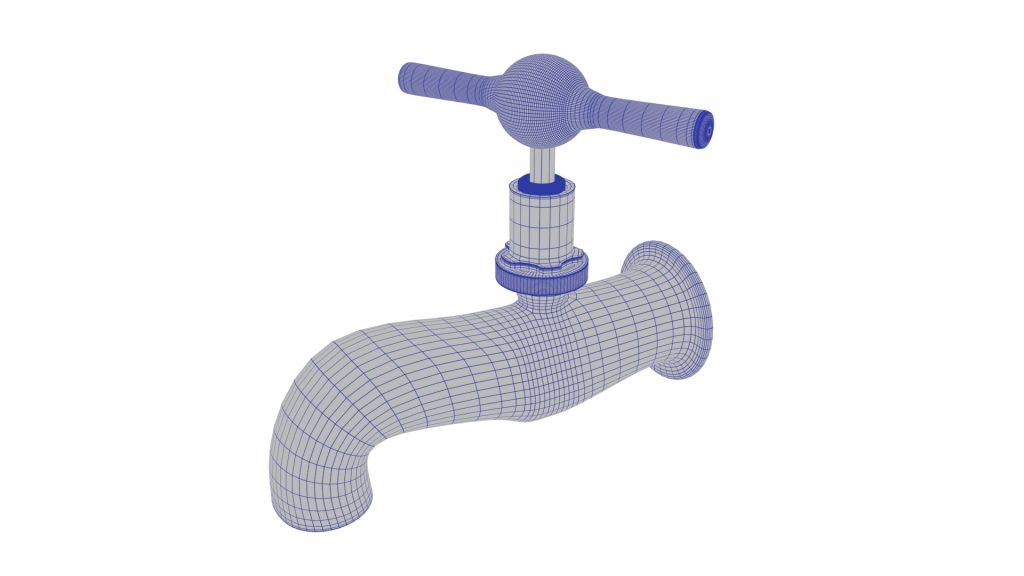
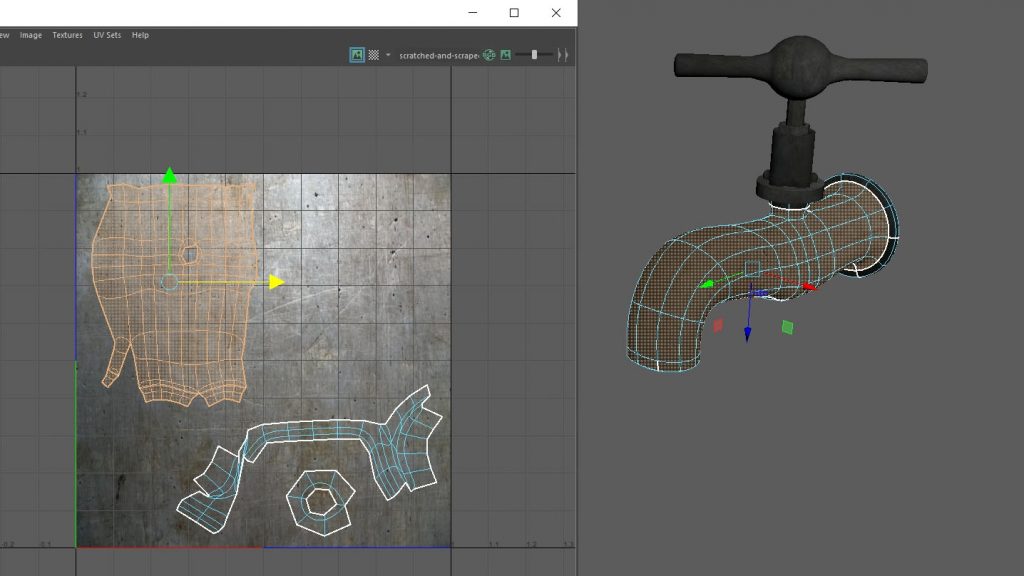
Building a water tap model and adding UV mapping on it
Result
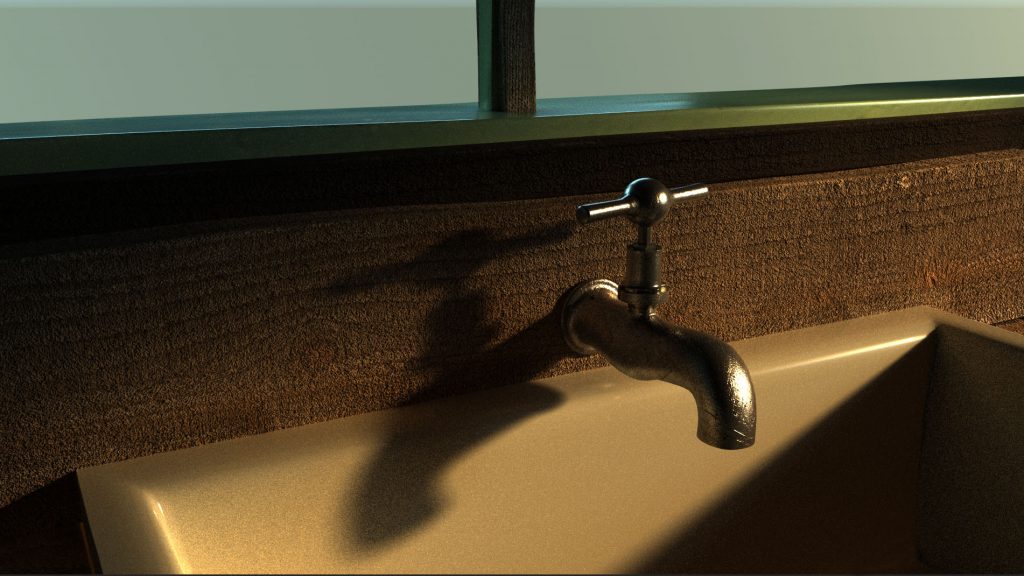
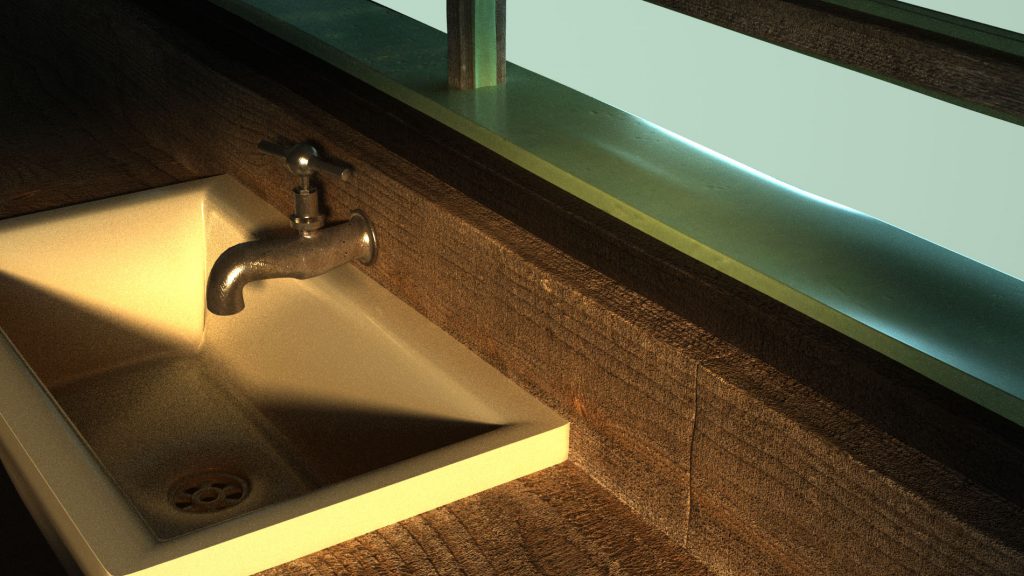
And put it into a scene
Work In Progress
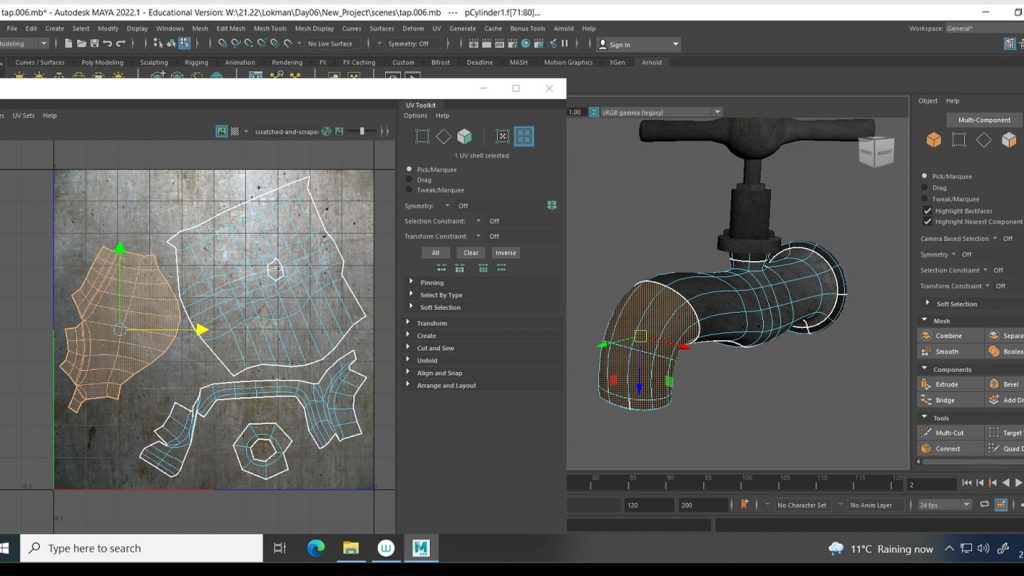
Metal texture from lostandtaken.com
I would like to apply the texture to my model.
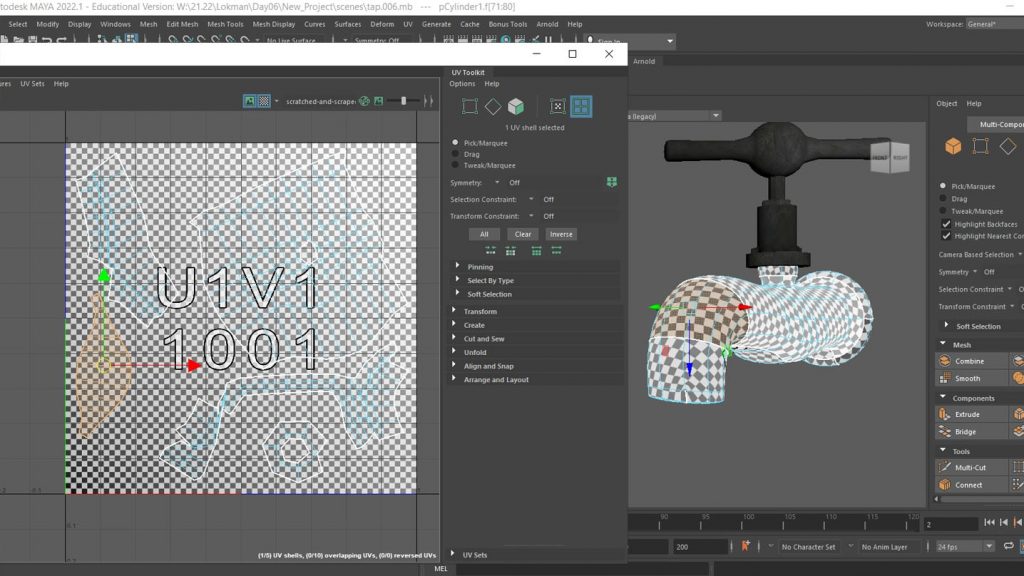
The UV for my tap goes wrong ..
I shouldn’t cut it that way…
After severe hours of the cut and sew surgery … Sometimes, Maya don’t know how to unfold my UV and crashed.
That one is much more better.I fixed my tap !
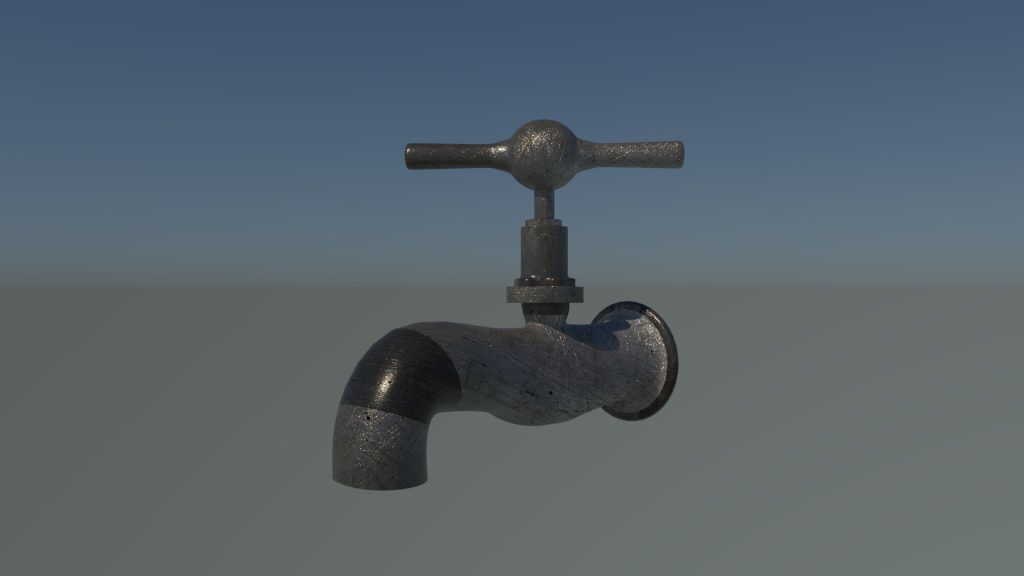
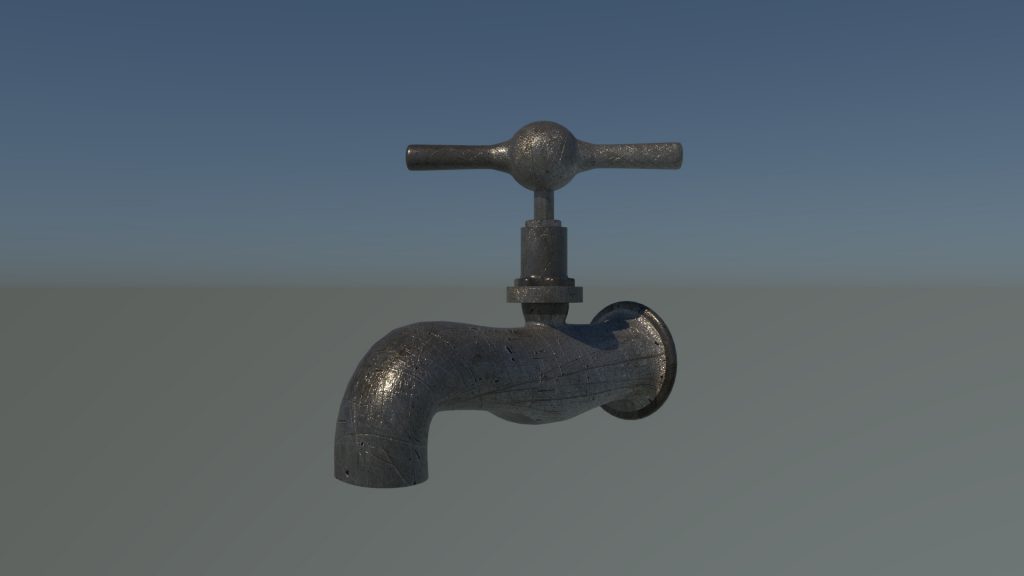
The Result
With bumpmap and color correction
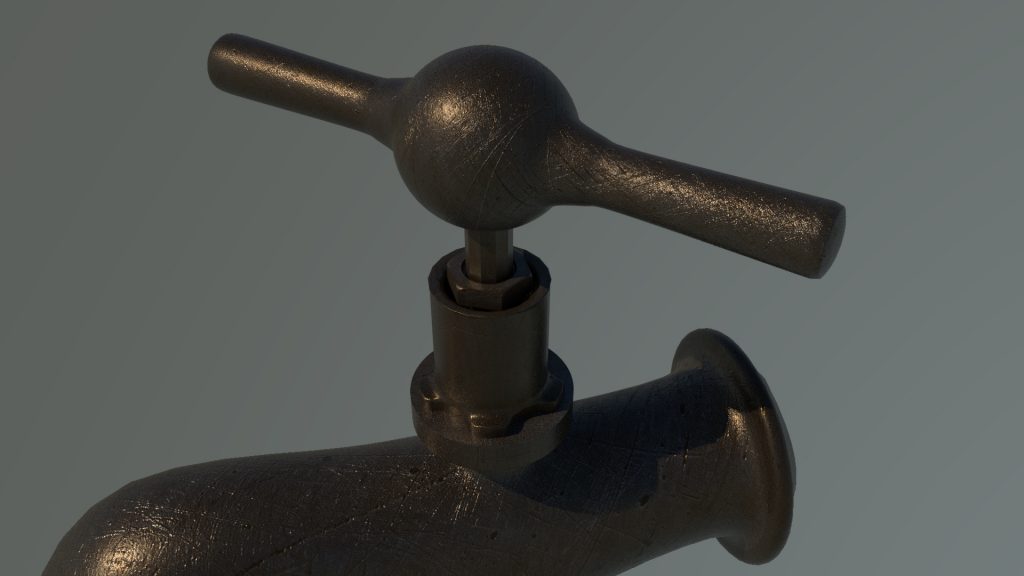
Other color and bumpmap testing
Reflection
I suppose I will not very keen on this topic of UV mapping in my future career, as it gave me such a huge frustration after hours and hours working time. Even I can fix my tap in this assignment, hard to imagine another task for UV again with aims of as distortion-free as possible. As UVs are vital because they provide the link between a surface mesh and how an image texture gets applied onto that surface. They are basically marker points that control which pixels on the texture corresponds to which vertex on the 3D mesh. But still I am gonna say, I hope I can be a specialist in other fields other than UV mapping.
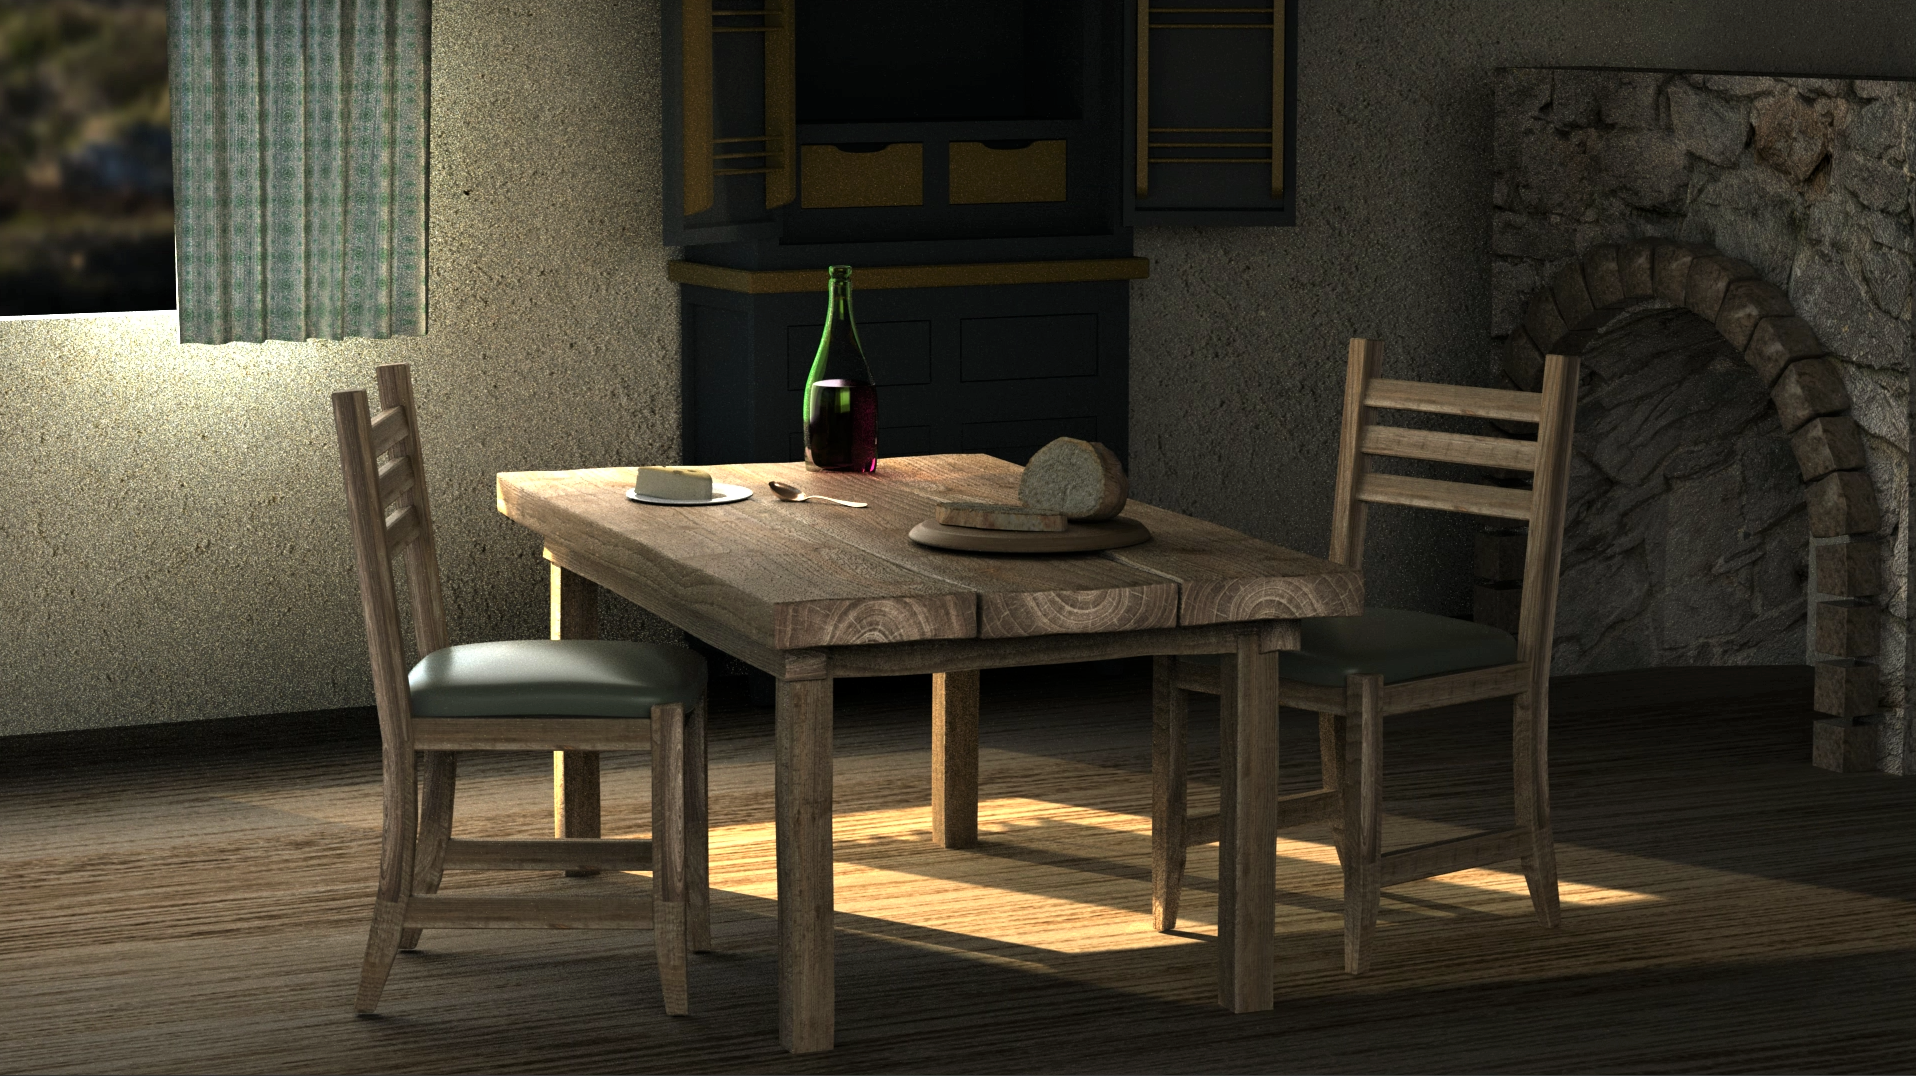
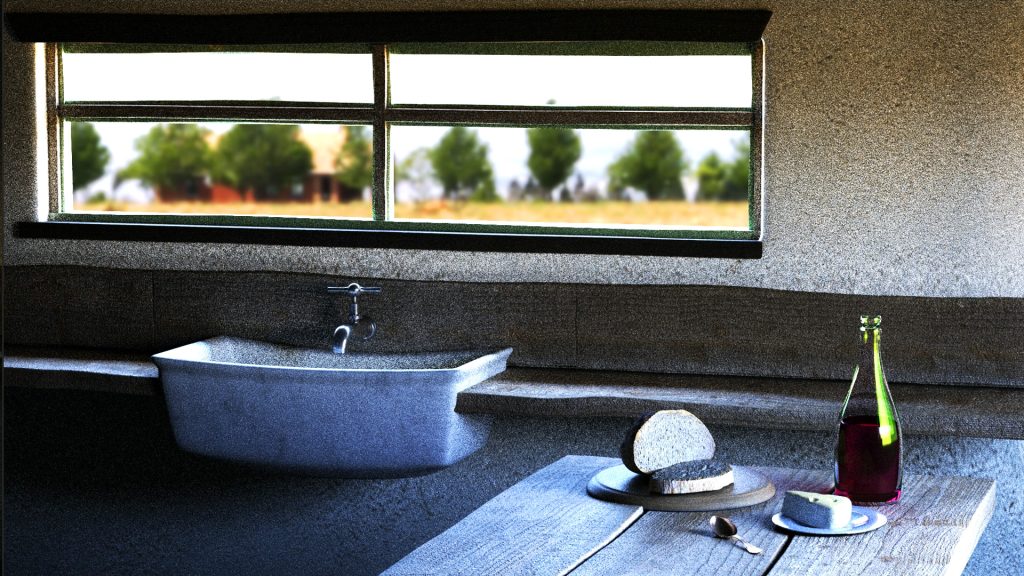
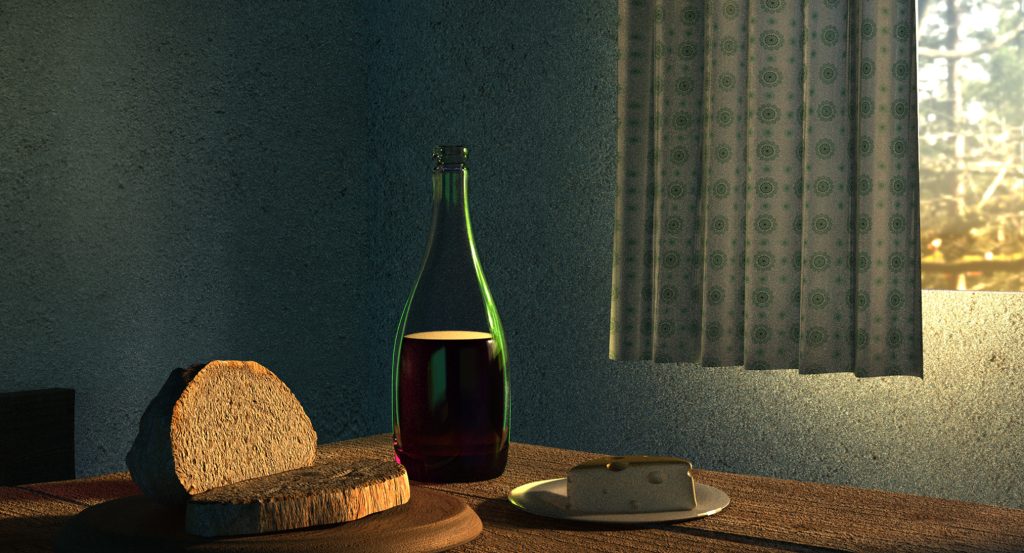
Modelling objects for the dinner table scene, including cheese, bread, plates, wine bottle and window curtain.
Result
Work In Progress
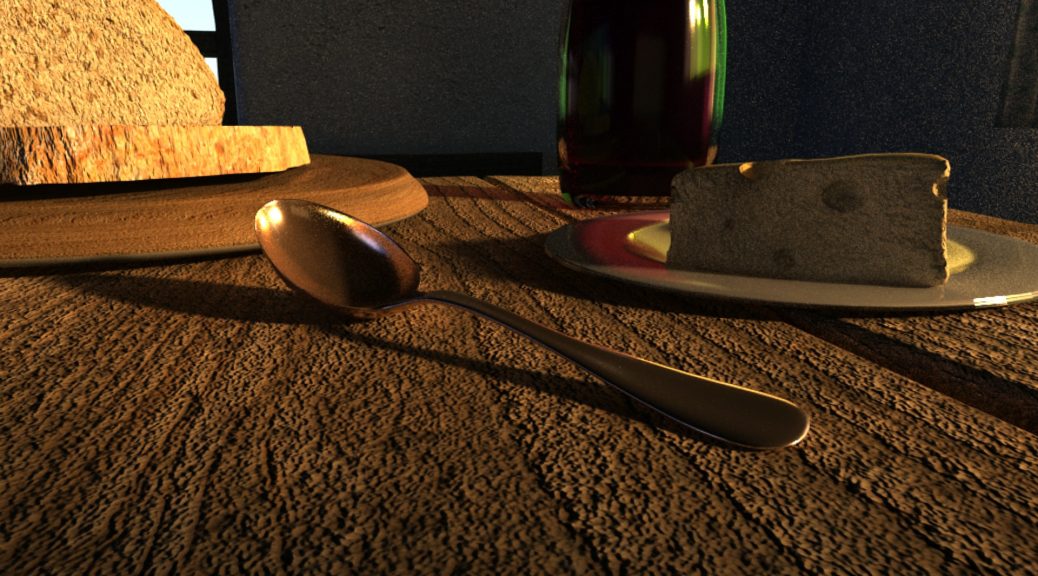
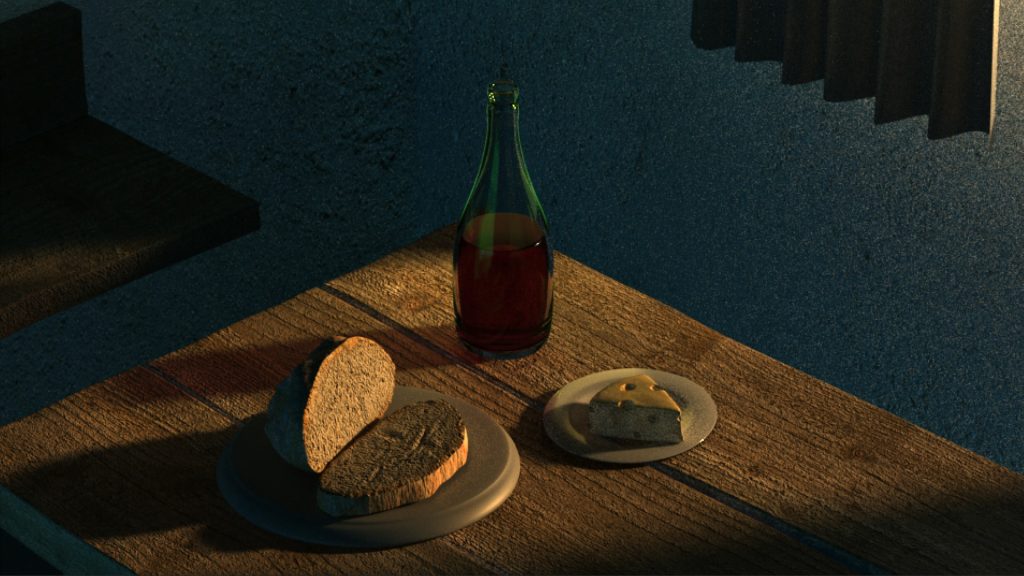
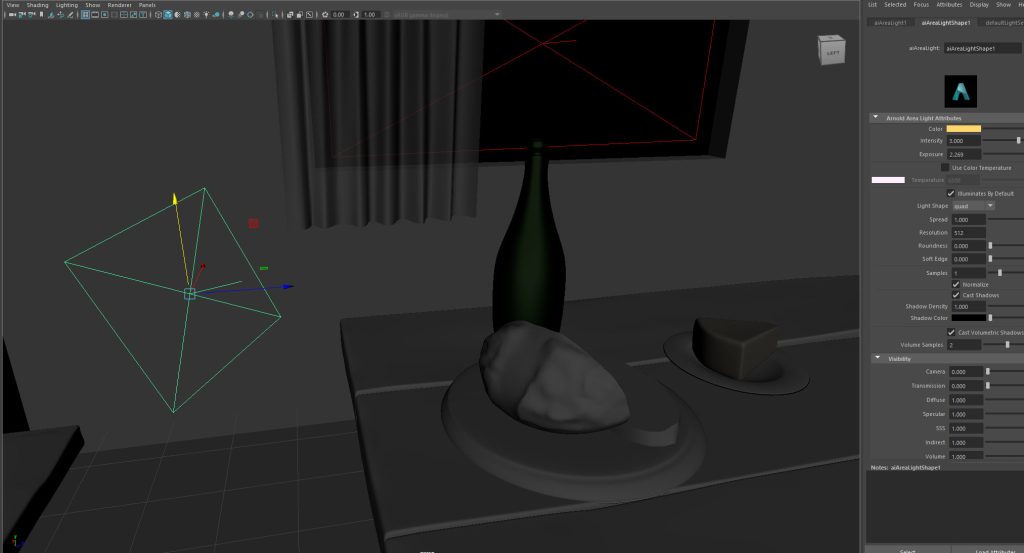
Lighting Design
I need to stand out the bottle from background
Adding back light to it
Different light and texture testing for the objects
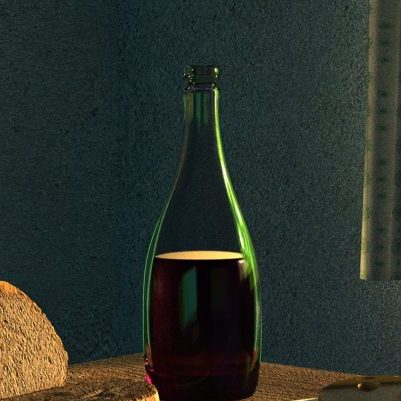
I think this one is much better
Reflection
I enjoy working on glass texture the most, even it takes longer rendering time. The important thing is to make the reflections look natural. And I am quite satisfied with my result , which reflect and refract light around the room, while the purplish wine color can also be able to reflect though the greenish bottle. However, the object of liquid has been scaled down slightly, hence, the gap between the glass and the liquid is quite obvious to cause the rendering does not look realistic. I will definitely put more efforts on this issue later on.
In my second 3DE tutorial, I have to apply the tracking method into a human face.
It is also essential to place the tracker point in most recognisable area.
How to identify good reference points in sight to locate a tracker point : 1. High in color contrast. 2. Clearly defined edges. 3. Limit the track region within a same depth. 4. The search region should have sufficient distinction from the track region.
Take my tracking point as an example in below (Figure 2.1):
Figure 2.1 – Tracking points in background. Figure 2.2
Especially for trackpoint “02” and “14” (in Figure 2.2), they are high-contrast and obvious stickers of the pole. I also resize the tracker region within the pole area as a long vertical rectangle.
And when all these principles apply to a human face, basically they are the same. With some friendly reminders for myself :
1. The centre trackpoint in the middle of forehead is quite an essential point to determine the rotation of the head.
2. The points for left and right sides on face should be even.
3. Be aware the points which are close to the edge of the face. For example (Figure 2.3), on the right hand side of the main character, trackpoint “17” is a point that lost its way for a few frames.
Figure 2.3 – Tracking points, which I select to optimize my tracking in my 3DE on a human face.Figure 2.4 from Insider.com to show the face trackpoints in Pirates of the Caribbean
Looking at the Pirates of the Caribbean movies as an example (Figure 2.4), the trackpoints on Bill Nighy’s face showing the same technique for animate the facial expression of the character in movie.
Result
Figure 2.4 – The result of the classwork of matchmoving on face track
The rotation movement is not sensitive enough, as there are no sufficient trackpoints on the character right hand side. But so far, I am quite satisfied with the result.
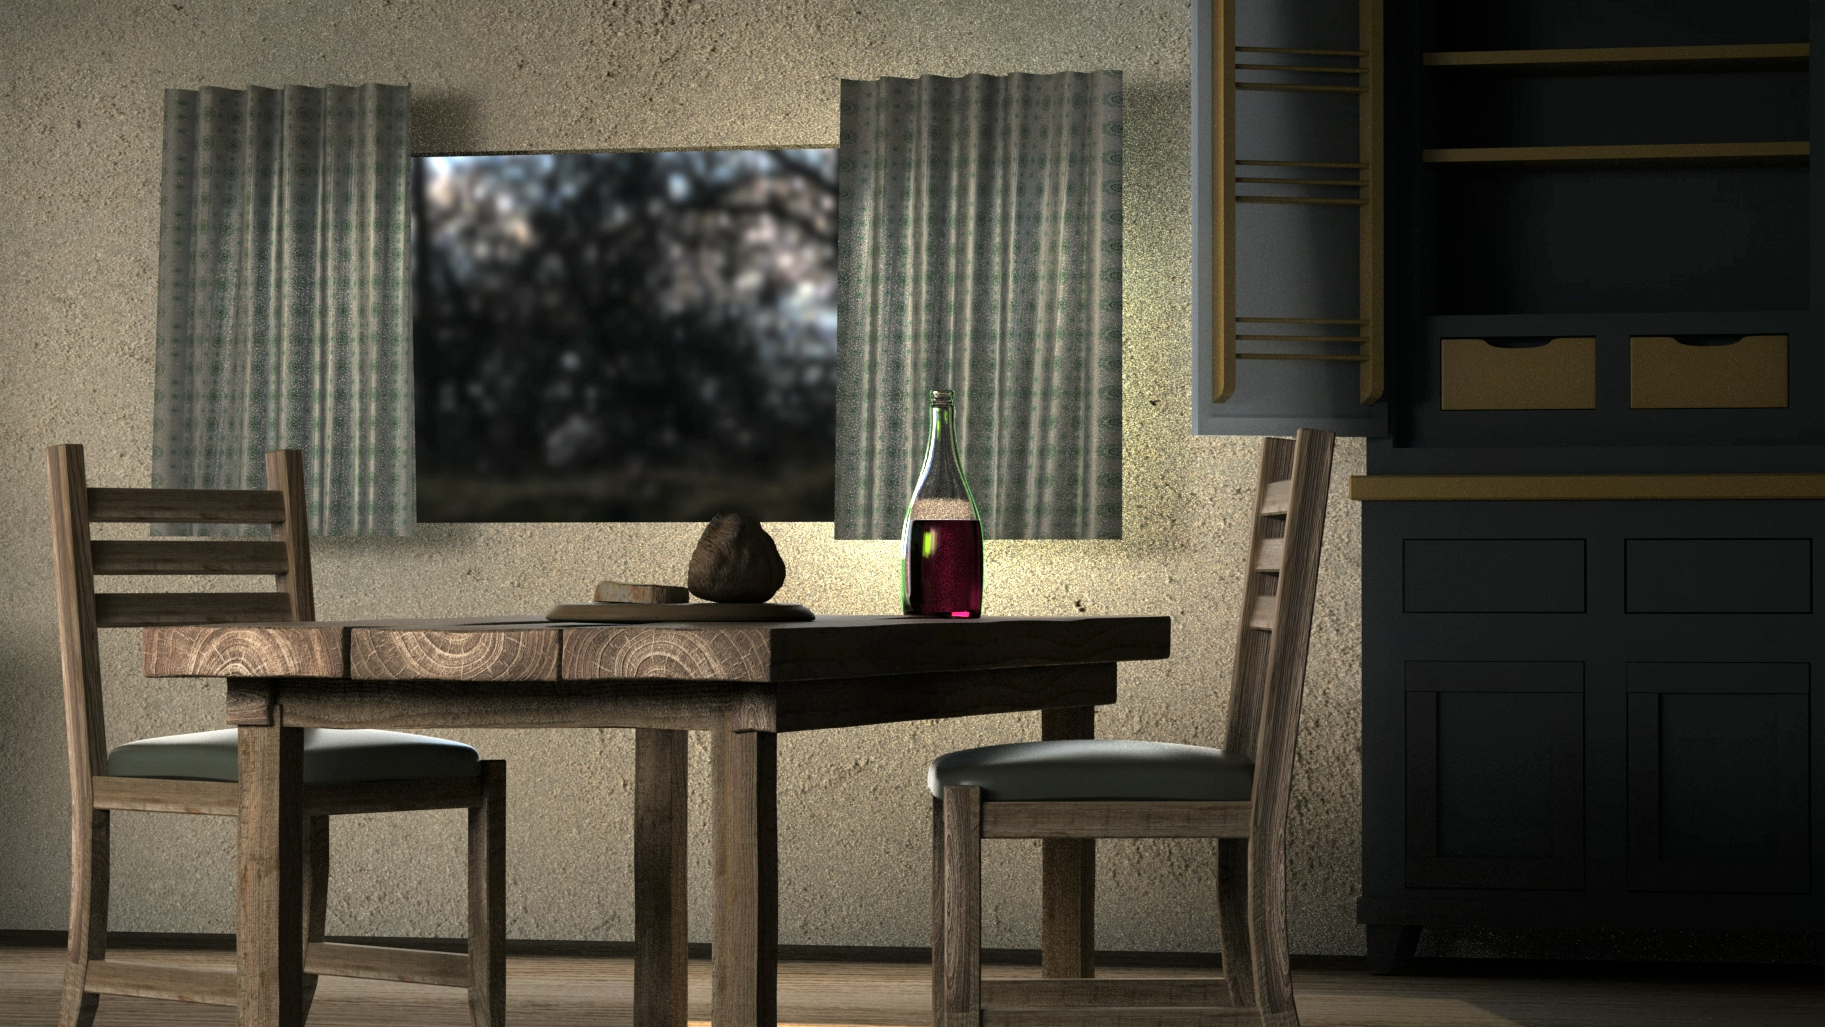
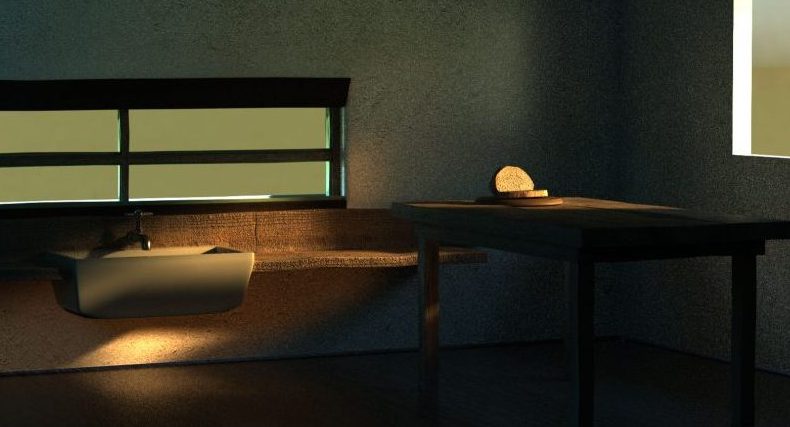
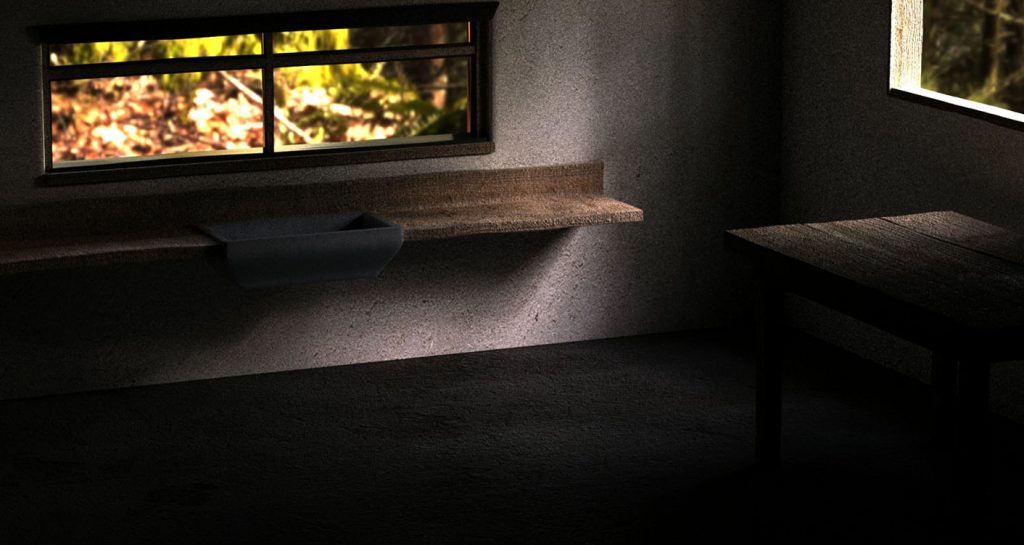
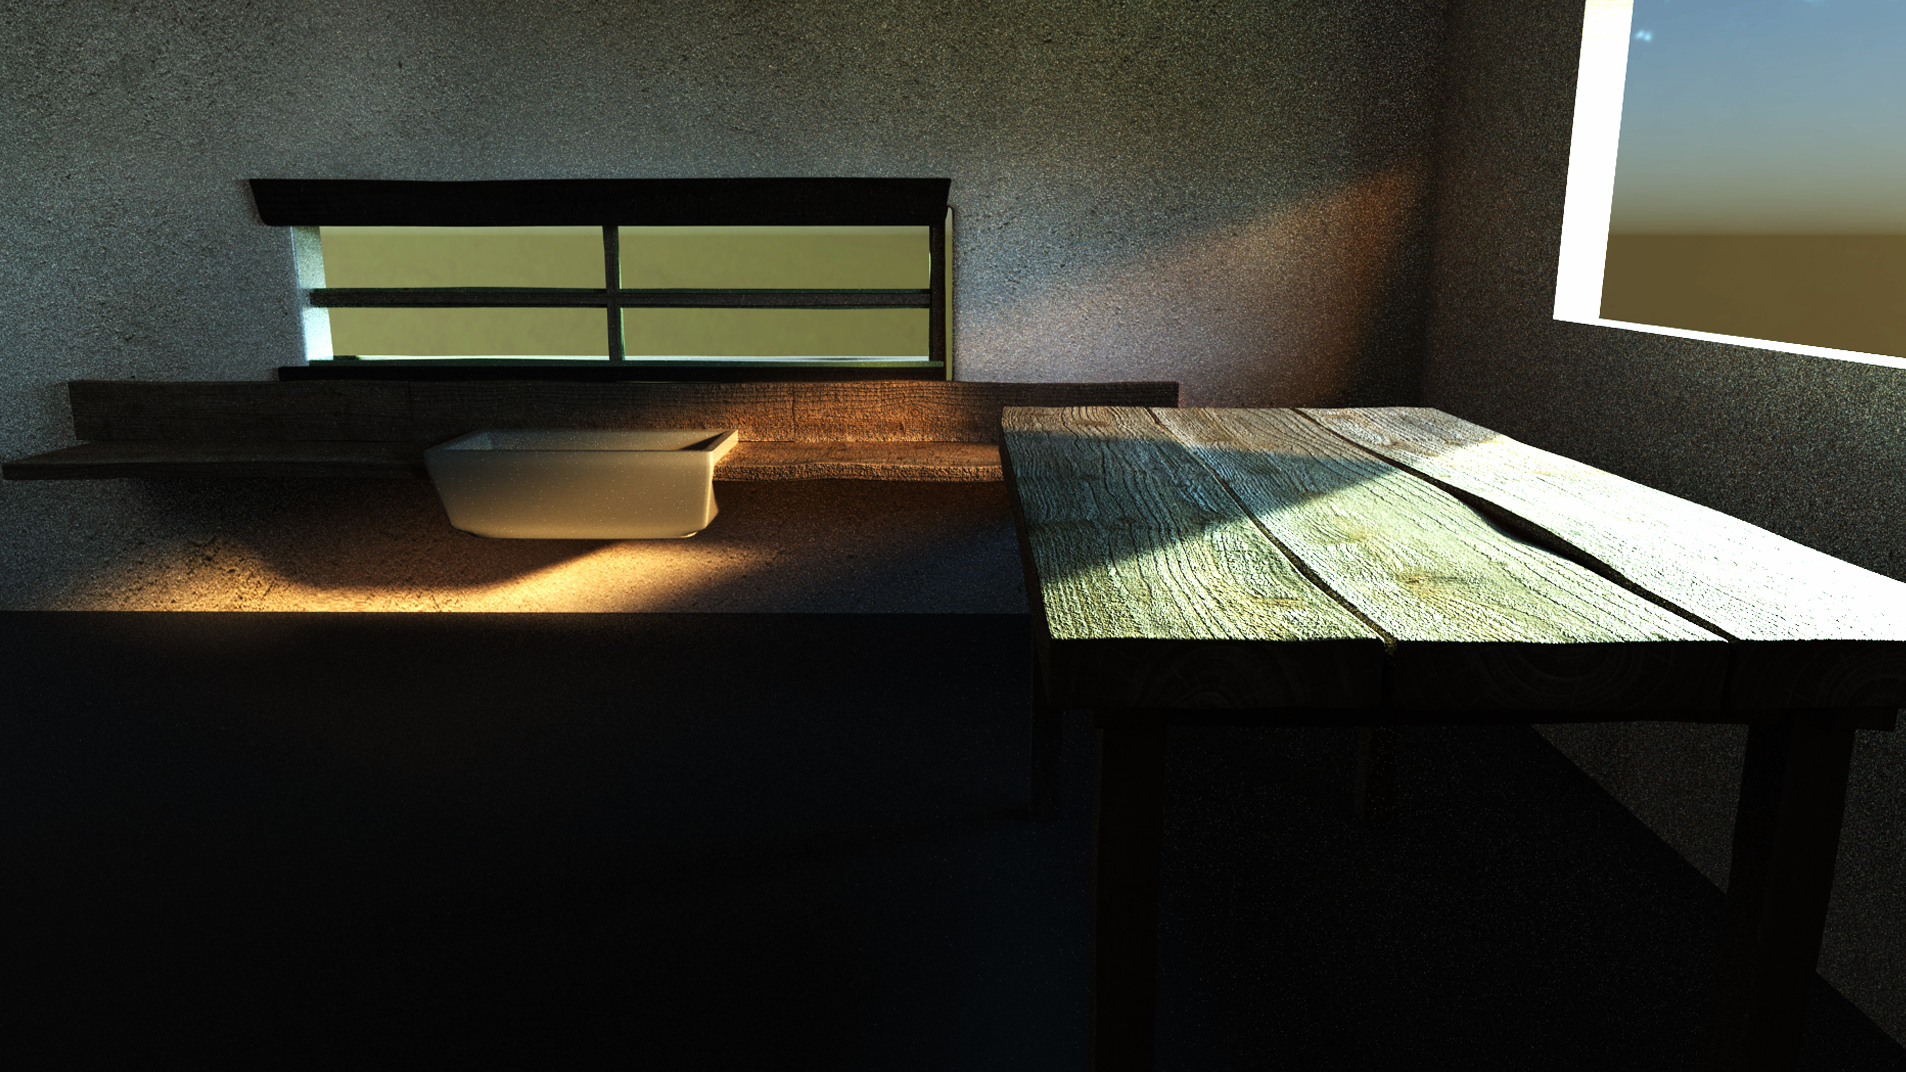
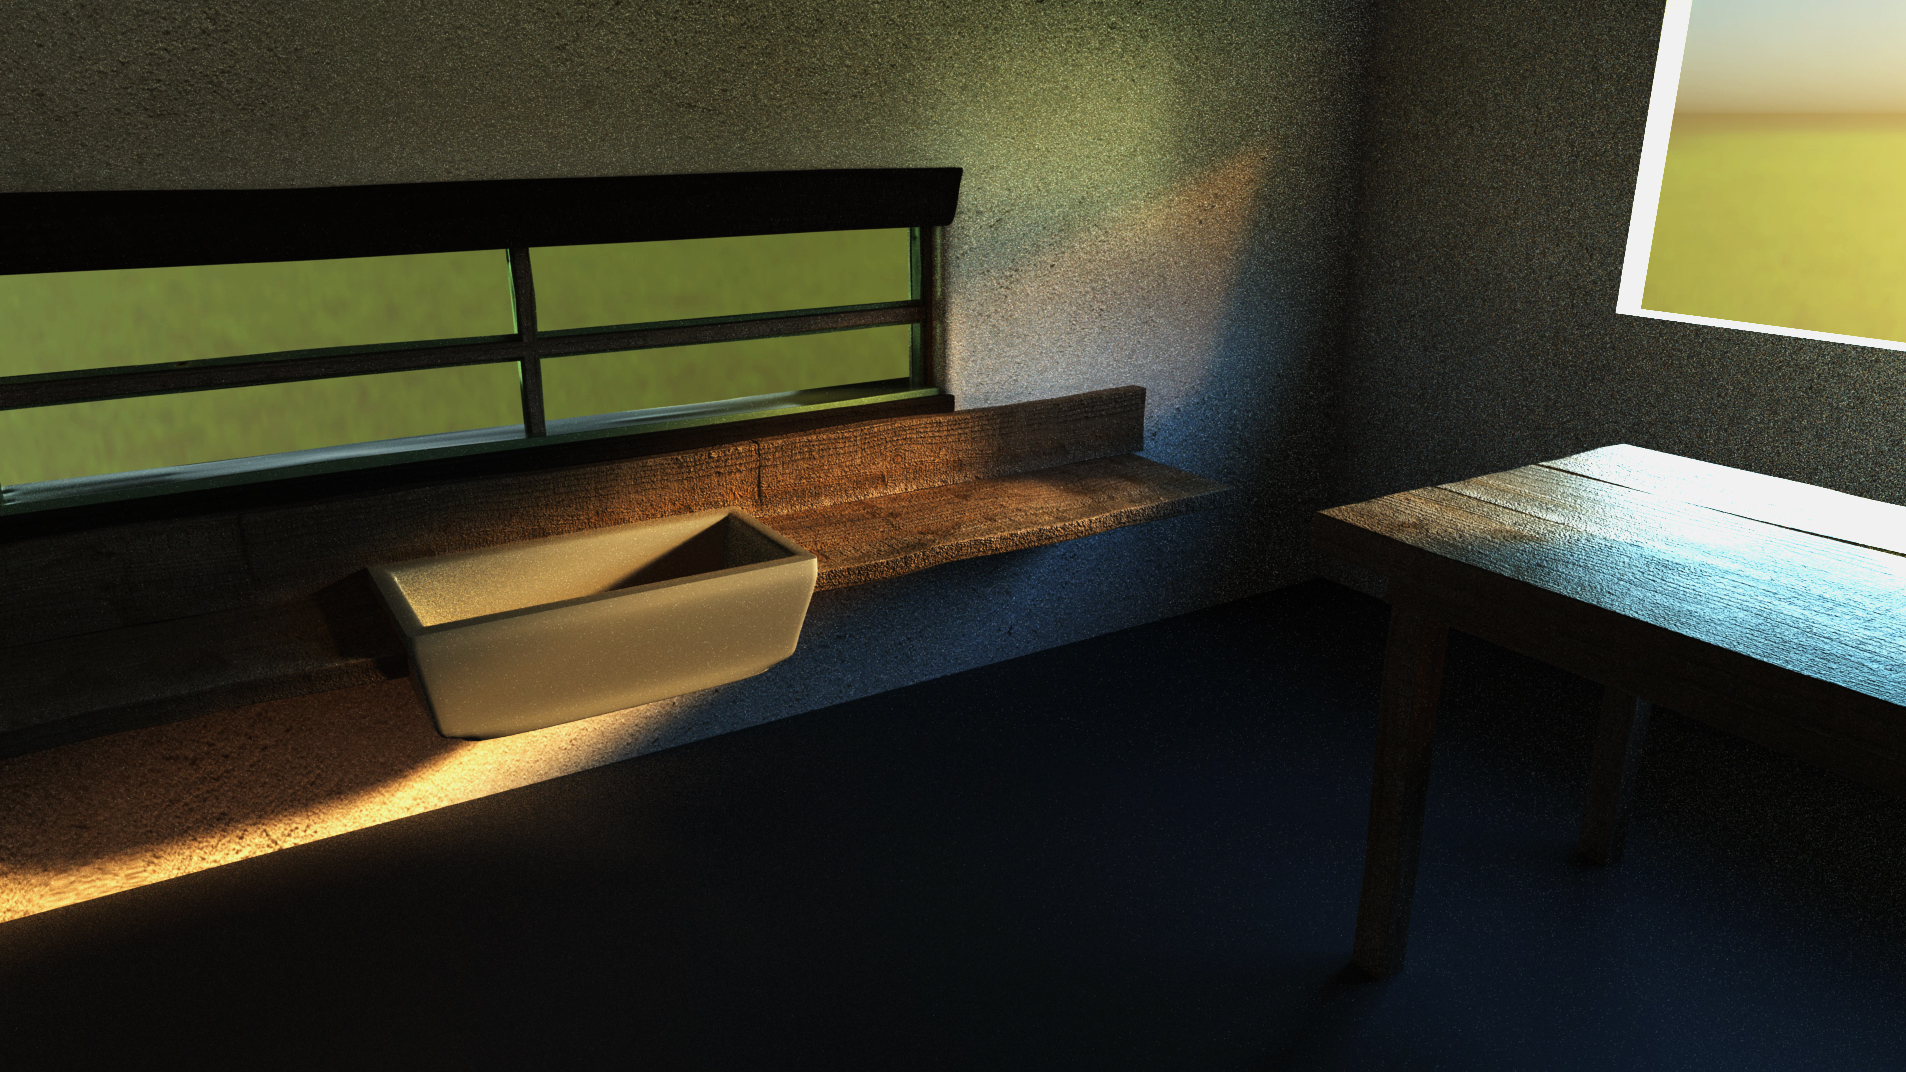
Lighting source from HDRI , a light portal for each window, and fill light for the furniture.
Testing for different lighting angle and HDRI :
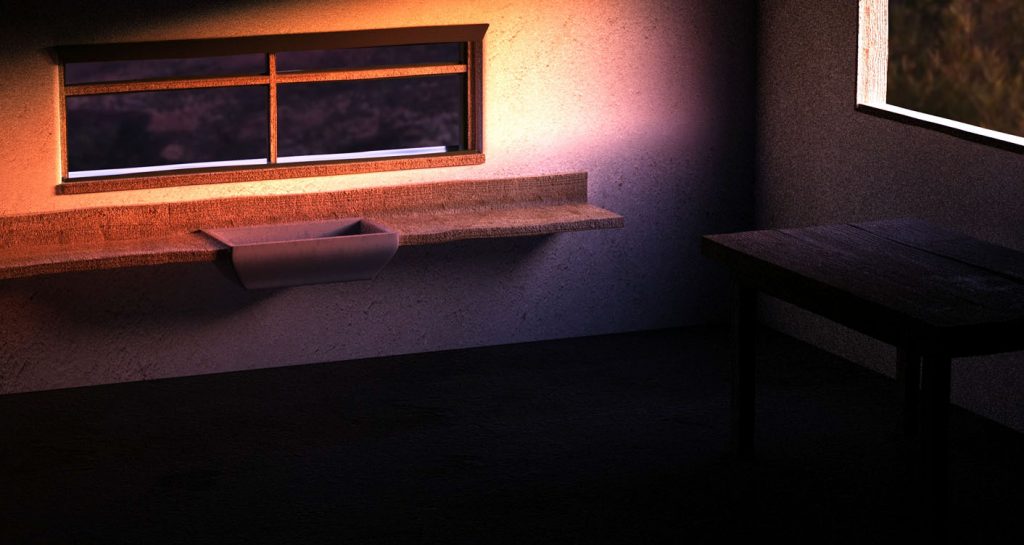
Night sunset scene
Morning forest scene
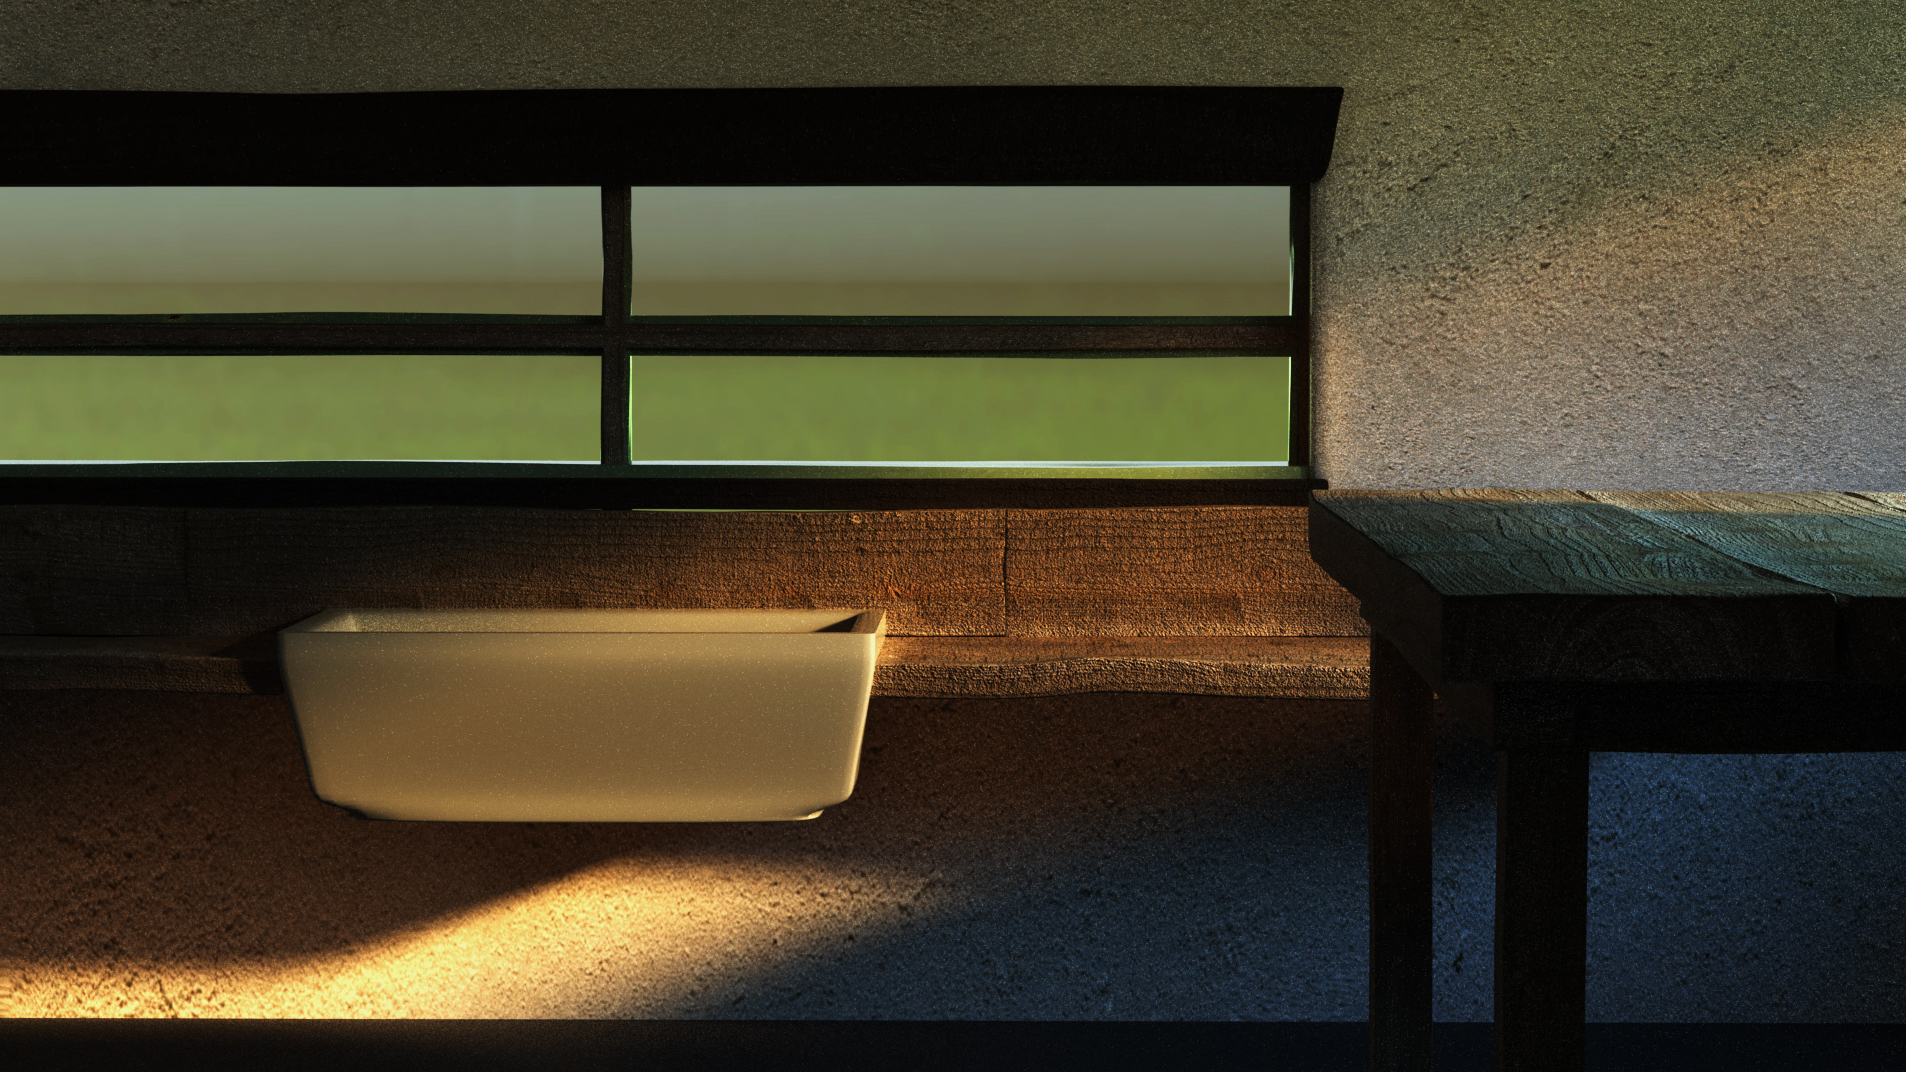
Warm sunset – front
Warm sunset – Side
I quite enjoy working on the light shape on the wall, but for other areas are either overexposure or underexposure ,which are not easy to adjust with the same lighting setting. Maybe I will need other lighting source for them. Also, the lighting shape is still softer than I expected, as it comes from the HDRI, that I still want to look for a harder lighting one. My tutor suggested that I can adjust the lighting with separating passes in Nuke later, which I will learn it in next term. So, let me shift my focus on other aspects in Maya at this moment.
My first tutorial of learning how to use 3D Equalizer to do matchmoving, and here are the things that I should always bear in mind:
Adjust the gamma and contrast in image control setting, which is non-destructive to the footage, to find the most recognisable area for the tracker points.
Avoid water surface and glass reflections.
Place tracker points evenly from inward to outward. All the x&y axis and z-depth should be covered. ( as image belowed)
A capscreen from 3DE tutorial on class.
From this tutorial, I have experienced what a matchmove artist will do in his/her daily job routine.
According to the description on screenskills.com, “Matchmove artists match computer-generated (CG) scenes with shots from live-action footage so the two can be convincingly combined. They recreate live-action backgrounds (plates) on a computer in a way that mirrors the camera on the set in every way, including lens distortion.”
And I have learnt matchmove artist is an entry level job position in the industry, thats why we, as the students, should practise the skill. Perhaps it is one of the positions I would like to work on after my graduation.