All posts by Lok Man Kwan
Subject Researching
Disney Character Design for people of color
Turning Red (2022)
Meilin (voice of Rosalie Chiang) is a confident, dorky 13-year-old torn between staying her mother’s dutiful daughter and the chaos of adolescence. Her protective, if not slightly overbearing mother, Ming (voice of Sandra Oh), is never far from her daughter – an unfortunate reality for the teenager. And as if changes to her interests, relationships and body weren’t enough, whenever she gets too excited (which is practically ALWAYS), she “poofs” into a giant red panda.
By IMDB
Articles related to this topic:
https://www.cbr.com/ways-turning-red-like-encanto-ways-different/
https://www.mic.com/p/why-do-animators-keep-turning-people-of-color-into-animals-65481570
https://www.wired.com/story/turning-red-is-pixars-most-personal-movie-yet/
Comparing to the earlier one of Disney animated film with Asian character, Mulan(1998).
https://www.jstor.org/stable/41819264
https://www.castlescapesandclones.com/post/a-look-at-people-of-color-in-disney-animated-films
My own thought after watching these two movies:
Why are there some similarities in visual element and story setting ?
Why Disney presents Asian in these ways?
Is there a Disney “formula” to tell a Asian story?
Is it a stereotype or is it a generally acceptable by Asian?
Why is there only “one-single type” of Chinese, Disney is trying to depict?
– Term02 Showreel –
Term 02 Showreel
Wk11 ultimate final Version
Result

Part01 Part02 Part03 Full script
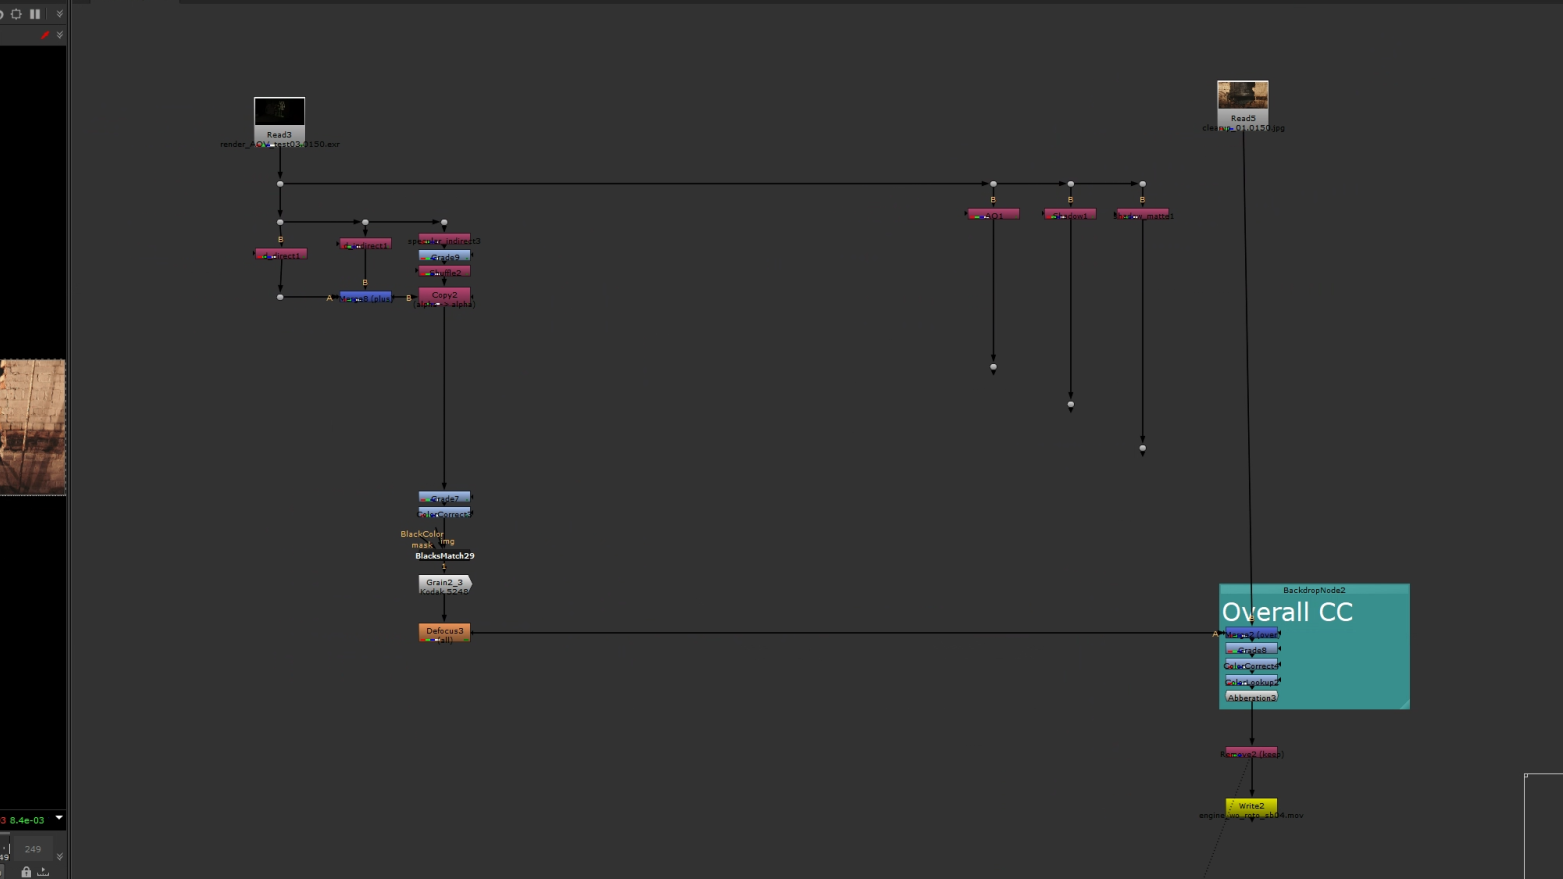
Finally, I completed my crypt project. It took me one more working day than my expectation to finish it. And I still need extra time to document my blog.
I didn’t add Lightwarp in my script as I think the lighting direction is not coming from the background of the crypt. It might be not helpful in this case.
WK10 Semi- Final Version
I can’t manage my time to complete a fully final version on the submission day (3pm 17/3/2022), but I will definitely plan 1-2 more working days on it. (This blog will still be updating on 18th, 19th 20th Mar)
So here is the semi-final version for submission. As you can see, the roto is still missing and some color matching adjustment is needed.
There is still a load of parts I havn’t complete yet.
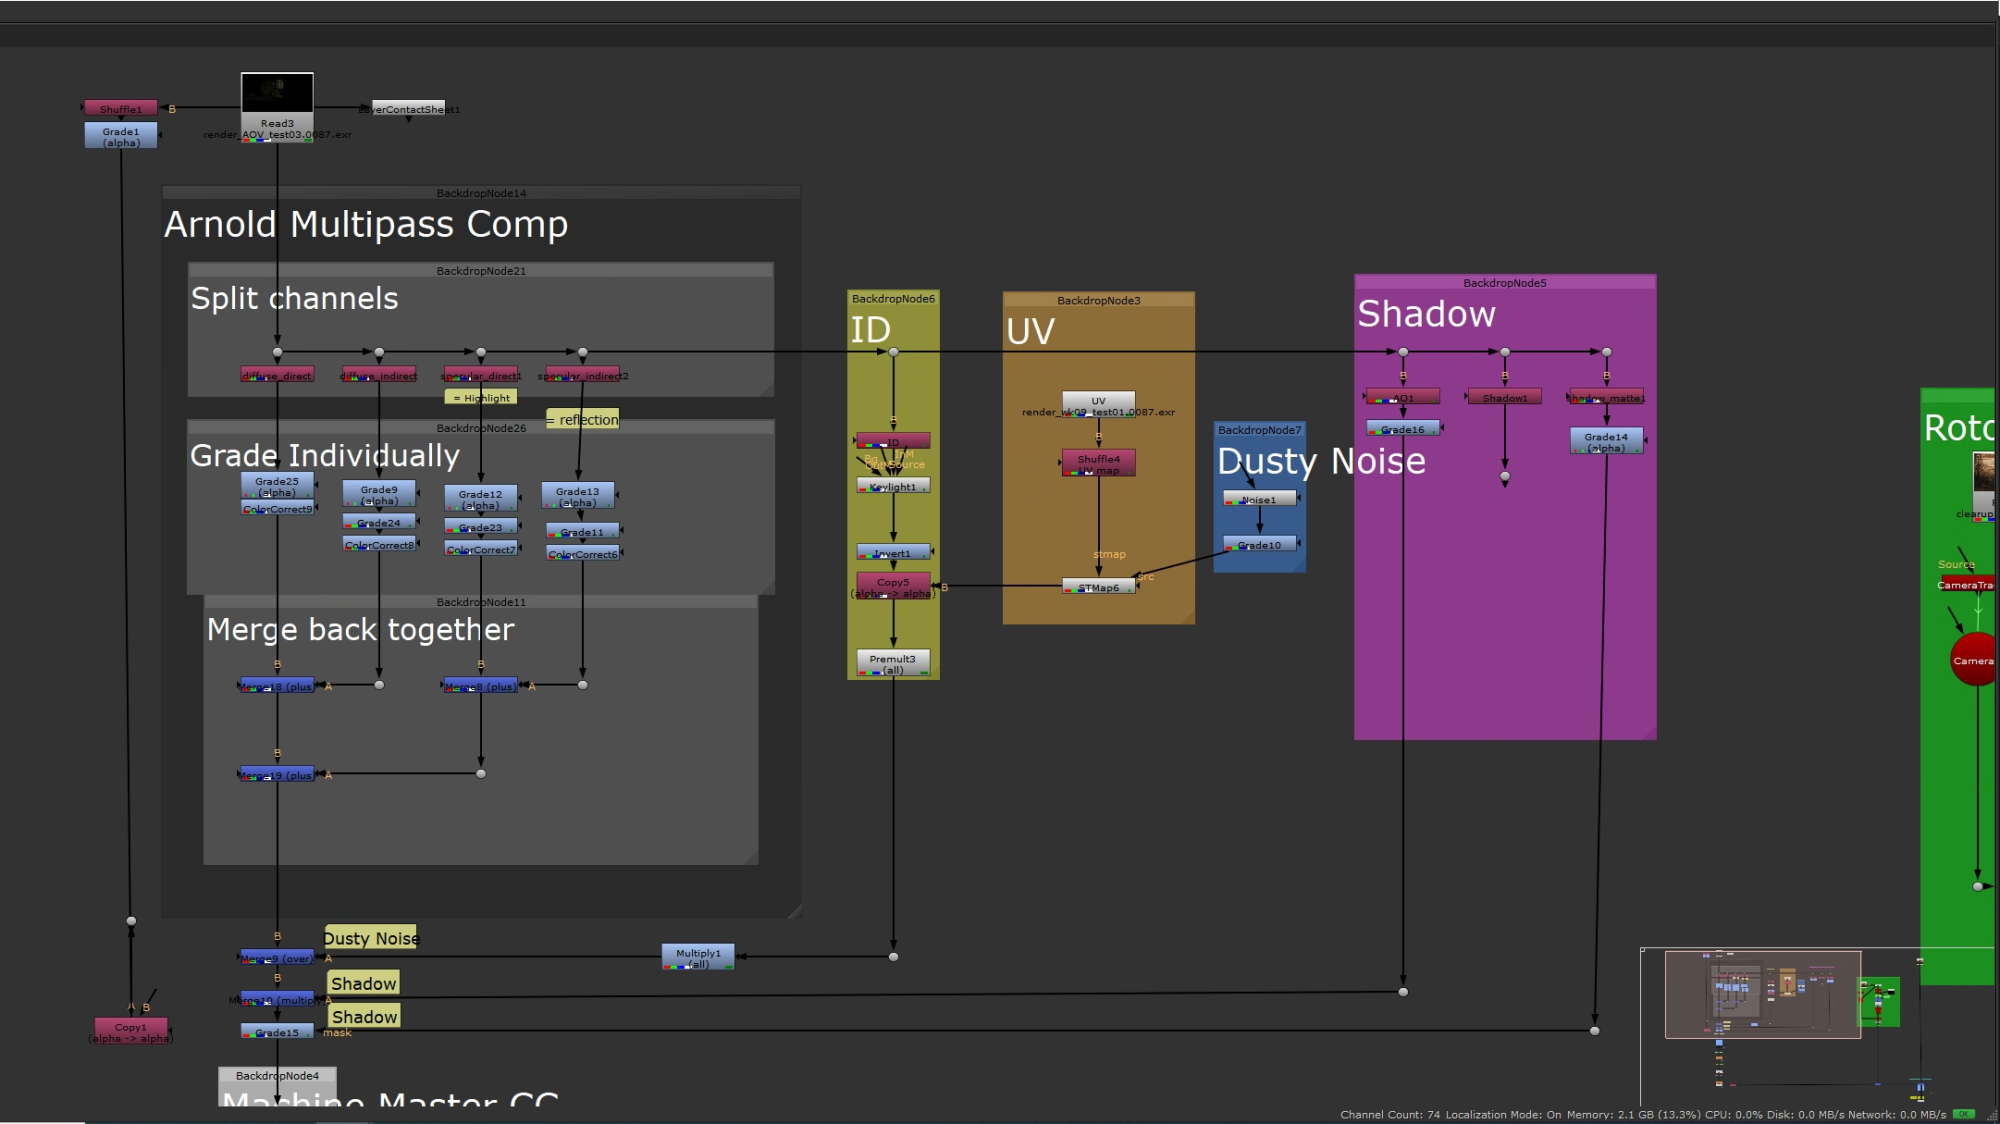
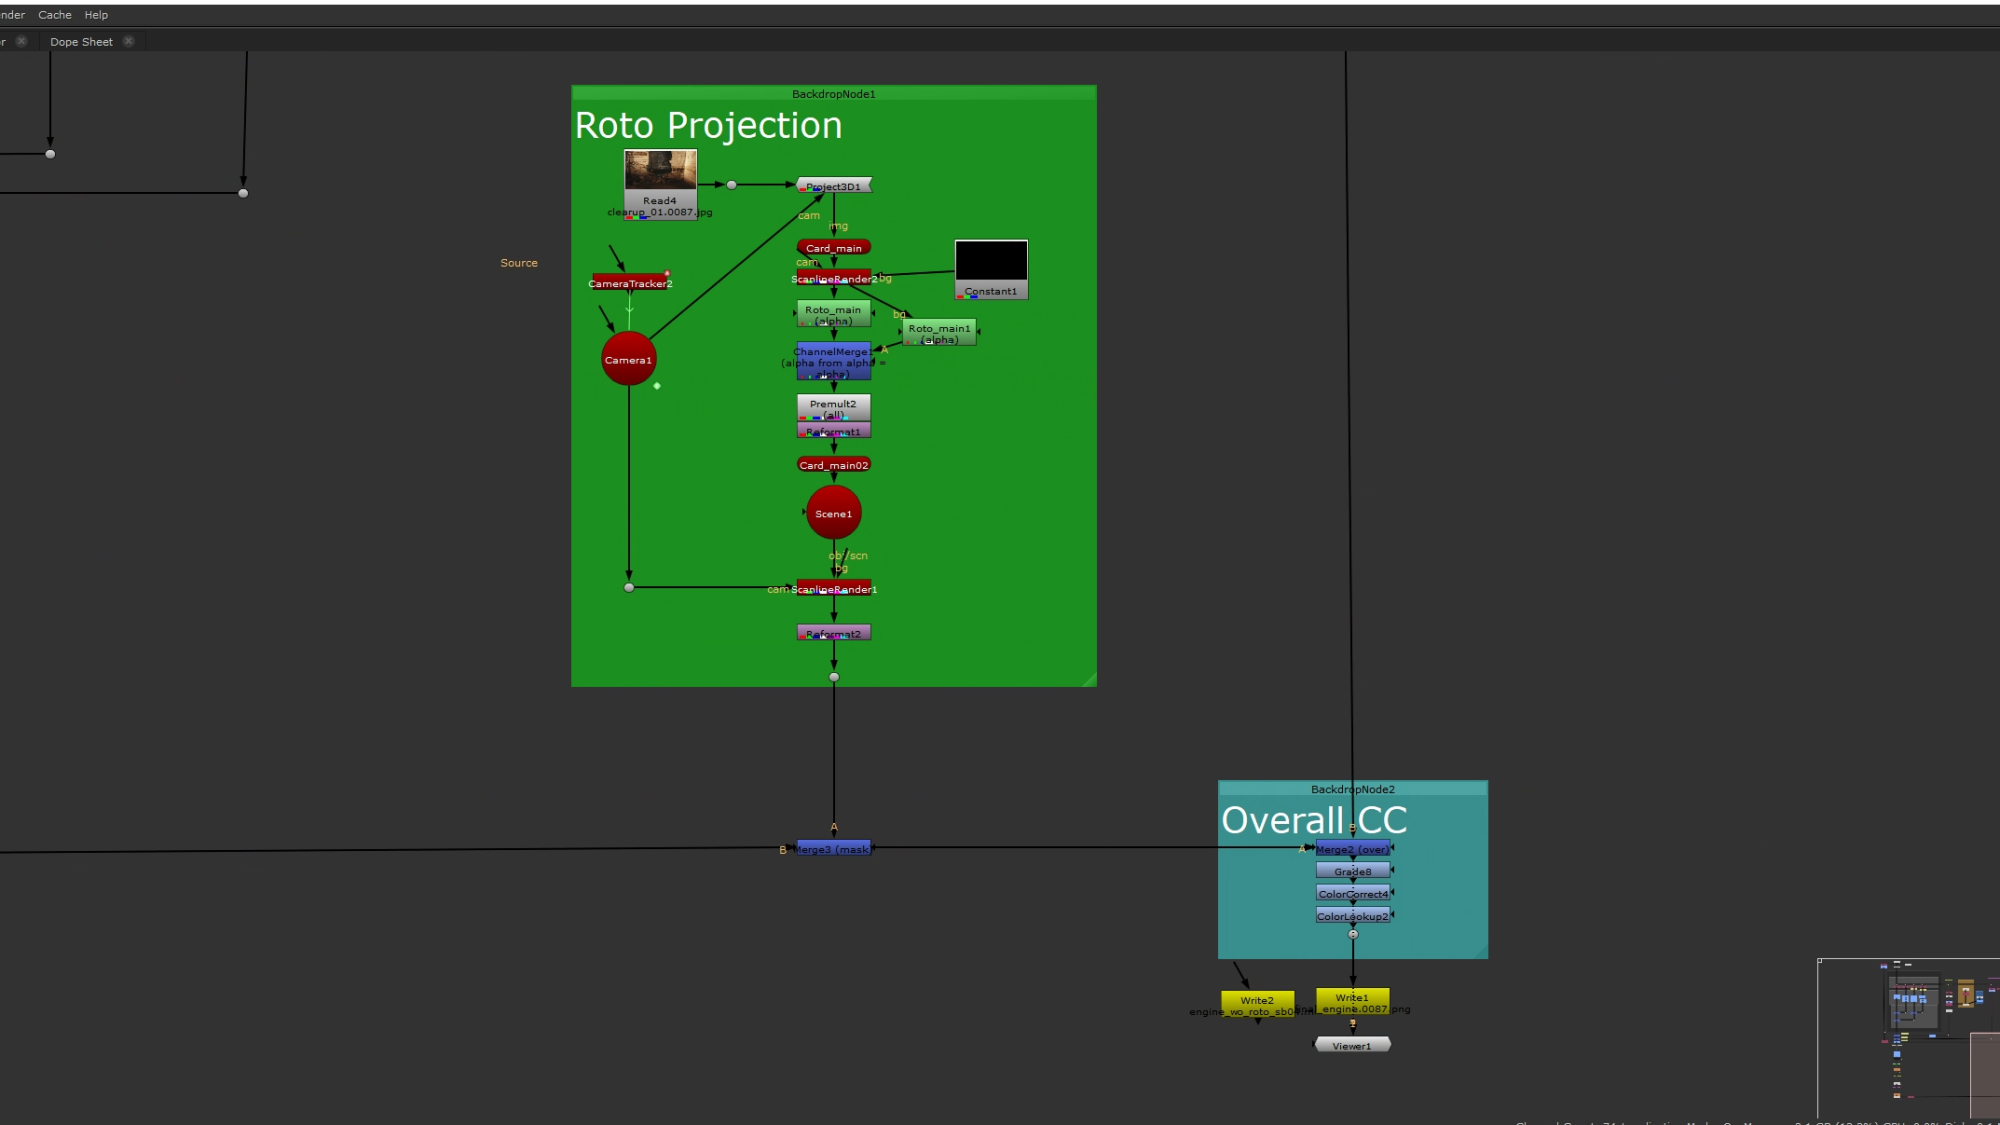
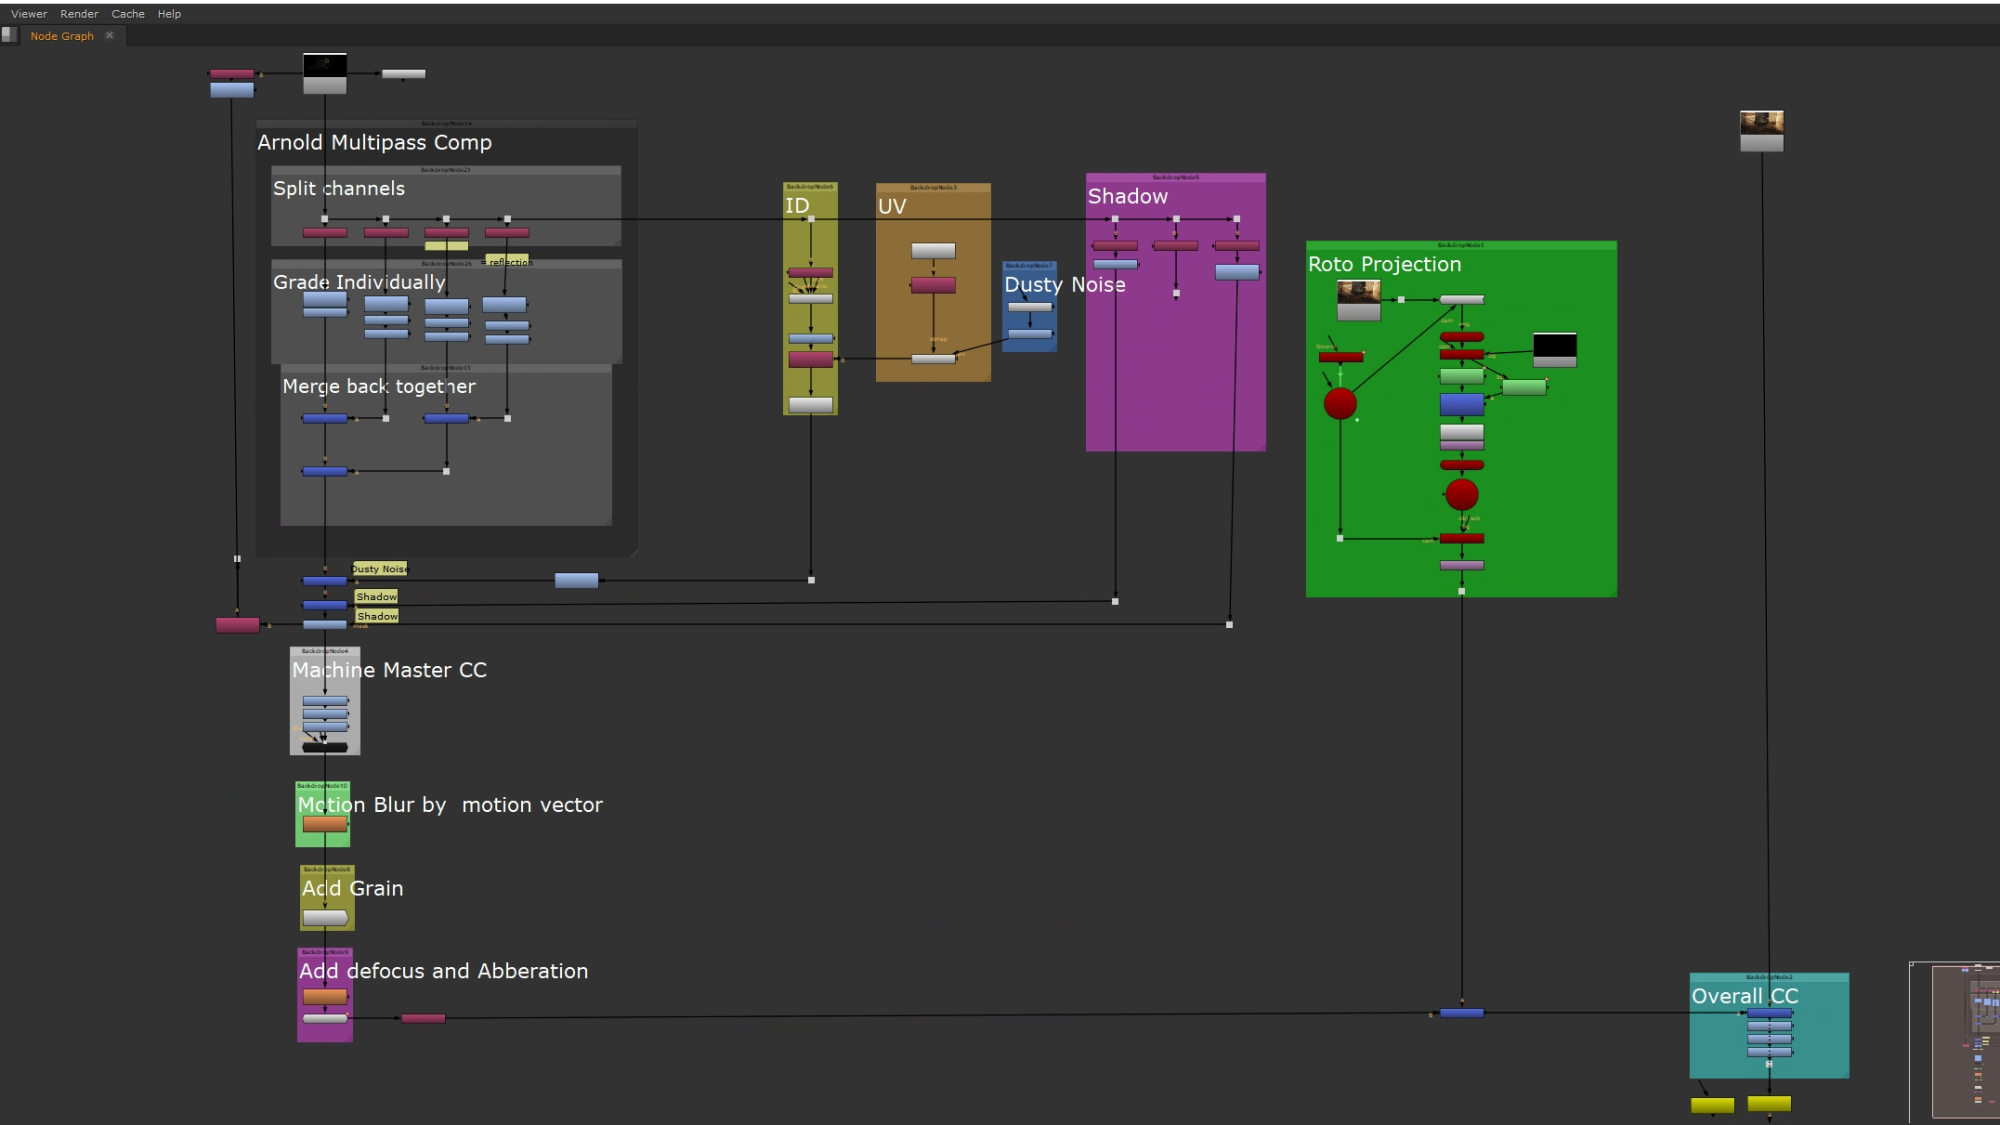
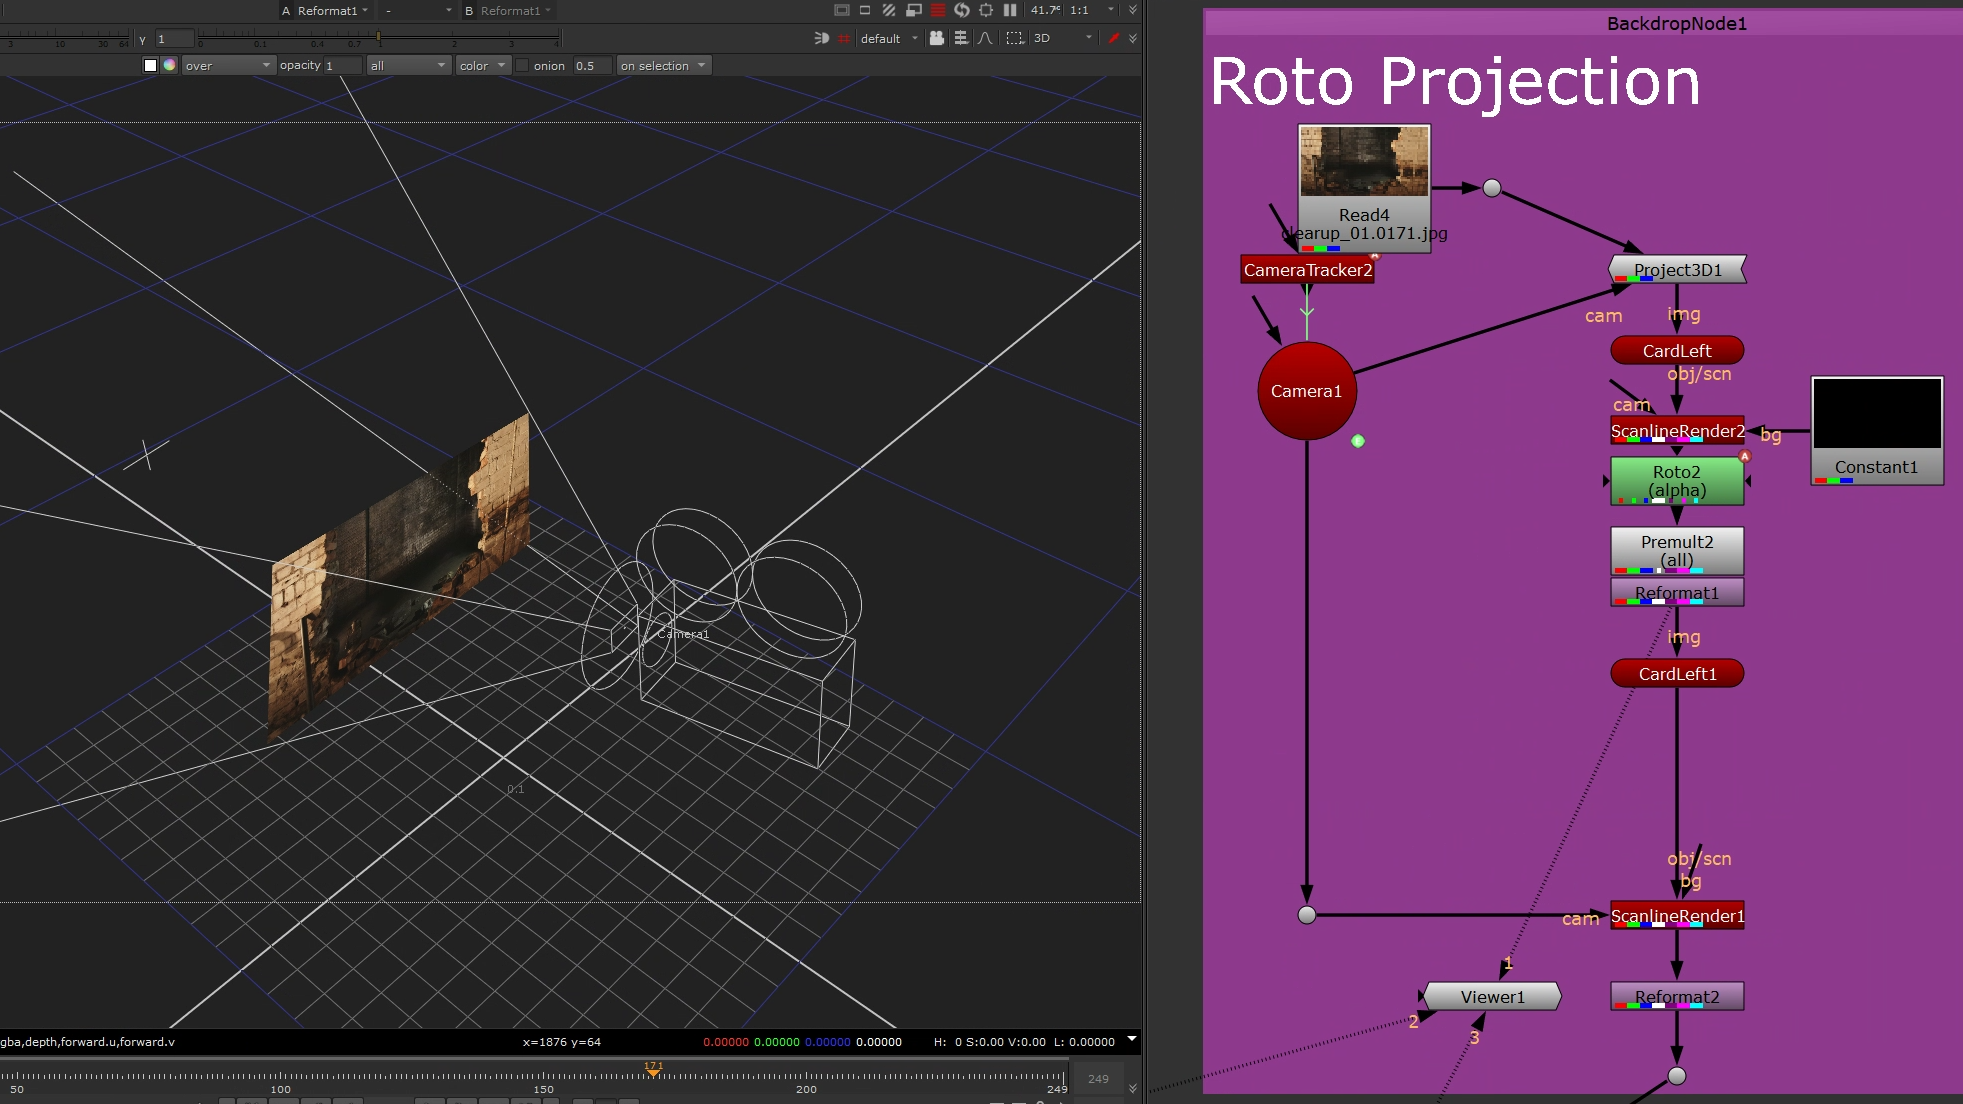
Roto with 3D Projection
Using 3D projection to project a card with UV mapping on the same card, to get a much easier workload in roto. Then merge the roto mask into the CG to get a nice roto.
Adding Dusty Texture by ID and UV passes
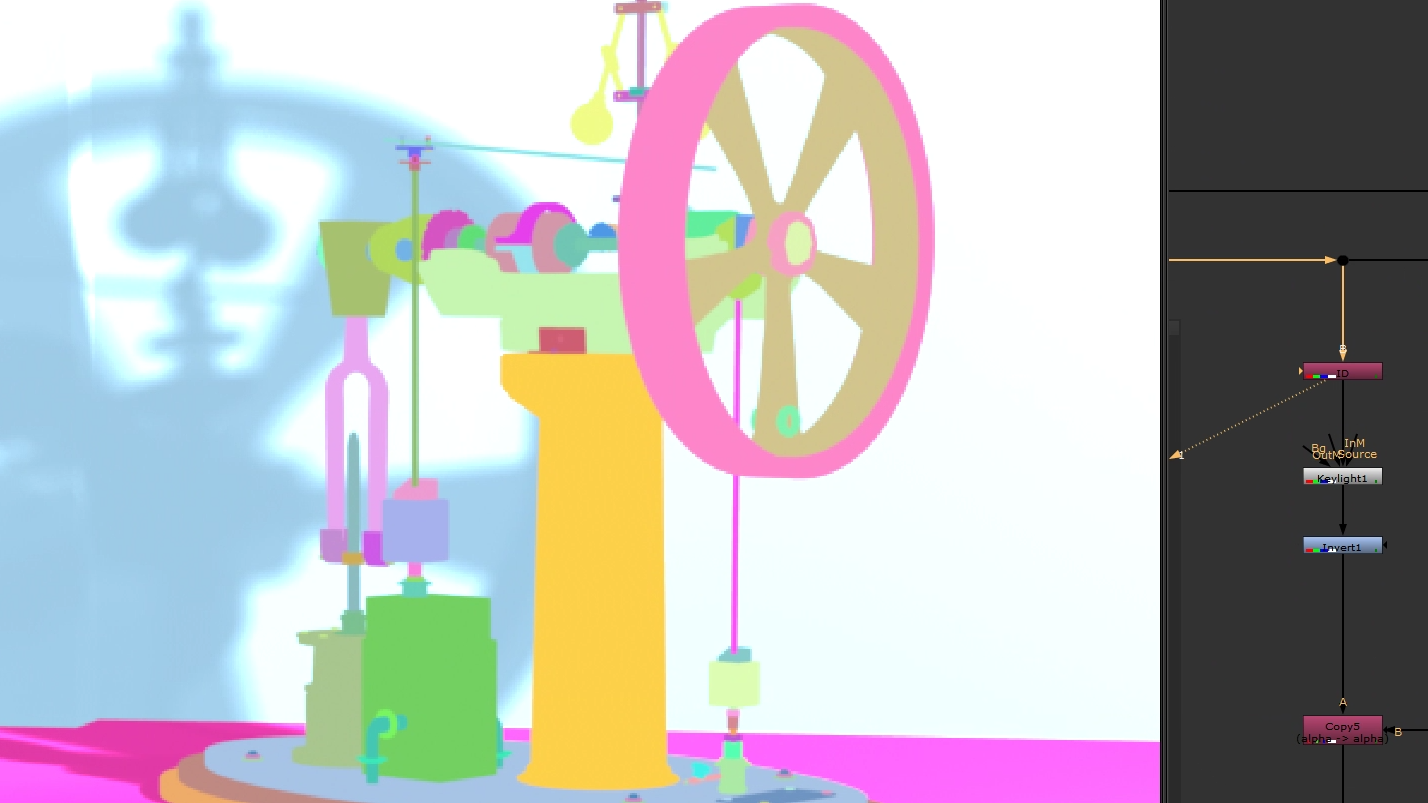
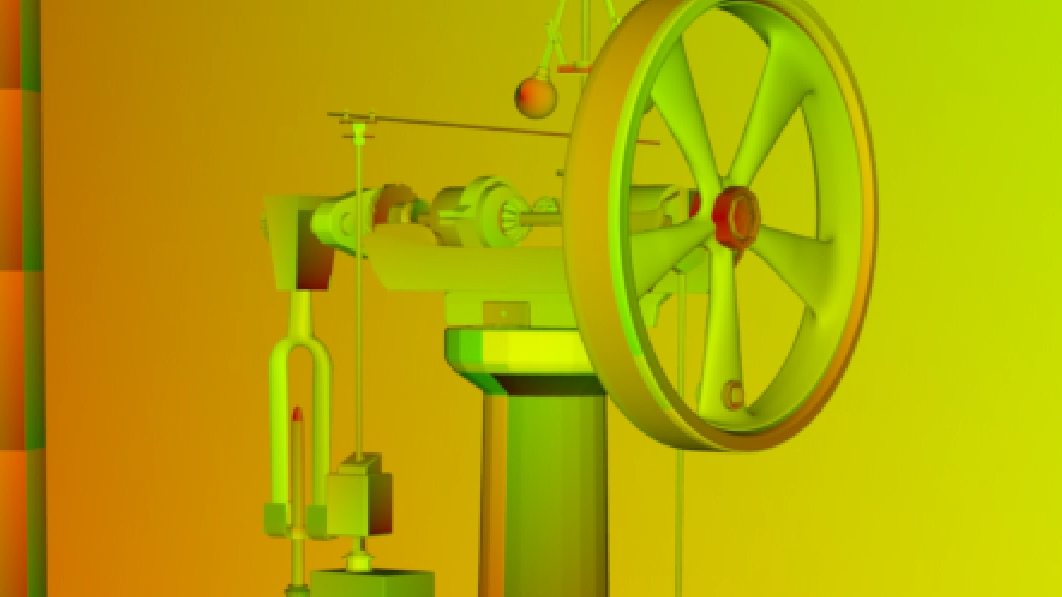
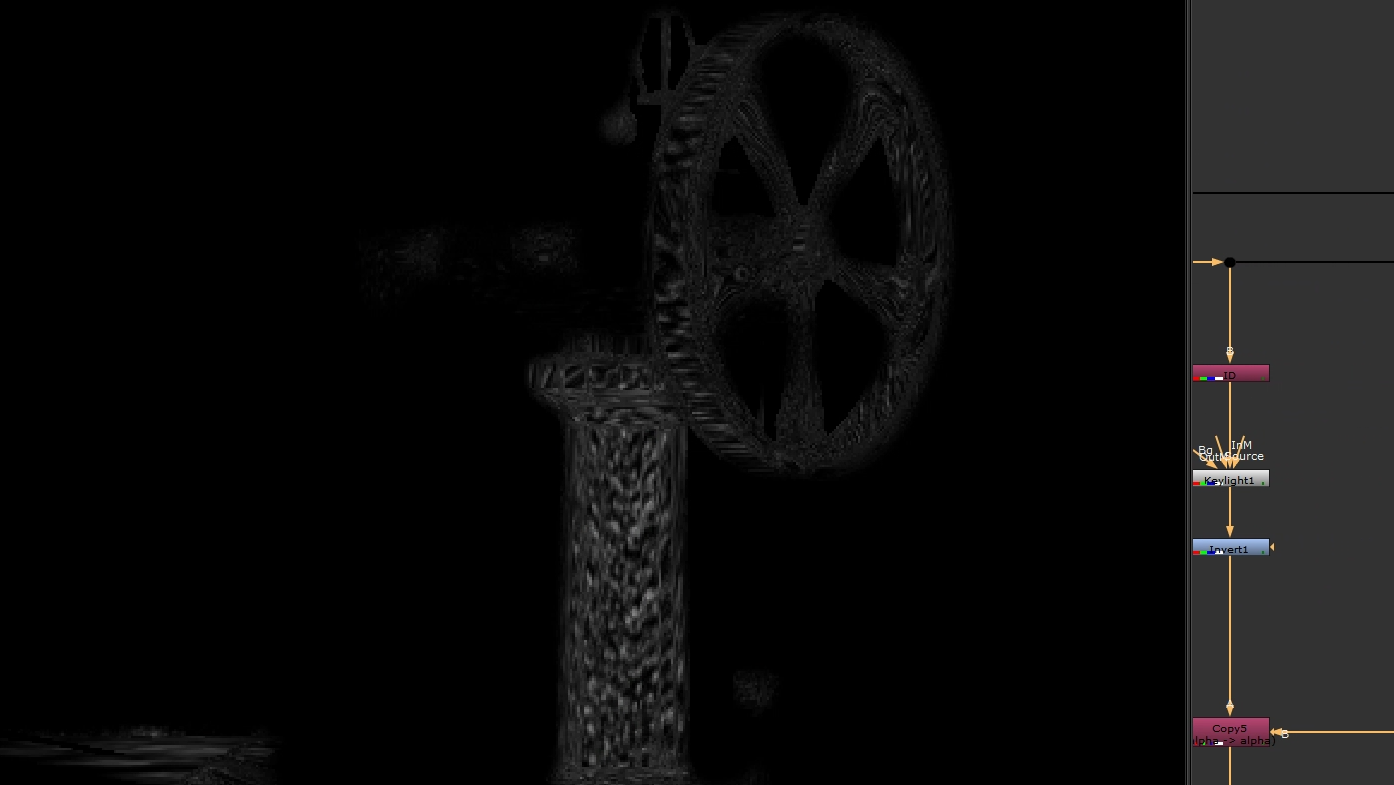
I think the metal surface of my machine is too perfectly smooth for that environment, therefore I used the Keylight node to select some area in the ID pass. Plus, using the UV pass, I can warp a layer dusty noise on top of my model. Hopefully, it can be a subtle imperfect to enhance the appearance.
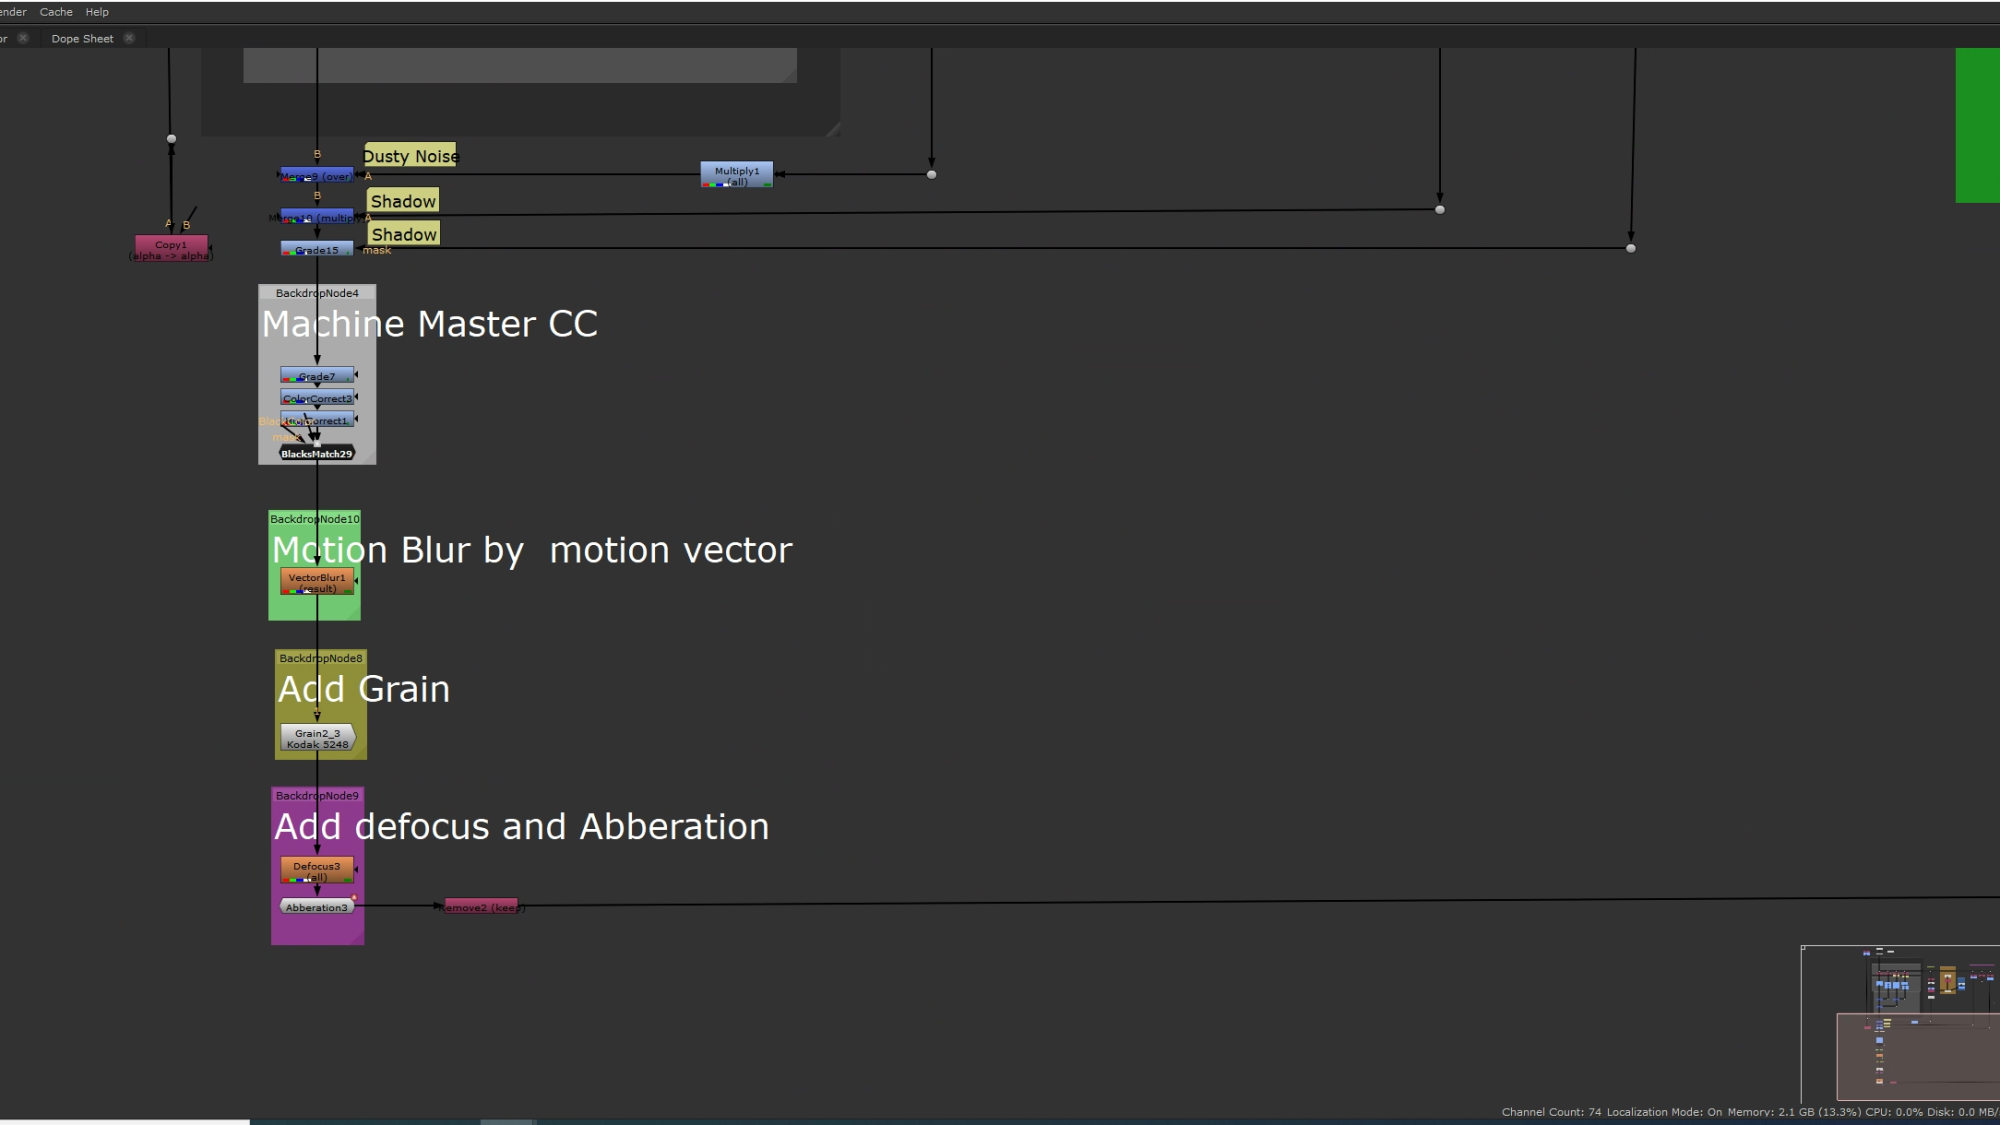
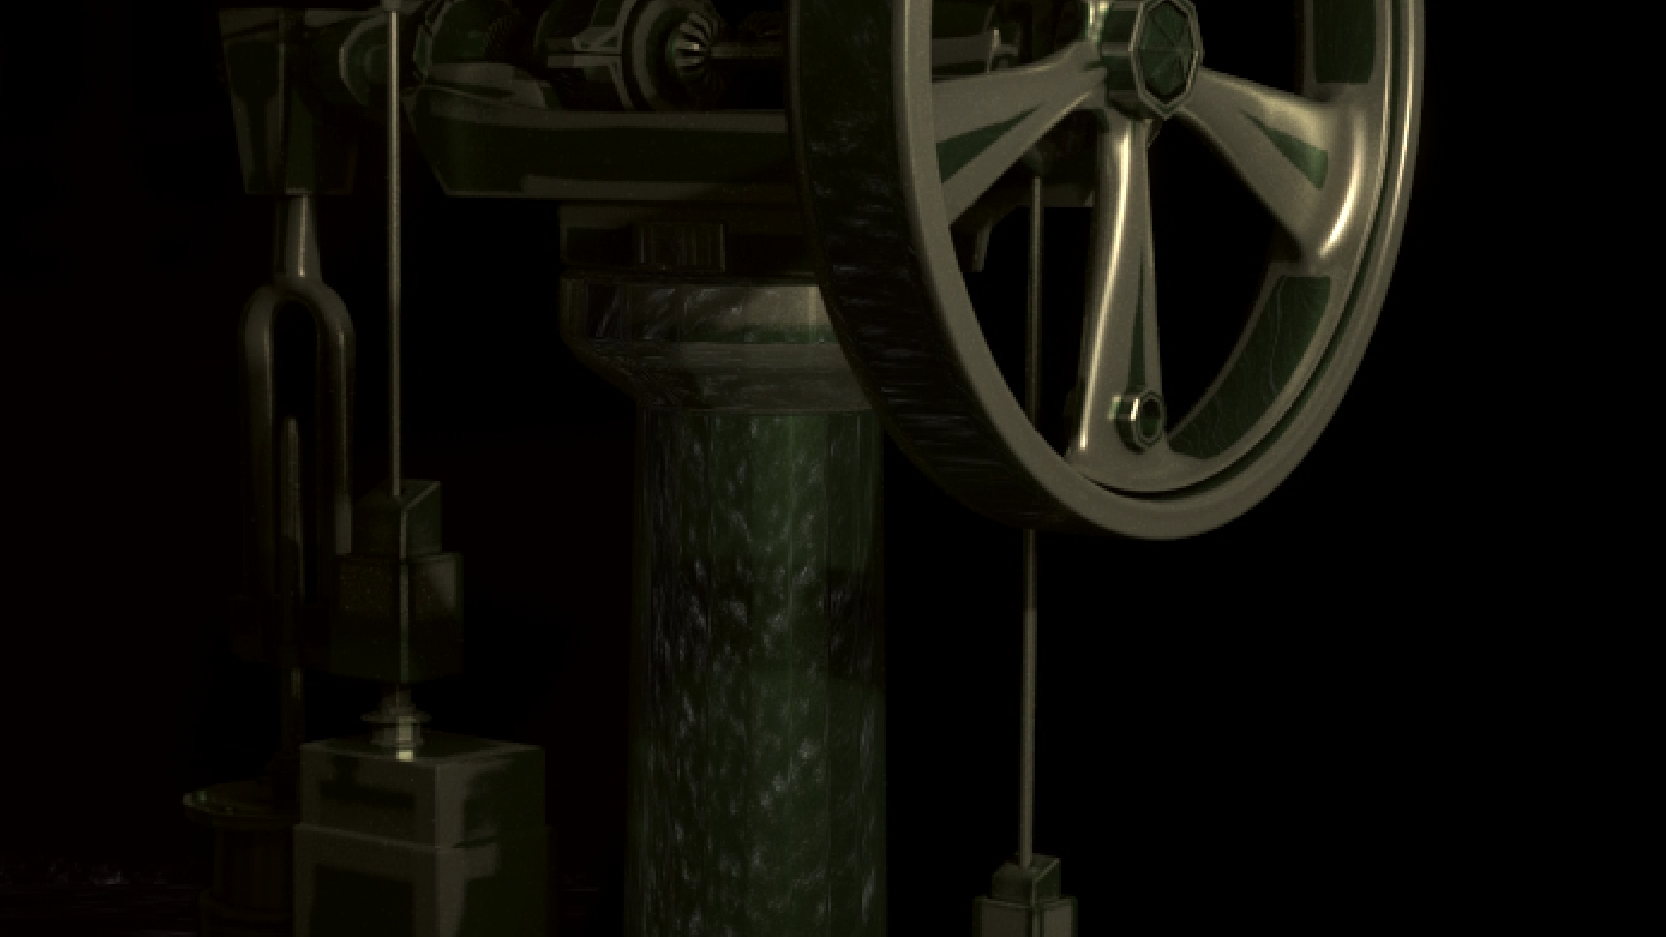
Output for Submission
Lanxi – Action animation
VFX Student
Changdong Wang – Director and FX artist
Shiwang Xuan – Modelling artist
Lokman Kwan – Compositor
3D Animation Student
Yingyue Feng – Animator
Everyone worked on their own professional area accordingly. We did face a sudden change of our group member, therefore, we have to make some sacrifices on our original idea.
Overall, I think our group communicate to each other well with respects. We gave our comments in groupchat. And using Onedrive to upload every processes we did. It is quite transparent to see what everyone is doing.
However, with limited time and stressful workloads, we didn’t complete the works we planned on our schedules. I think if there are more working days, a better version will be completed.
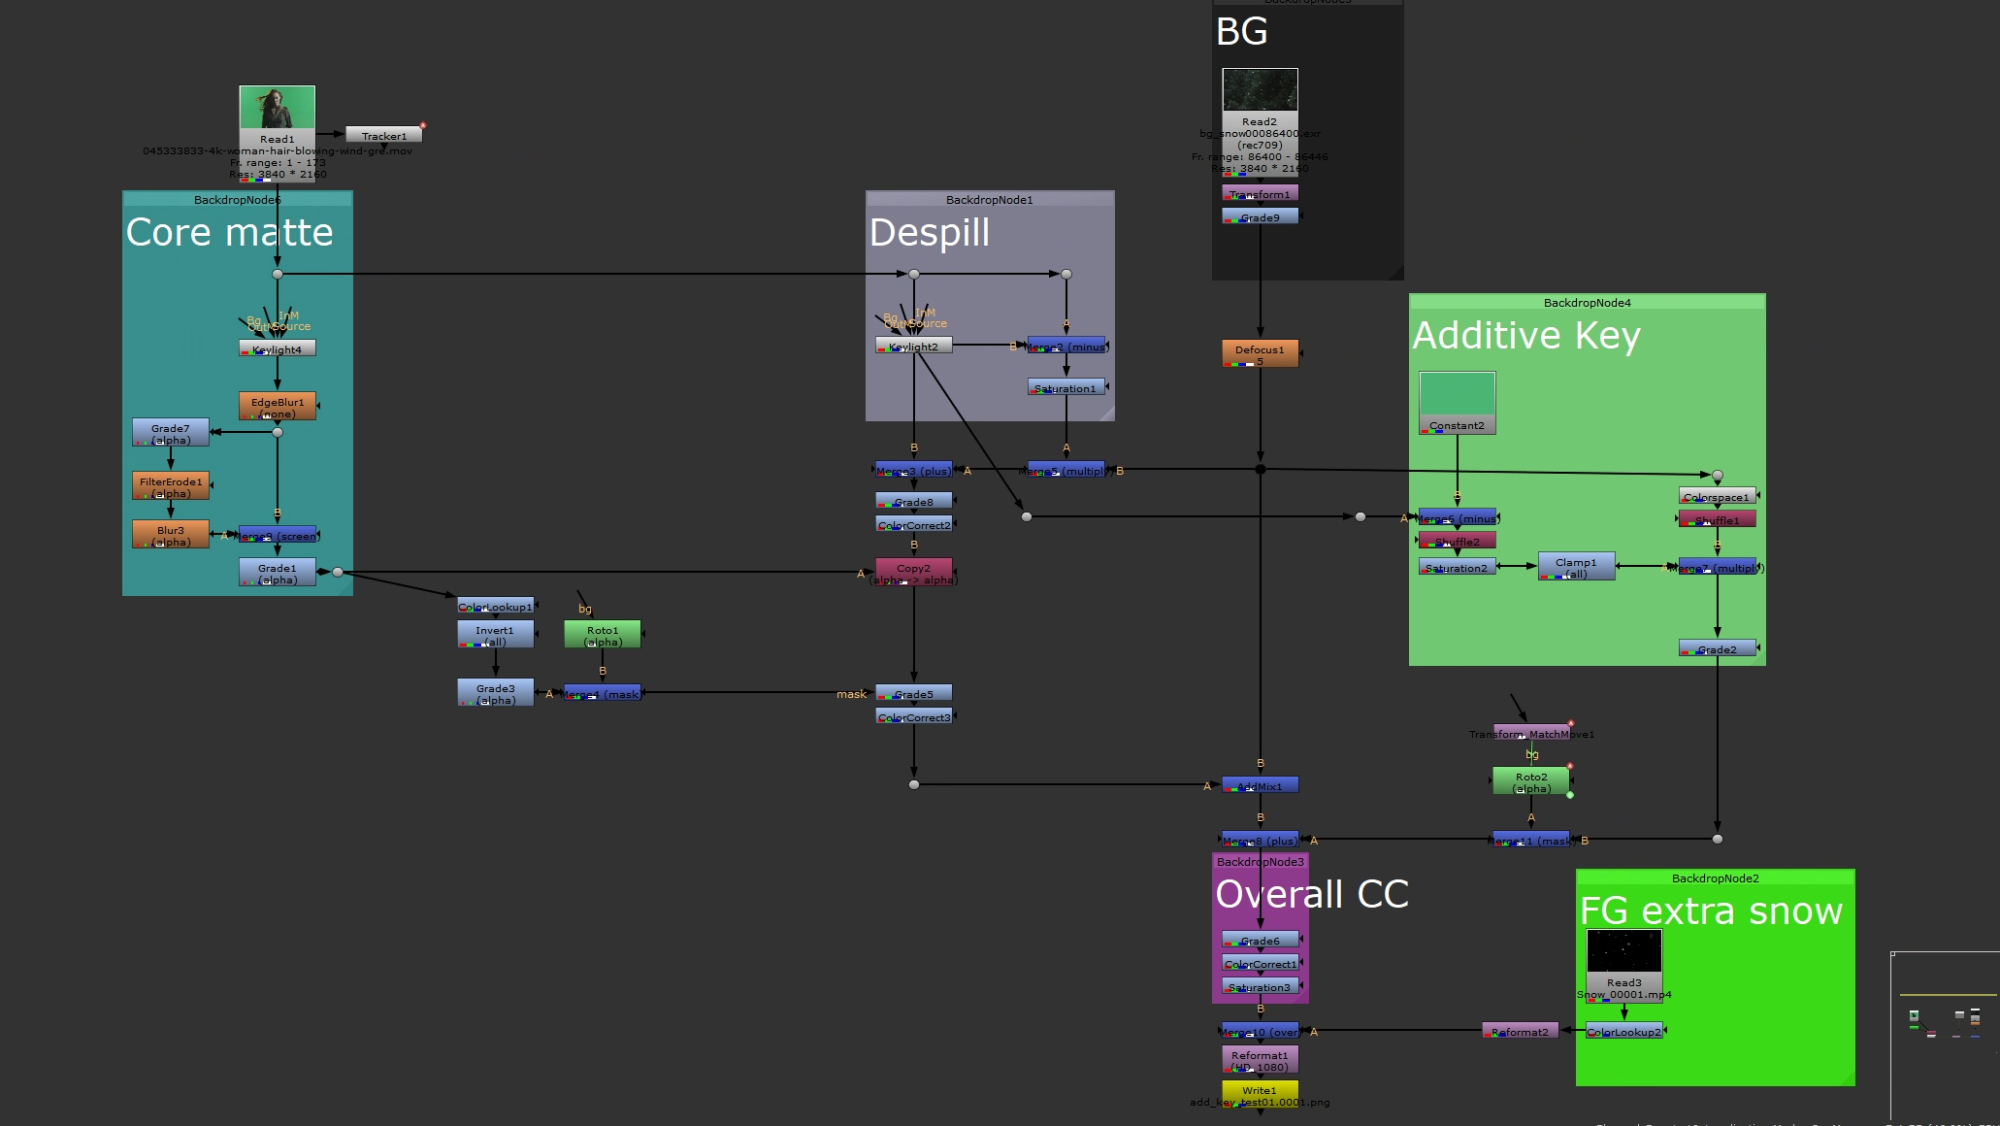
WK10 Additive Key
Result
Work In Progress
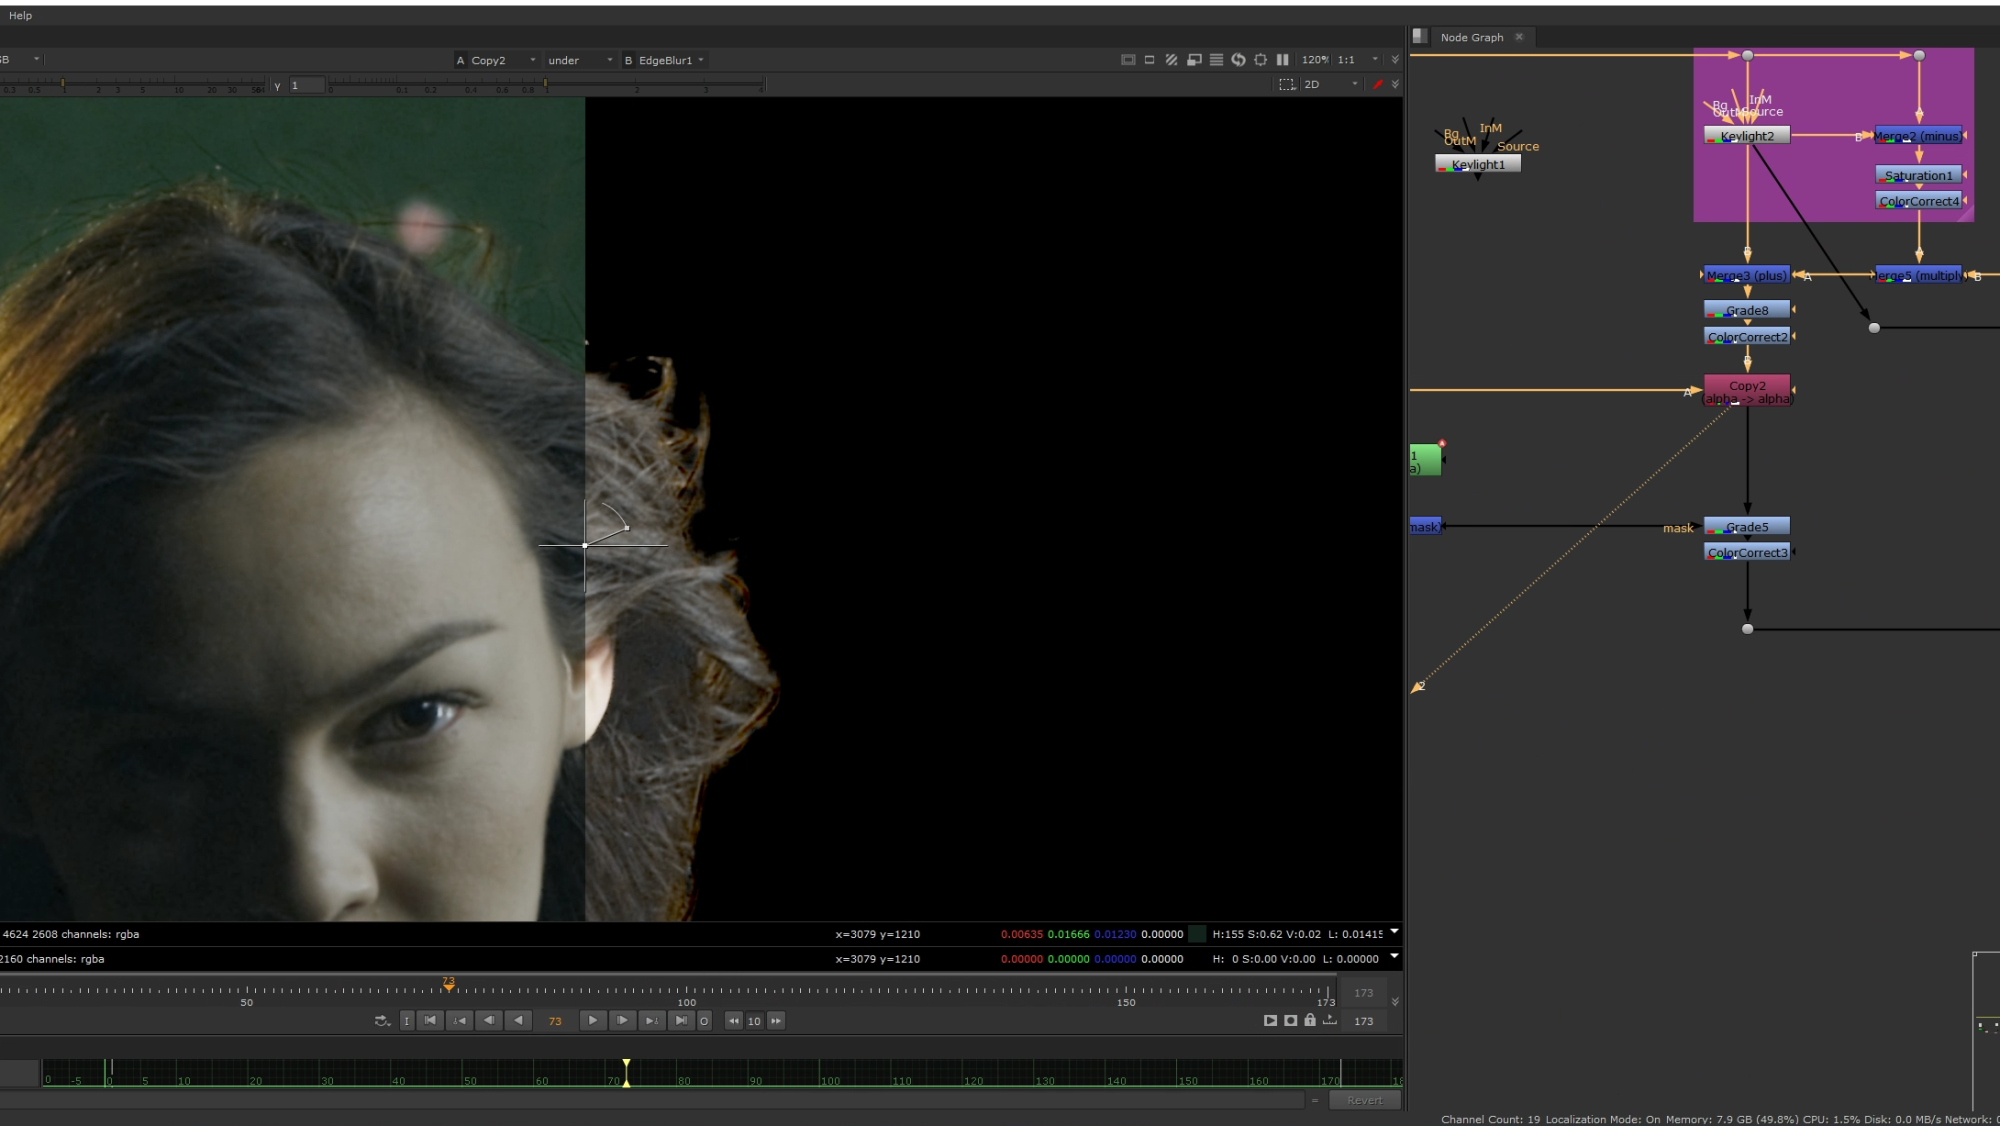
The result is not perfect. When I turned the exposure up, it is easy to see the edges of hair are still not fixed yet. However, it is a practise for me to train my brain to make the concept to know using Merge Minus and Plus to gain a bit details of lightness for edges.
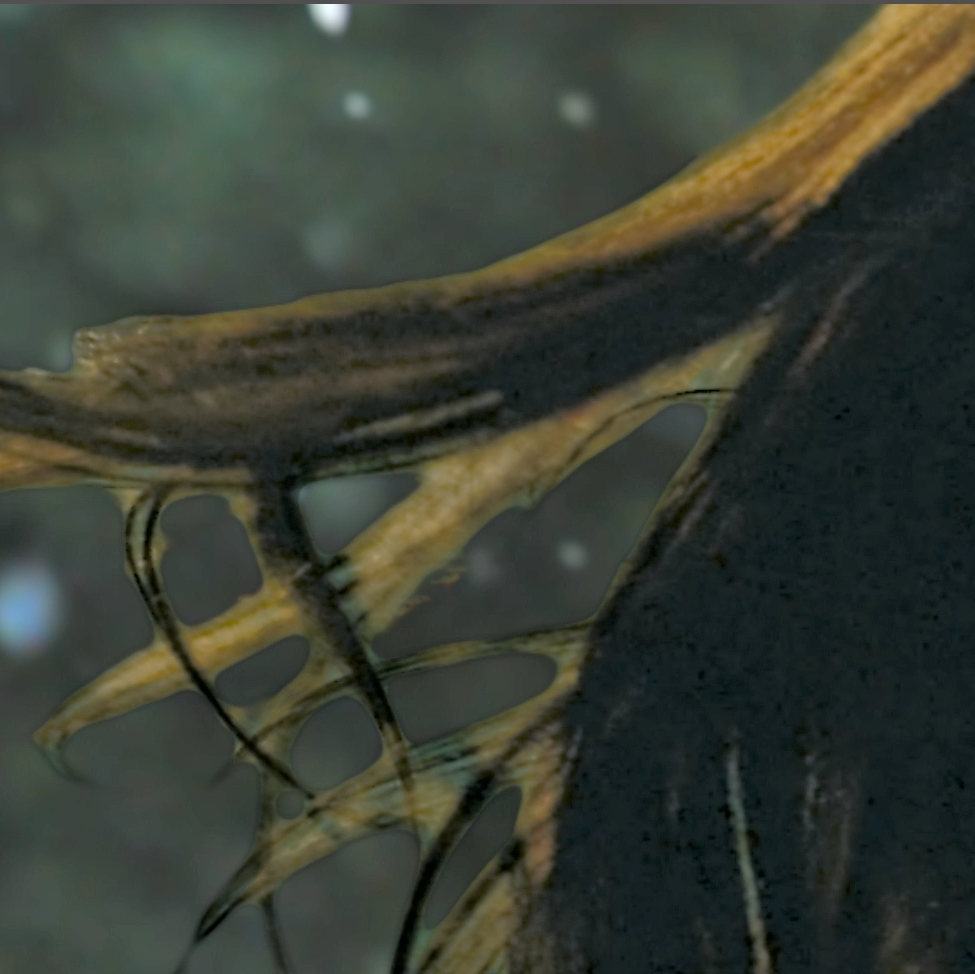
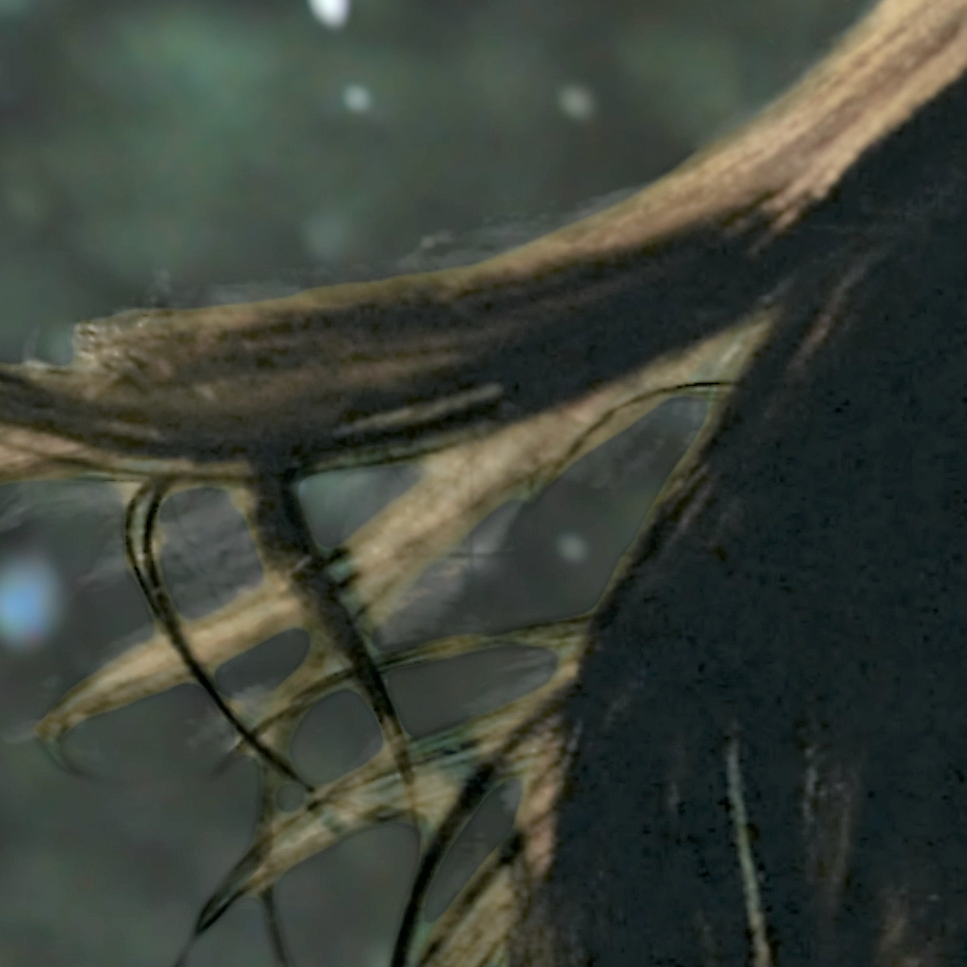
W/O Additive Key With Additive Key
WK10 Final From arnold Render
Work In Progress
This week, final adjustments in Maya are settled. This is a version with less shadow noise. In order to cast a harder shadow, I applied a spot light with its target on my model. And for its direction, I followed the shadow of the rock on ground.
Due to limited time, the rendering of other pipes on walls and other machine outdoor was skipped. As the lighting setting for outdoor area was different, I thought I d like to render in a different render output, to gain better result. However, it was predicted to spend a few more working days on it. As the submission deadline is coming, I finally decided to skip it.
Then I have to do the roto and color matching in Nuke.
week 09,10 compositing
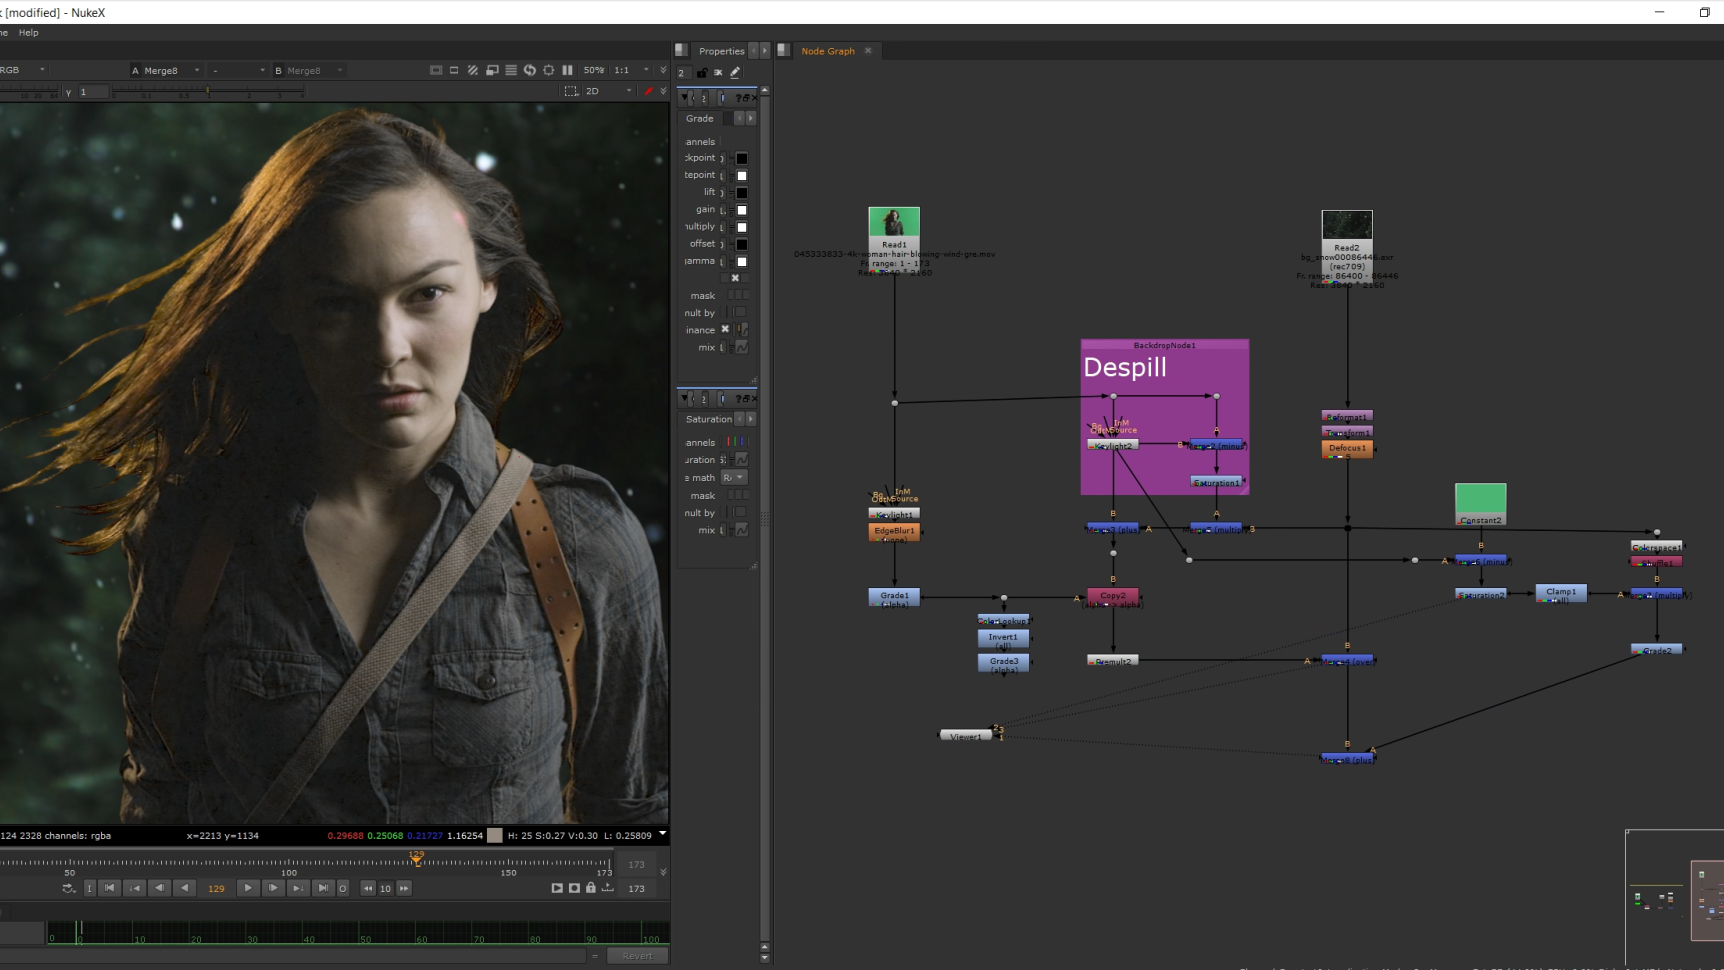
Challenges I faced
Original CG plate Background from unsplash.com


There are severe highlights caught my attention immediately when I received the file of this original CG sequence.
Firstly, the brunch of tree at the background are way too hidden. Despite the fact that our director enjoyed to play around with the fog effect, it is such a waste to put it in the thick fog like this. After I show my concern to my director, we are agreed to add slightly saturation color on it, as the layer of fog has rendered in fully complete stage that we don’t want to retouch on it further.
Secondly, the exposure of the lamps fire in scene are way too over. The models look great, very nice zen style that I think some details on the appearance can be helpful as well. And I d like to try some motions on the brightness to make it to pretend to be a flicking fire.
Thirdly, there are a layer of white dots appeared on the water surface. I had misunderstood that they are caused by the starry night background.
As it turned out, the white dots are caused by lacking of rendering quality. Due to limited time, we can only deal with it in Nuke instead of re-rendering.
Work In Progress
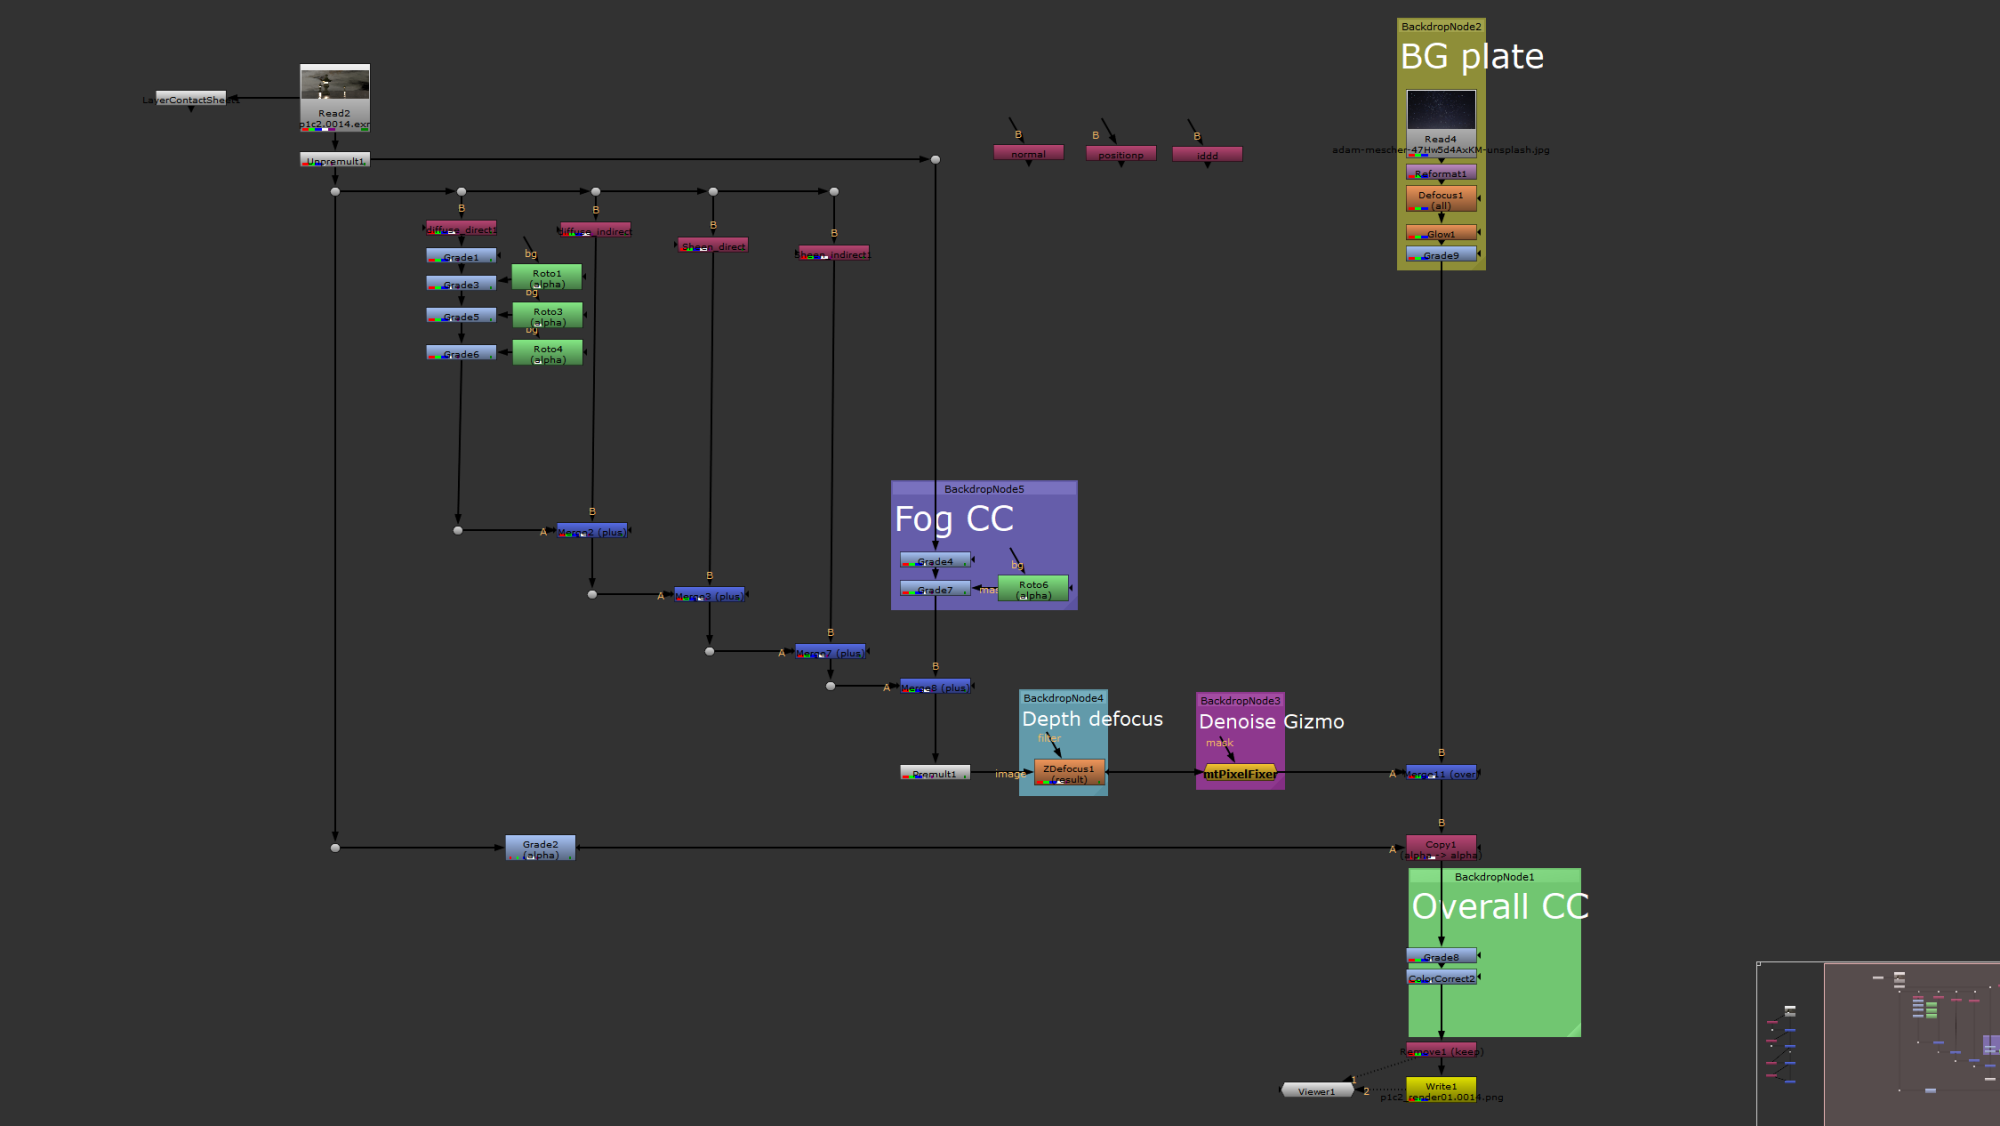
Depth of field added easily
It is time-saving to use the depth pass to do a Zdefocus in Nuke. If we do it in maya, it would be too render-consuming to render good quality of lens blur. And much less control of defocus in maya as well.
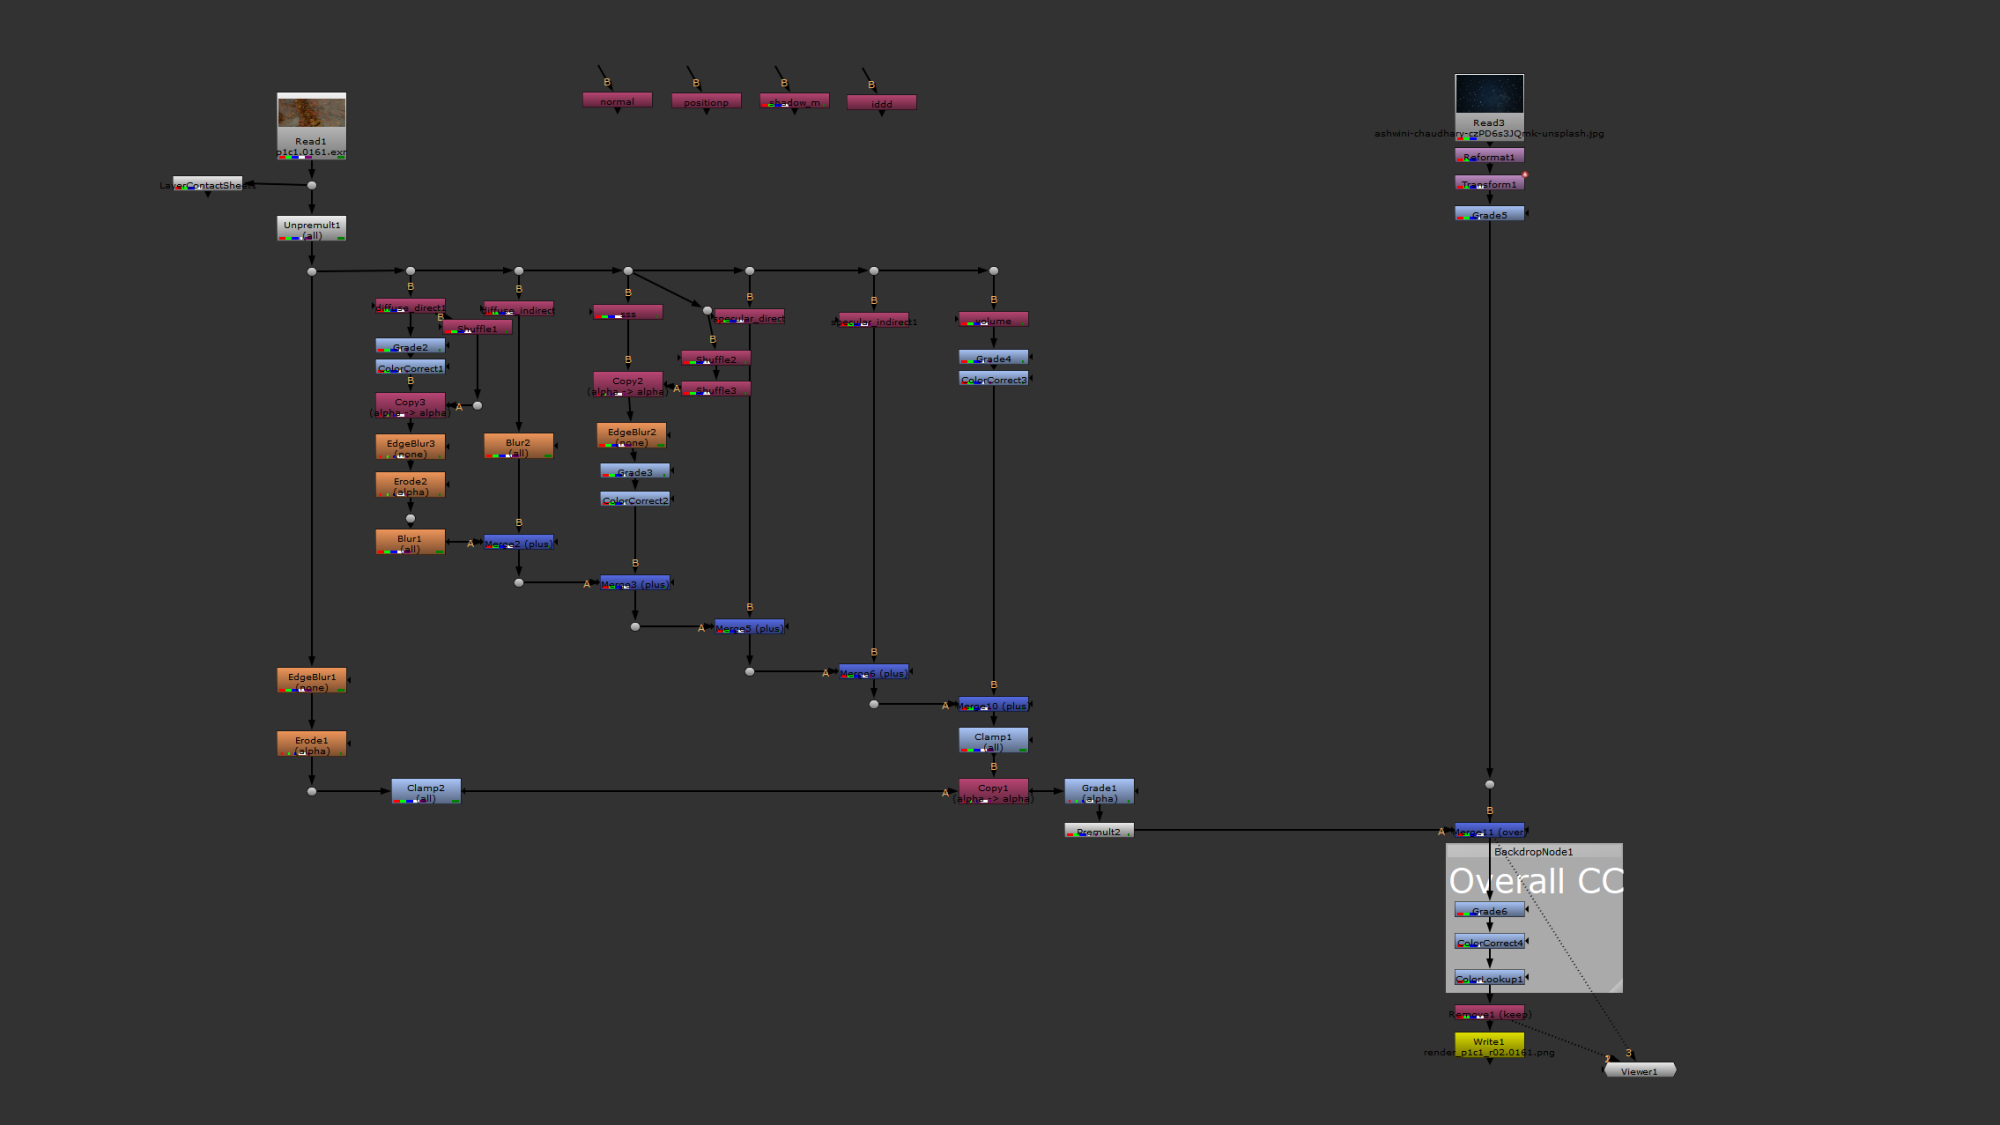
The AOVs I missed
Again, as all the passes didn’t be separated by objects. I might need to shuffle some channels to get my selected area to add adjustments.
However, I still missed the channels I wanted, especially the reflection on water surface. As I decided to do flicking fire effect to the lamps. It would be unnatural to add it to lamp fire only without considering the reflection. Therefore, I didn’t make this change.
No shame on using Gizmo
There are two gizmos suggested by my tutor, to deal with the rendering noise on the water surface of original plate. One is Firefly Killer by Stefan Muller, and the other one is mtPixelFixer v3.0 by Miguel Torija. Both did a great work on the plate. Instant result by a quick plugin and no flicking while footage playing as well.
Before using gizmo After using gizmo
Overall, as a compositor for this project, I should balance the work between respecting director’s ideas and creating my own design. Luckily, I gained full support by our director to try the version I want.
But stills, I believe digital compositors, especially when they are working for the industry with clients, have to ask for permissions to make changes, and show their respects to all other artists. No one wants their artworks being adjusted without asking, right? Therefore, even this collaborative unit is a student group project for us to practise, I still applied this kinds of manner and attitude to my groupmate.
Week 07,08 Compositing
Work In Progress
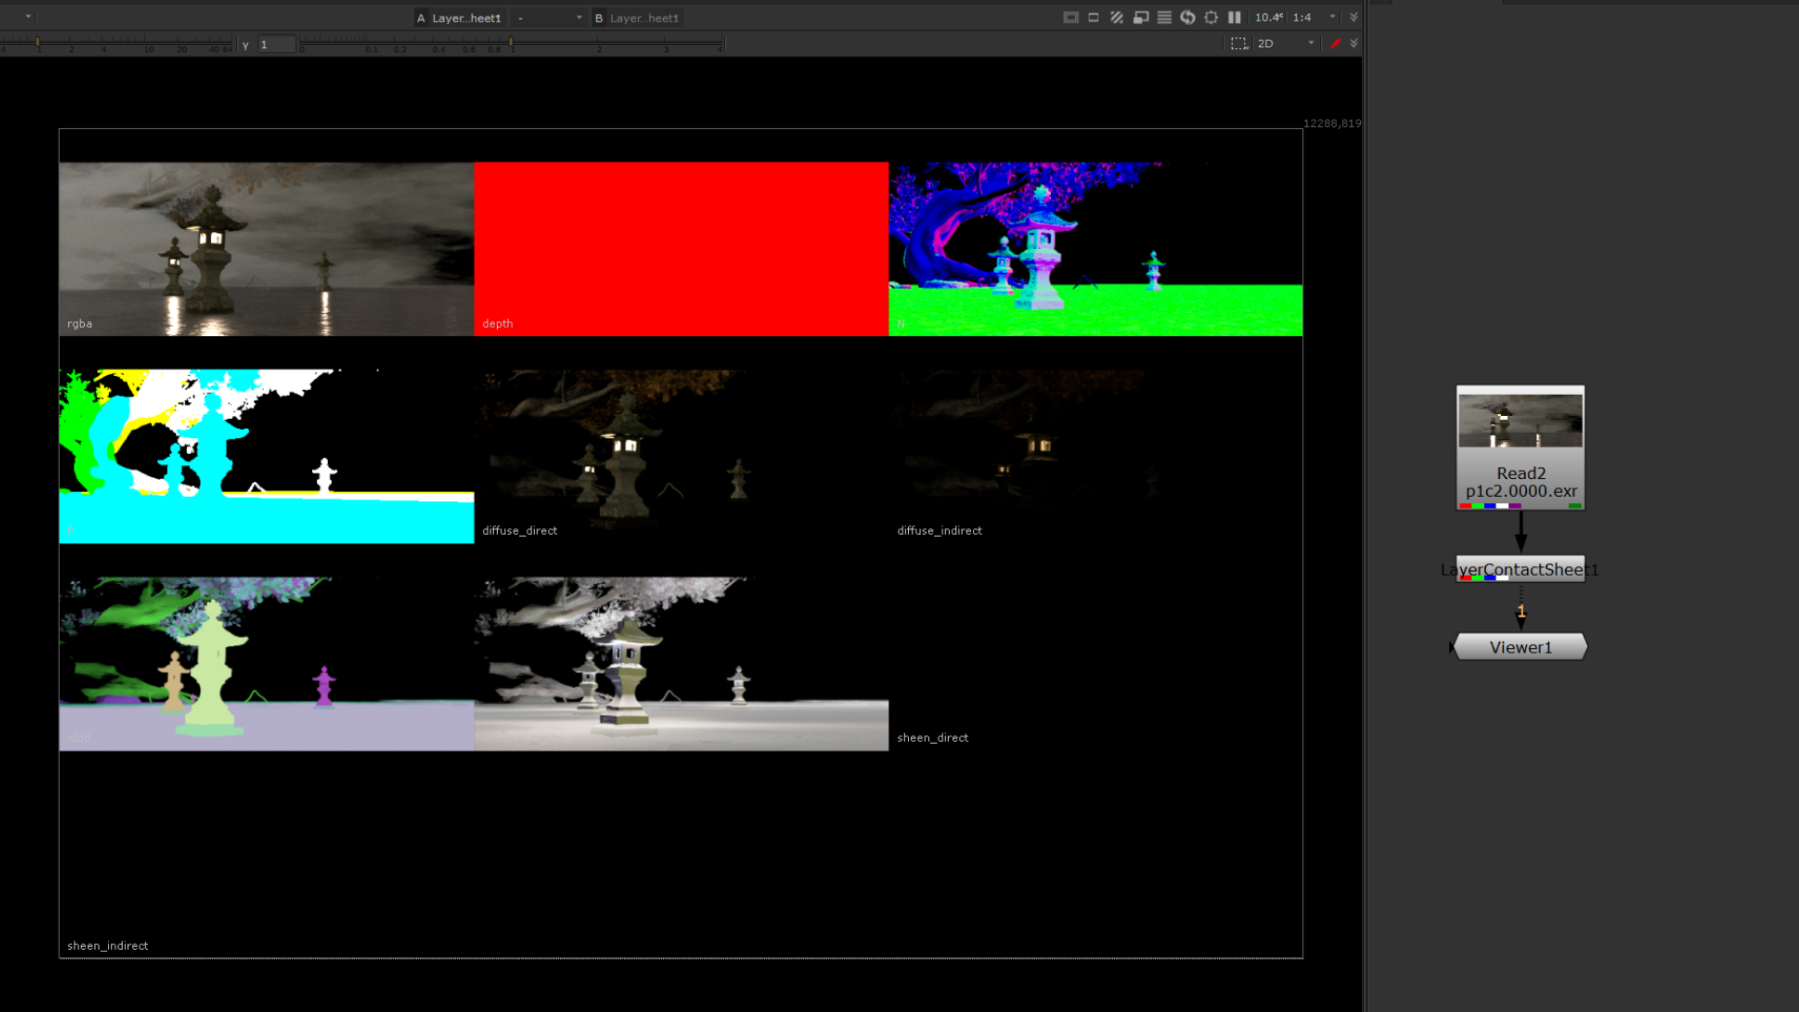
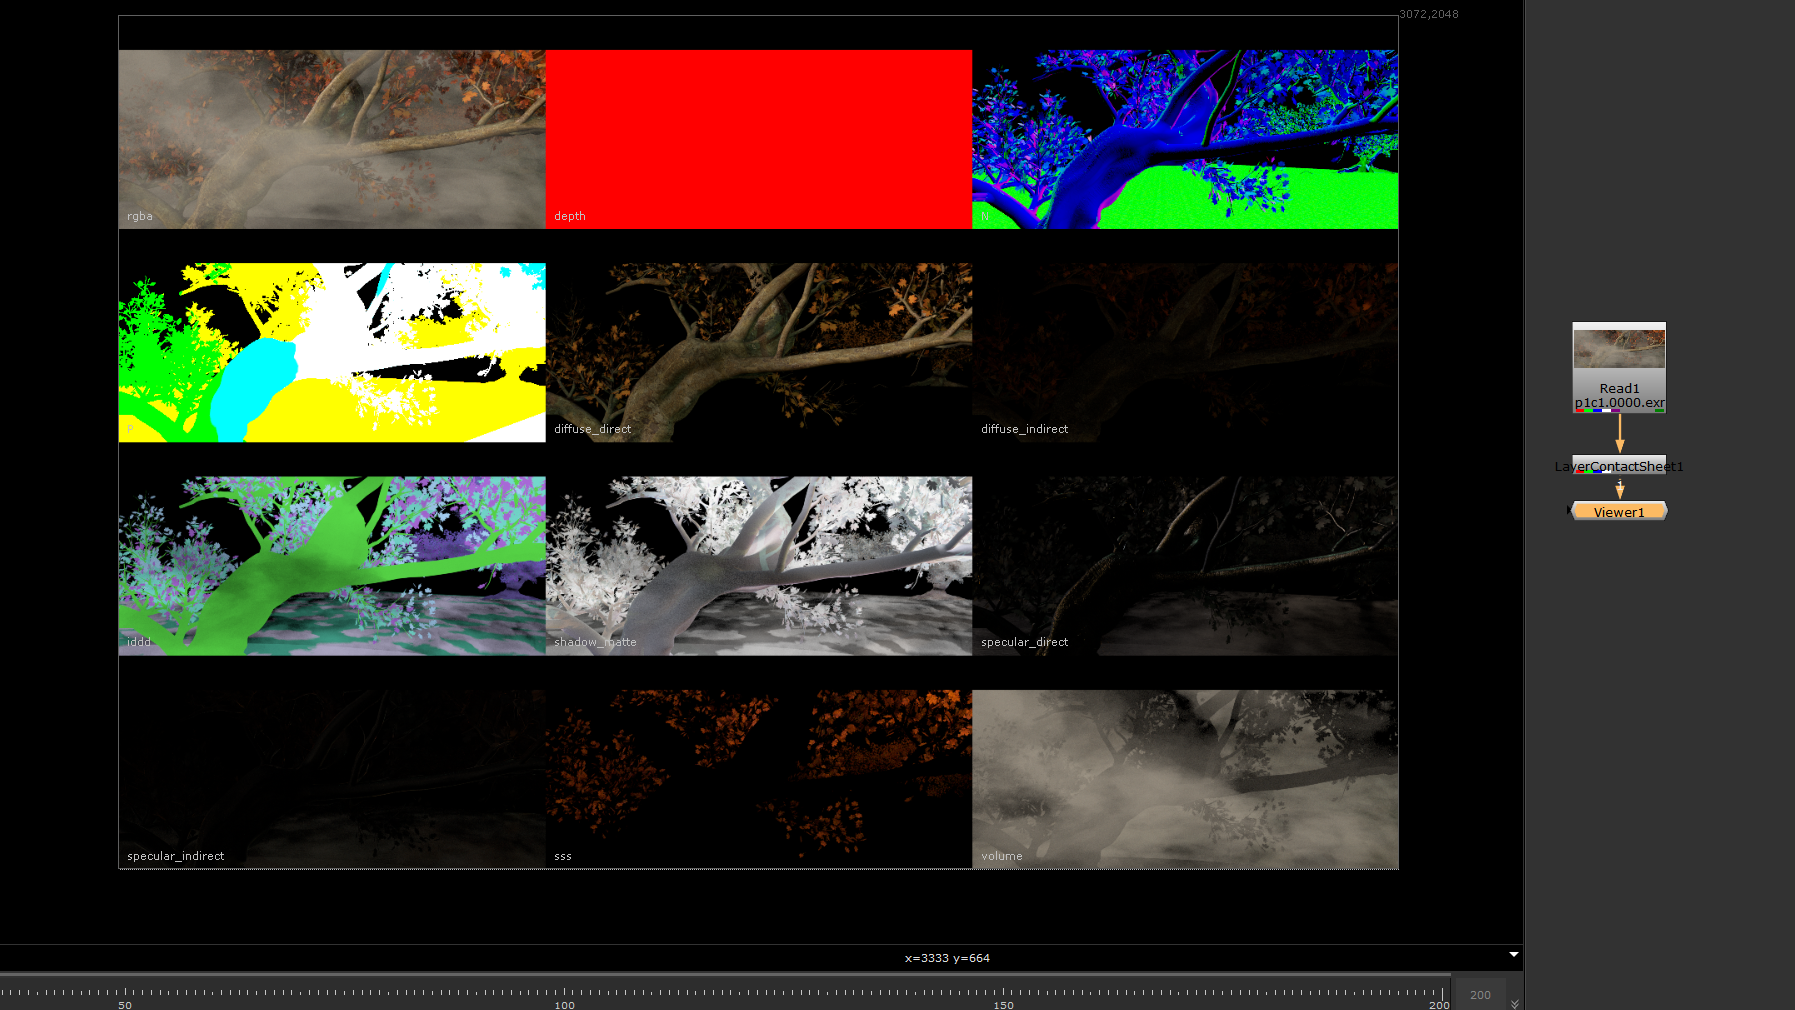
For this week, here is the CG exr that I received from my group CG artist, with all the AOVs passes that I need.
My goal for this shot is to merge this CG with a starry night background, and do some color correction with it.
Original plate Background from unsplash.com
1st Version
All the passes allowed me to control my adjustment in pixel-details. According to out director, he d like to see a variety of leaves color and a lttle more bit of soften edges on my 1st render result.
Result
Therefore, here come my final adjustment for this shot, which you may see some of the leaves are yellowish, while others remained reddish.
This version still didn’t show the starry night background much, and personally I think this shot would be better to extend a few second more, to show the fog spread away, and a starry night appeared in the end.
Last but not least, I wish our CG artist would separate the different brunch of tree into different exr outputs, which can provide room for me as a compositor to have some creative input in this shot.
However, due to limited time provided, it is the best things I can work for it.
Also, some of the passes I didn’t use at all, which I think they did waste some rendering time and space. Personally, I d like to improve the communication between me and CG artist before pressing the render button.